The following tutorial shows the user How to FREEZE a track in Pro Tools.
CLICK HERE to learn Avid Pro Tools one on one with a digital audio professional at OBEDIA.
Often times during the mixing process of a song, the engineer might encounter a situation in which there are so many tracks with active inserts in the session, that the CPU resources of the computer are considerably reduced, yielding several problems related to delay compensation. When these problems happen, the session starts to sound like certain tracks are being “dragged” simply because the CPU is not able to compensate for the delay that these heavy plugins add to the tracks.
The most obvious way to eliminate this problem is by simply deleting tracks or removing the inserts that are adding the longest amount of delay. However, this might not be ideal because as soon as the insert has been removed, the signal coming out of the track will not be processed anymore by the insert, therefore changing the sound.
Pro Tools has recently added a new function called “Track Freeze” that can help the engineer solve this issue. Once a track has been “frozen”, the processing of the inserts will still affect the signal coming through the track, however, the inserts will appear as greyed out so that the user will not be able to tweak their parameters. At the same time, the frozen track will have zero delay to compensate, therefore eliminating the compensation issue explained before.
This tutorial will present a step-by-step guide on how to freeze a track in Pro Tools. The tutorial assumed the user already has audio tracks created in the session.
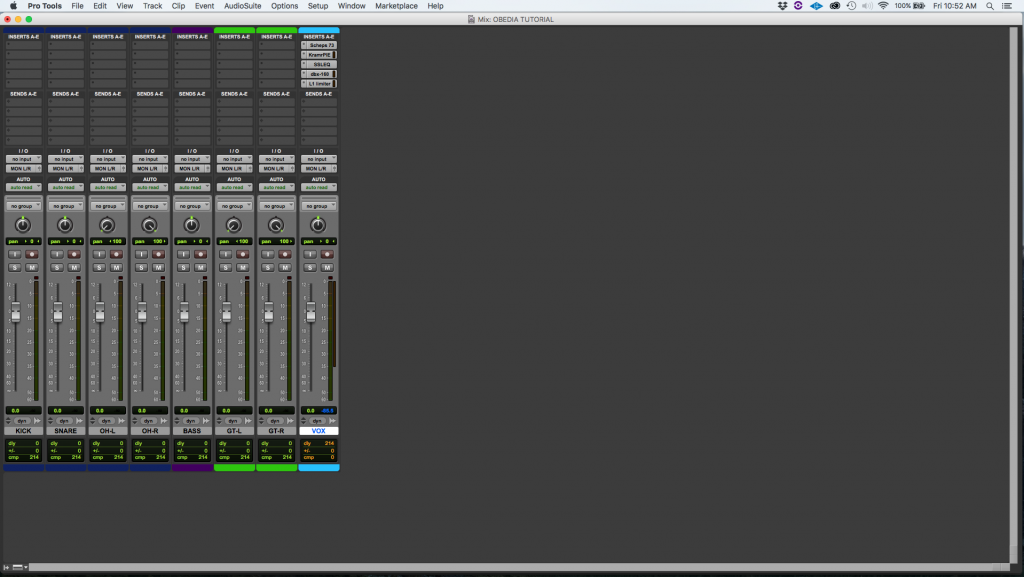
1. Open or create a new Pro Tools session and make sure you can see the Mix window:

2. Locate the last track labeled as “VOX”:

It is easy to see how this track contains five different inserts, creating a total delay of 214 samples. Supposing our computer were not strong enough to compensate for this, we can use the “Track Freeze” function to solve this issue, understanding that once the track has been “frozen”, the inserts’ parameters cannot be tweaked.
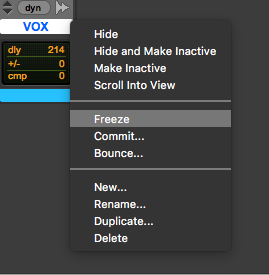
3. Locate at the bottom of the track, next to the name “VOX” and right click -> Freeze:

Once this has been done, the track now appears as:

We can now see how the inserts from the track appeared as greyed out, but the total delay of the track is zero. The Track Freeze operation has been done correctly.
At this point the user has learned how to freeze a track in Pro Tools. The tutorial has now finished.
CLICK HERE to learn Avid Pro Tools one on one with a digital audio professional at OBEDIA.
