The following tutorial shows the user how to create a VCA Master Track in Pro Tools.
CLICK HERE to learn Avid Pro Tools one on one with a digital audio professional at OBEDIA.
In analog consoles, a Voltage Controller Amplifier (VCA) is a channel gain control that can be changed by varying a direct current (DC) voltage on the control input. This amplifier lets the user “move” a group of faders together while keeping any offsets within them unmodified, by simply moving a single control fader, the VCA fader. This same concept has been added in Pro Tools with the VCA Master Track; it lets the user alter the overall gain of several faders in a uniform way provided that they have been previously contained into a “group”.
Compared to AUX Input Tracks, we can see how VCA Master Tracks do not let the user add any kind of processing to the group, simply because they are not meant to emulate another pair of channel strips from a console. VCA Master Tracks are only meant to be used for gain-riding purposes, making it easy for the engineer during the mixing stage of the production when several track levels must be modified or automated by the same amount.
This tutorial will present a step-by-step guide on how to create and setup a VCA Master Track for proper use in Pro Tools. The tutorial assumed the user already has audio tracks created in the session.
1. Open or create a new Pro Tools session and make sure you can see the Edit window:
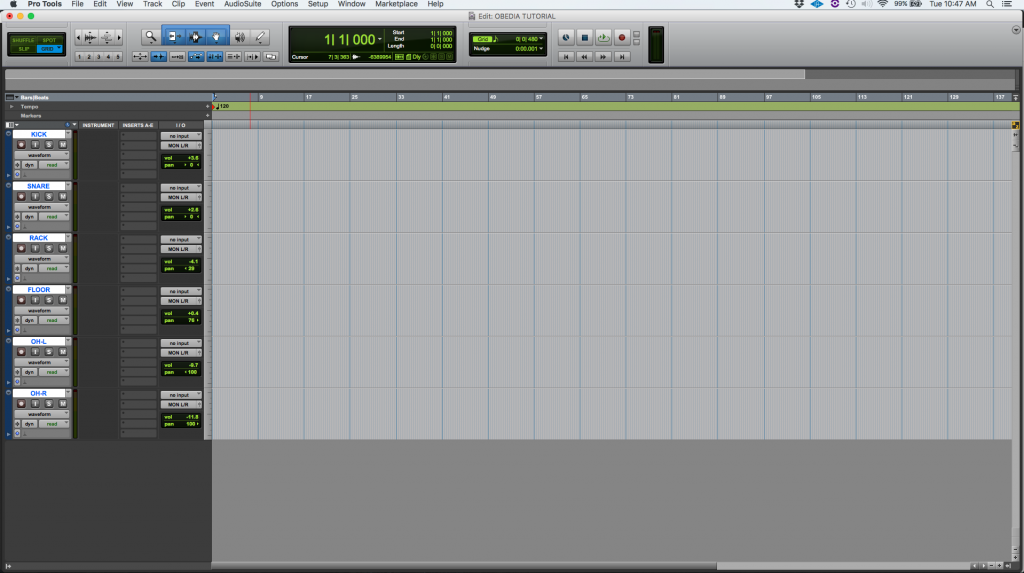
2. Group the audio tracks that will be contained in the VCA Master.
In order to do this, we must make sure all the tracks are highlighted, then click on the top menu bar: Track -> Group.
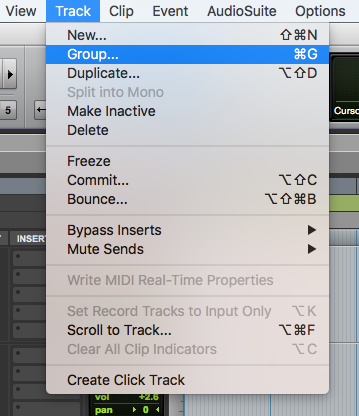
3. The “Create Group” window will appear as:
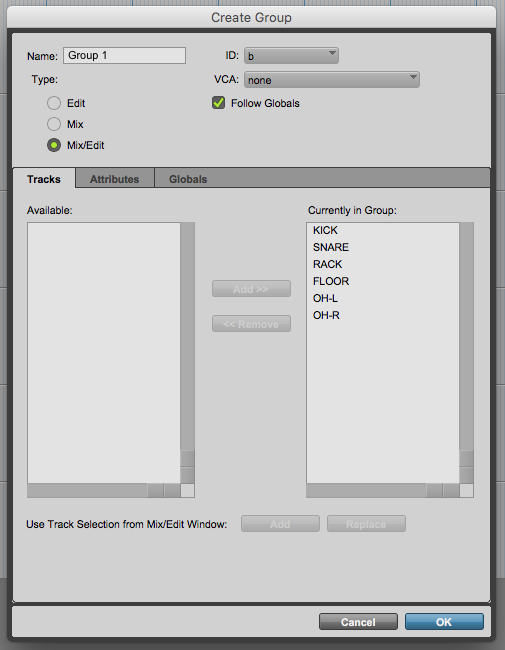
It is easy to see how our six tracks are contained currently in the Group. At the top left of this window, the user can rename the group to a more coherent label. For the purpose of this tutorial the group will be renamed to “Drums”:
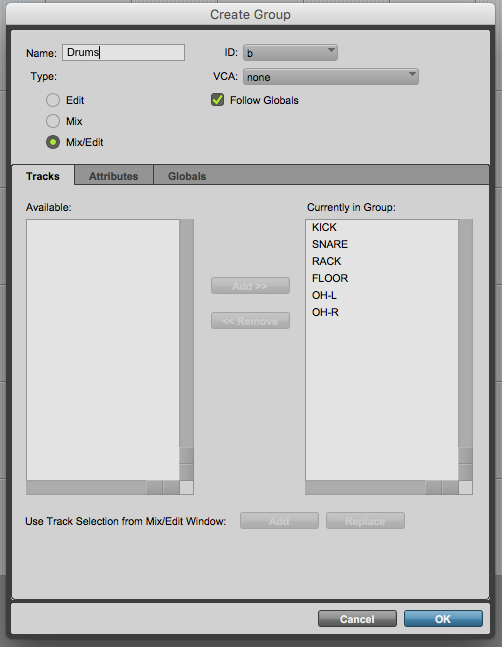
4. Press “OK” to create the group, the software will take us back to the Edit Window:
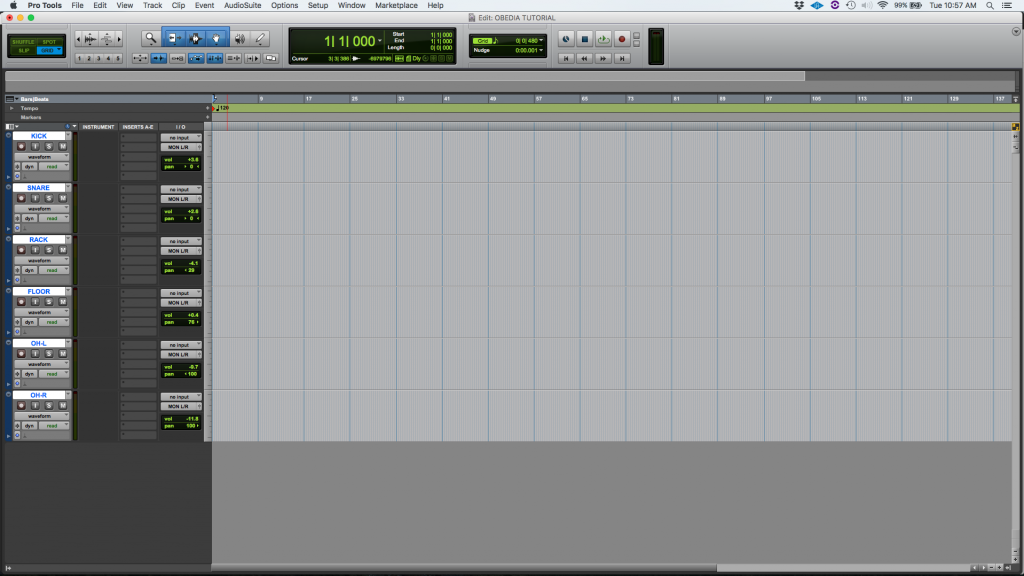
Now that the audio tracks have been group, we can proceed into creating the VCA Master Track.
5. At the top menu bar click on: Track -> New.
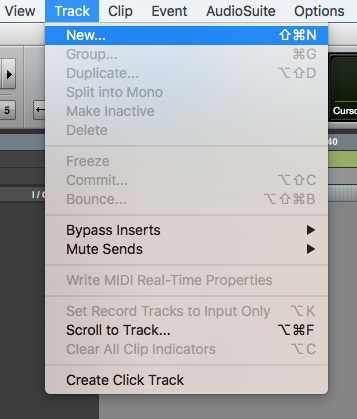
6. The New Tracks window will appear as:

7. Set the New Tracks window to create a VCA Master track:
For the purpose of this tutorial we will create a single VCA Master track, sample-based. The parameters of the New Tracks window will be set as:
- Create: 1.
- Mono/Stereo: N/A.
- Track type: VCA Master.
- Samples/Ticks: Samples.
Our New Tracks window should look like this:

8. Press “Create” to create the VCA Master track. As soon as this button is pressed, the window will close and the program will take us back to the Edit window:
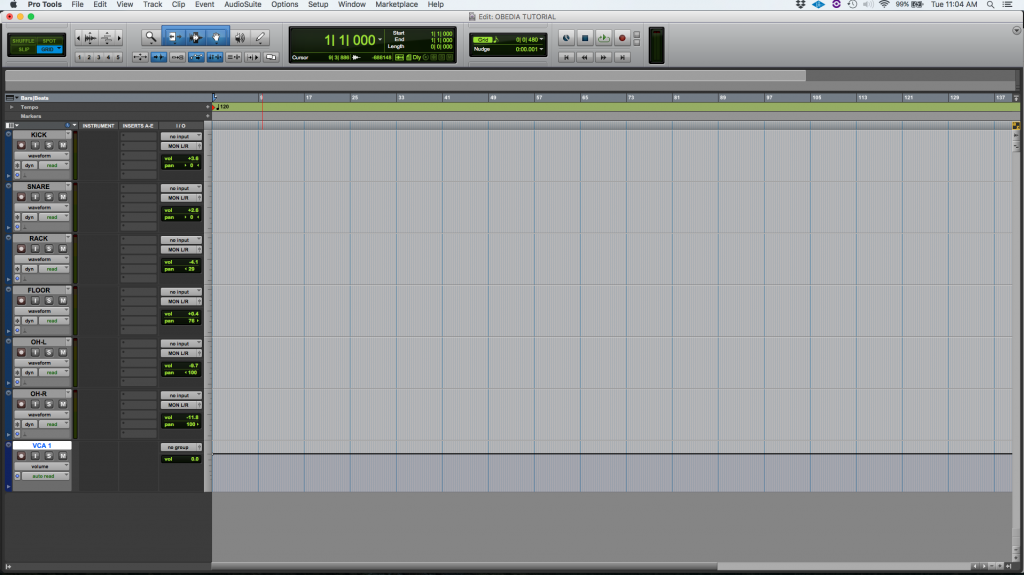
Note how the new VCA Master track has been created at the end of the list and labeled as “VCA 1”. Also, the VCA appears to be assigned to “no group” by default:

The last step of the process is to assign the VCA to control our previously created “Drums” group.
9. On the “VCA 1” track select the Drums group by clicking on: no group -> Drums.

The VCA 1 track will now appear as:

Note how our VCA Master track is now succcesfully assigned to control the “Drums” group.
10. In order to use the new VCA, we can go to the Mix window by clicking on the top menu bar: Window -> Mix.
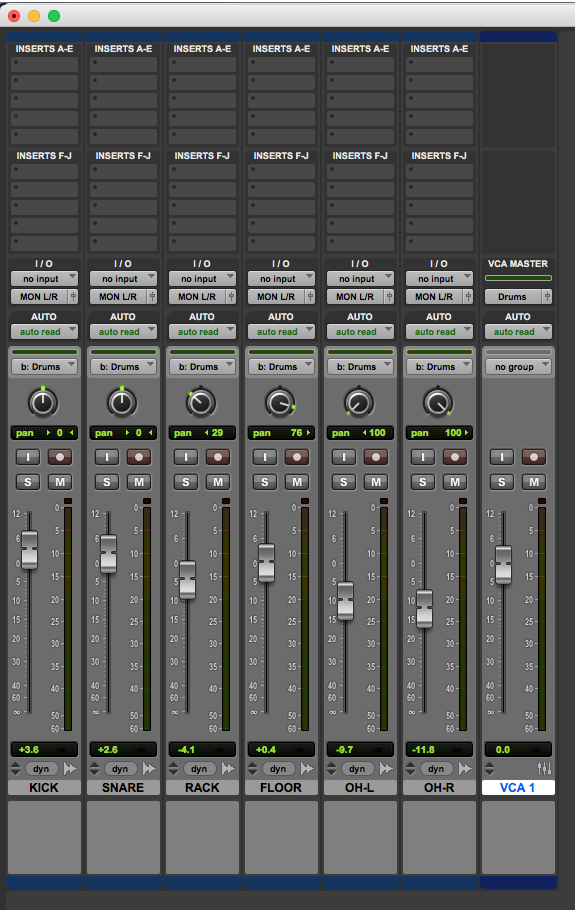
At this point the user can control the overall gain of the group of faders by simply moving the single VCA fader. We have successfully created and configured the VCA Master fader to control the group of drum tracks. The tutorial has now finished.
CLICK HERE to learn Avid Pro Tools one on one with a digital audio professional at OBEDIA.
