The following tutorial shows the user how to add Inserts in Pro Tools.
CLICK HERE to learn Avid Pro Tools one on one with a digital audio professional at OBEDIA.
As it can be seen from previous tutorials and other Pro Tools resources, the main concept of this software is to resemble the workflow of an analog console where the signal flow goes from “top-to-bottom” of the channel strip. One of the main features of these channel strips if the ability to process the audio in “series”, which means being able to pass the signal through a processor, and keep sending the “modified” or “processed” signal down through the rest of the channel strip. This process can be done by using “Inserts”.
In the analog domain, engineers would use hardware units such as compressors, gates or equalizers, just to name a few and they would need to be “patched” manually into the channel strip inserts. In our case, we will be using plugins, which are basically digital emulations of these hardware units that can develop the same dynamic or spectral processing functions.
This tutorial will present a step-by-step guide on add plugins as inserts in Pro Tools. The tutorial assumed the user already has audio tracks created in the session.
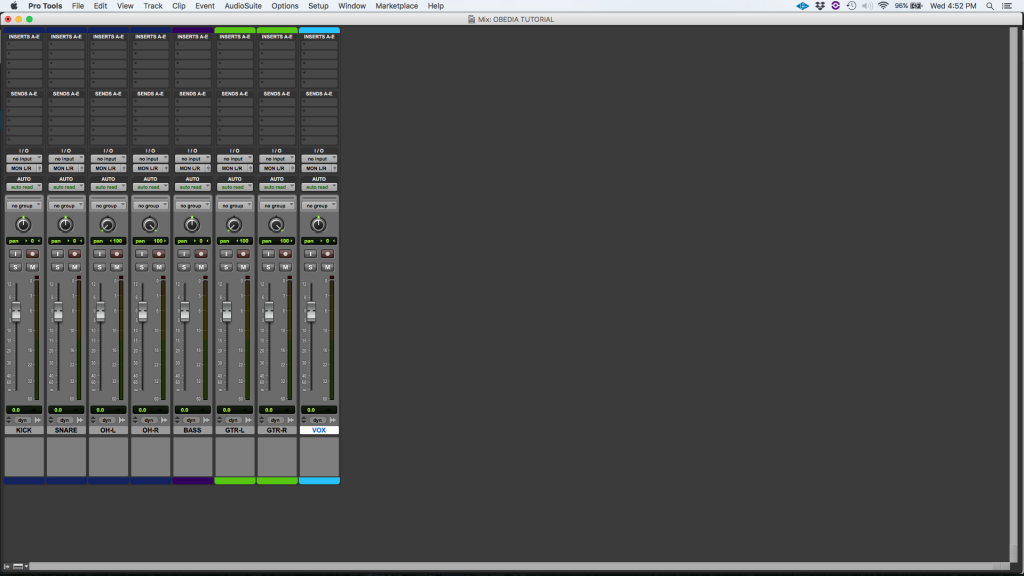
1. Open or create a new Pro Tools session and make sure you can see the Mix window:

Insert slots are located on top of each channel strip, in blocks of five slots each. This is the area where the user can add the plugins to the channel strips.
2. Locate the inserts slots area of the desired channel strip. For the purpose of this tutorial we will add plugins as inserts on the track labeled as “VOX”:

It is easy to see the five empty insert slots on our track. By clicking on these spaces the user can add the plugins.
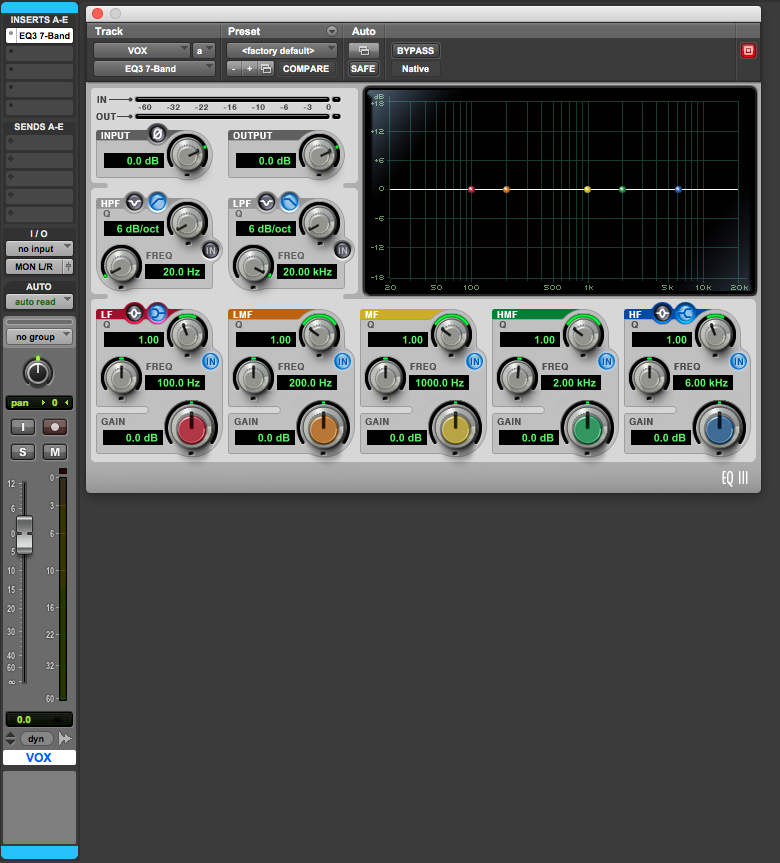
3. Click on the first insert slot and navigate through the list to select Pro Tool’s stock EQ plugin labeled “EQ3 7-BAND” as: plug=in -> EQ -> EQ3 7-BAND.

4. Once the plugin has been selected, it will show on the first insert slot and the plugin’s graphic interface will appear as:

Now that the plugin has been added, the user can tweak its parameters to modify the signal that it has received and ultimately output the modified version. Any plugin that is added after will be affected by the previous because the signal flows in “series”.
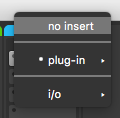
5. (OPTIONAL STEP) The user can remove the plugin by clicking on the small dot located to the left of the plugin’s name on the insert slot and selecting “no insert” as:

The plugin will be removed and the channel strip will be displayed as it was originally:

At this point the user has learned how to add and remove plugins as inserts in Pro Tools. The tutorial has now finished.
CLICK HERE to learn Avid Pro Tools one on one with a digital audio professional at OBEDIA.
