In this tutorial, we will cover the topic of How to Bounce a Mixdown in Ableton Live.
This tutorial assumes you have finished your mix and your master output is routed to the main stereo outputs of your interface, which most likely will be the analog line outputs 1-2.
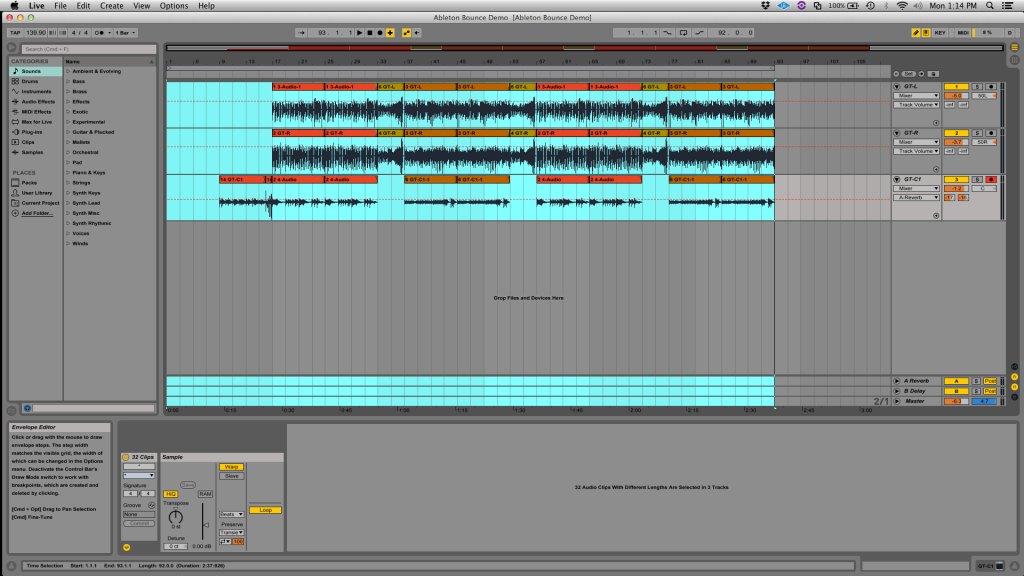
The following picture shows how a basic Ableton Live project will look like before bouncing, specifically the arrangement view.
When the mix has been finished, the user can bounce the mix into a single stereo file for future playback on a regular audio system like an iPod, car stereo or your receiver at home. This tutorial shows the steps needed to accomplish this task.
In order to bounce or export a mix in Ableton, the user must make sure the Start and End Point Markers are placed at the start and at the end of the arrangement. This is crucial because the Export function will only export the parts that are contained within those markers. In this case, the area within the markers is shown highlighted in turquoise blue. This is important to pay attention to when approaching the topic of How to Bounce a Mixdown in Ableton Live.
- Click on the main menu bar: File -> Export Audio/Video
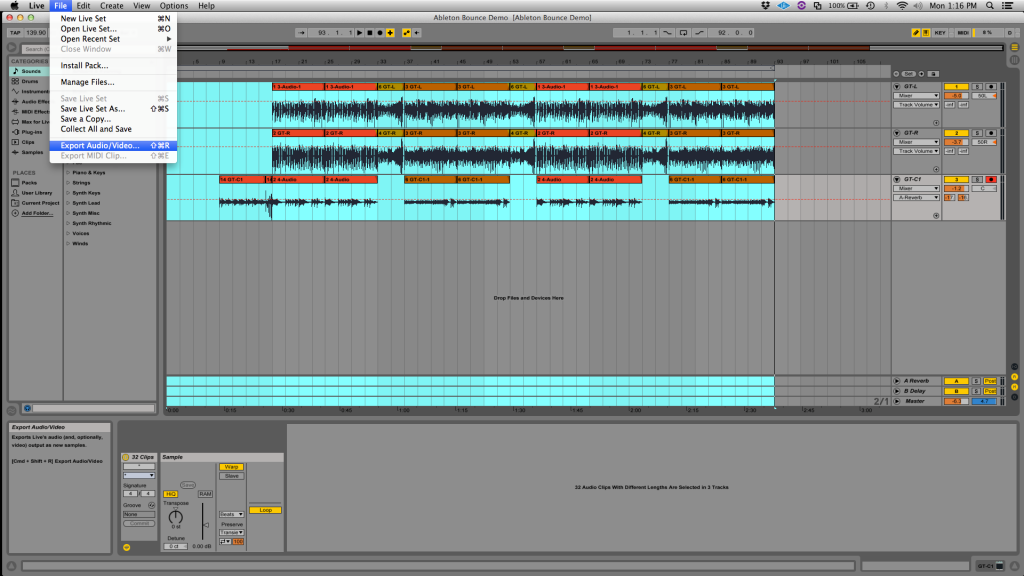
The following window will show:
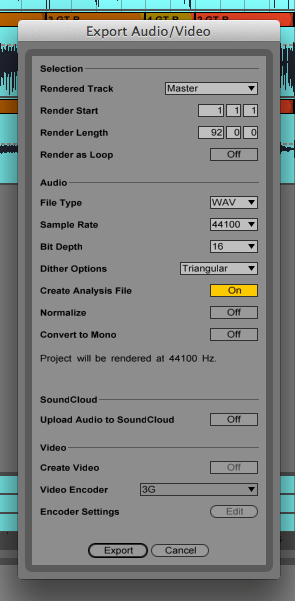
On this window the user can configure the settings of the export function like the start and length of the file, the file type, sample rate, bit depth, dither and other specifications.
– The general recommendation is to bounce files to the standard Audio CD format, also known as RedBook Audio format, which is: WAV file type, 44.1 KHz of sample rate at 16 bit depth.
– The “Rendered track” should be set to “Master” so that all the audio coming out of the master output gets rendered into a new stereo audio file.
– The “Render Start” should be located at 1:1:1 which is the start of the arrangement, the length will be denoted by the highlighted area.
– The rest of the parameters can be left default.
2. Press “Export”. The following screen will show:
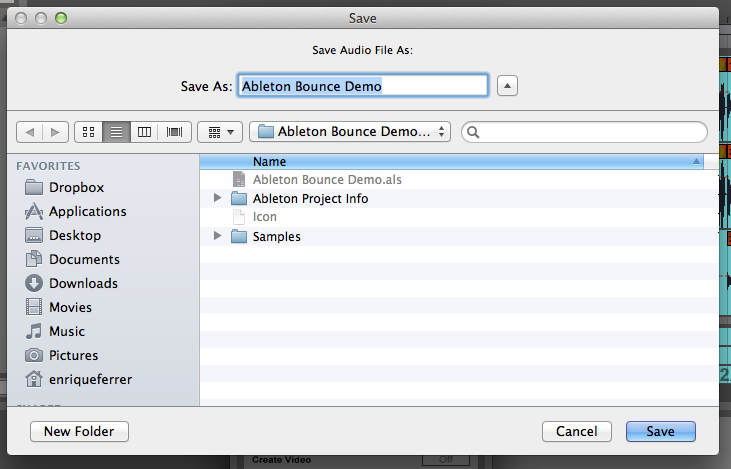
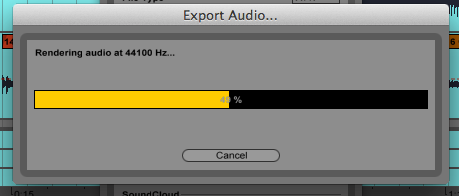
3. Press “Save” and the rendering process will start. The following screen will show:
This screen lets the user select the destination where the audio file will be stored. By default Ableton Live will place the file inside the Project Folder created for this session.
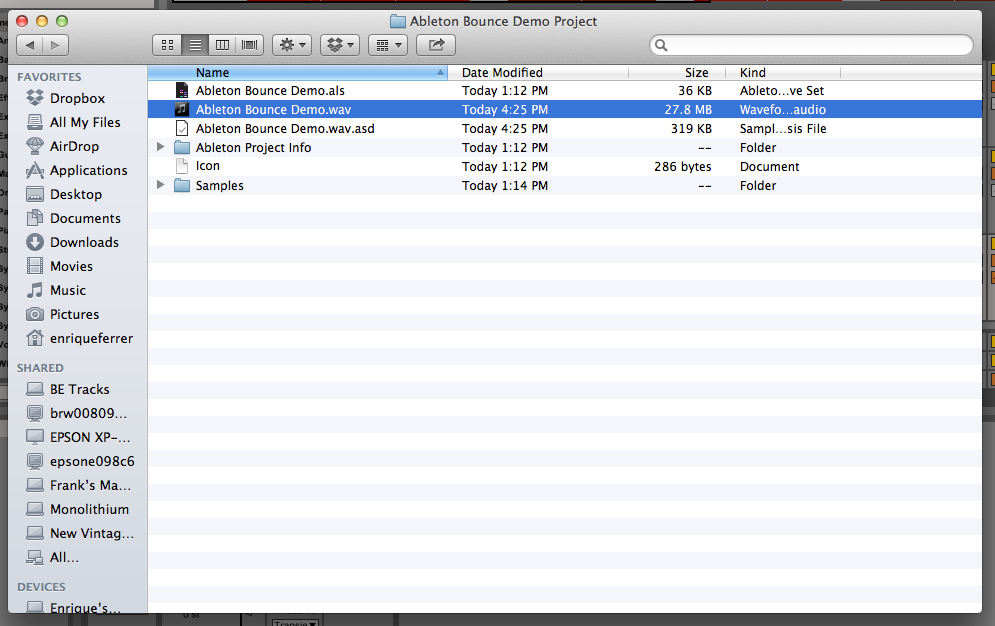
When the rendering process ends, the file will be located the destination determined in Step #2. In the case of this tutorial, the file was placed at the default destination, which was the main Project folder for the session. The next screenshot shows the file being highlighted within the folder.
And now you’re done! Simply browse to the folder in which you saved your mixdown, and you can then upload it, send it to others, and more.
We hope you found this tutorial on how to bounce a mixdown in Ableton Live helpful. For one on one help with Ableton Live, call OBEDIA: 615-933-6775, or visit:
https://www.obedia.com/ableton-live