The following tutorial shows the user how to bypass or make inserts inactive in Pro Tools.
CLICK HERE to learn Avid Pro Tools one on one with a digital audio professional at OBEDIA.
From previous tutorials, the user has learned how to add inserts in Pro Tools for audio mixing purposes. Often times during a mixing session, the user might need to listen to a track with the insert “bypassed” for a short amount of time just to make sure that the effect of the plugin is the desired. These A/B comparisons can be done by using the “bypass” function of the plugin. Once the plugin is bypassed, the incoming signal will not be affected, but the plugin will remain in the signal flow consuming the computer’s CPU resources. Bypassing a plugin is useful for A/B comparisons of the affected vs unaffected signal as well as automation for creative purposes. Once the bypass has been reverted, the plugin is active again keeping the same settings it had before being bypassed.
Another option the user has for these cases is to make the insert “inactive”. When an insert is inactive, it will not affect the incoming audio signal nor consume CPU resources and it will appear as greyed out.
This tutorial will present a step-by-step guide on how to bypass or make inserts inactive in Pro Tools. The tutorial assumed the user already has audio tracks created in the session.
1. Open or create a new Pro Tools session and make sure you can see the Mix window:
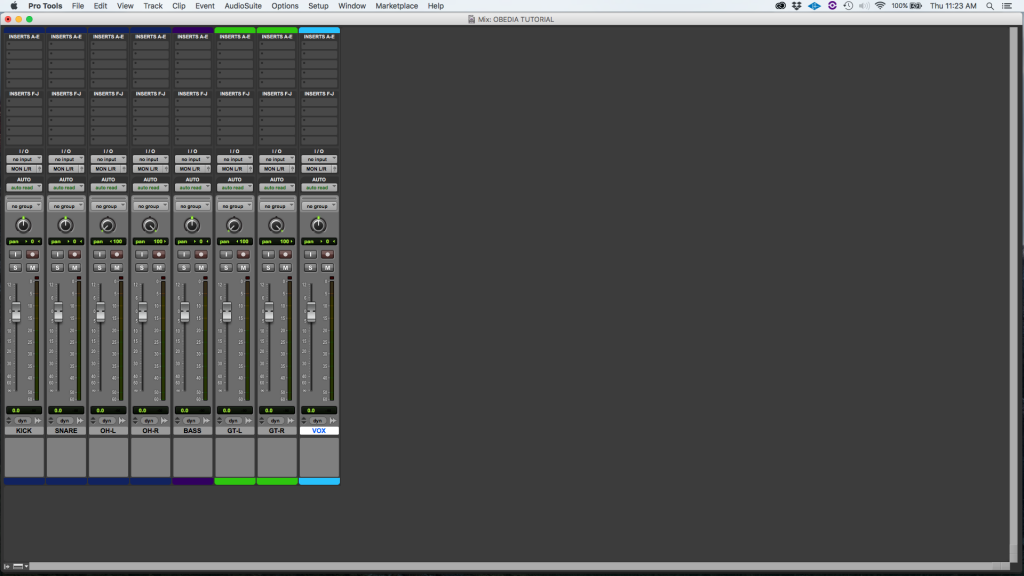
2. Following the instructions on how to add inserts to a Pro Tools track from last tutorial, add the stock 7-band EQ to the “VOX” track.

3. In order to BYPASS the insert, we must right-click on top of the insert name and select “Bypass” as:
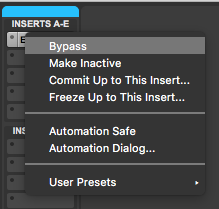
After the insert has been bypassed, it will show on the insert column with a blue background as:

4. (OPTIONAL STEP) The insert can be “un-bypassed” by repeating step #3:
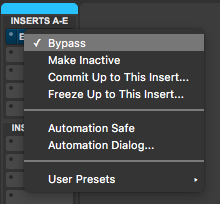
After the insert has been un-bypassed, it will show on the insert column active again as:

5. In order to make the insert INACTIVE, we must right-click on top of the insert name and select “Make Inactive” as:
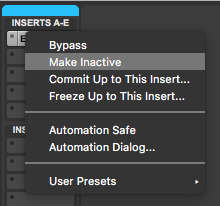
After the insert has been made inactive, it will show on the insert column greyed out as:

6. (OPTIONAL STEP) In order to make the insert active again we must right-click on top of the insert name and select “Make Active” as:
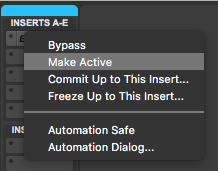
After the insert has been made active, it will show on the insert column as:

At this point the user has learned how to bypass and un-bypass inserts as well as how to make inserts active and inactive. The tutorial has now finished.
CLICK HERE to learn Avid Pro Tools one on one with a digital audio professional at OBEDIA.
