The following tutorial shows the user how to change MIDI velocity in Pro Tools.
CLICK HERE to learn Avid Pro Tools one on one with a digital audio professional at OBEDIA.
On previous tutorials we have explained how to record basic MIDI information into Pro Tools. After MIDI has been recorded, the user has several “Event Operations” that can be applied to the MIDI clip.
A very useful function of these operations is called “Change Velocity”. This function is capable of modifying the velocity of all the selected notes of a MIDI clip, which is specially useful when the overall relationship between the velocities of the notes is constant, but the engineer or producer just wants to make them all be louder (or softer) in a uniform way, giving them impression that the player has recorded them louder.
This tutorial will present a step-by-step guide on how to change MIDI velocity in Pro Tools. The tutorial assumes the user has already create a Pro Tools session that contains at least one track with MIDI information recorded. These operations have been explained on previous tutorials by OBEDIA.
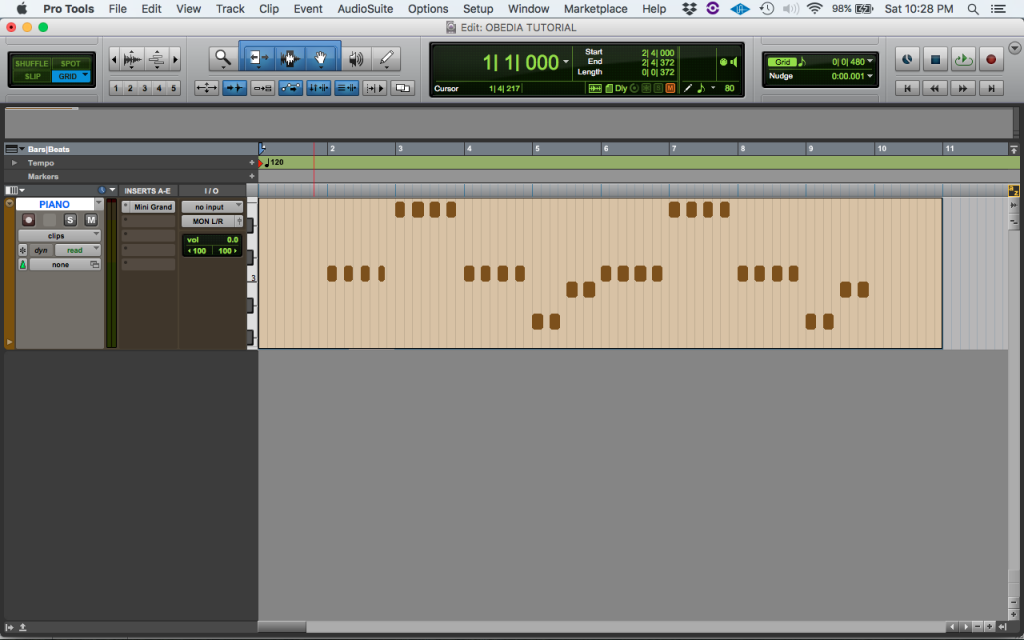
1. Open a new session. Make sure it contains an Instrument with MIDI information recorded to it:
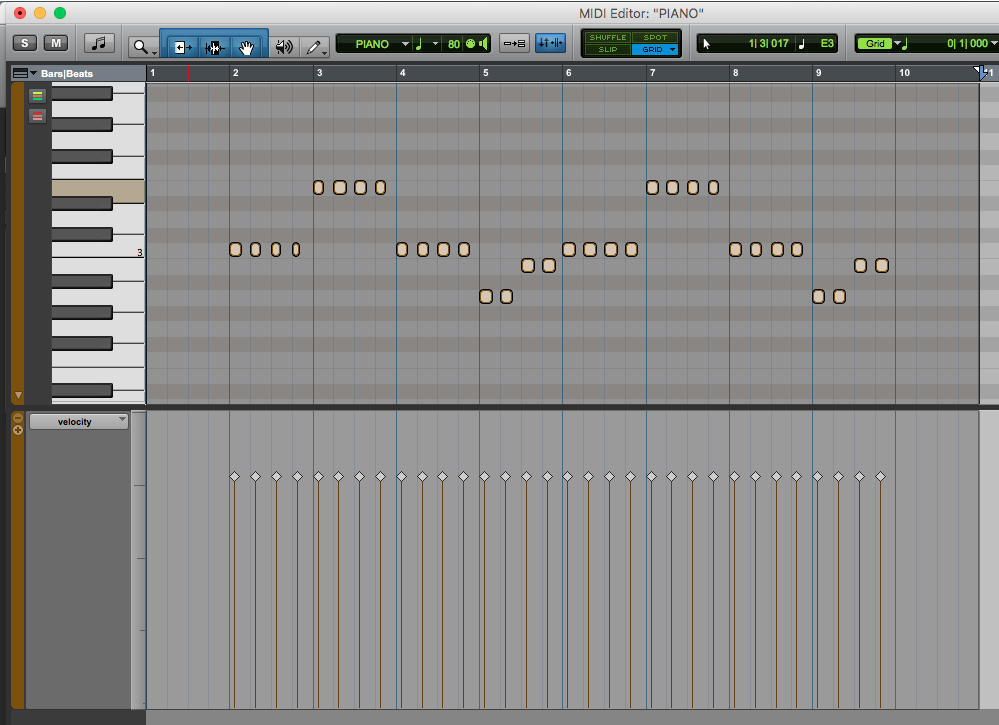
2. Double-click on the MIDI clip in order to select it. The MIDI editor will open and the clip will show as highlighted:
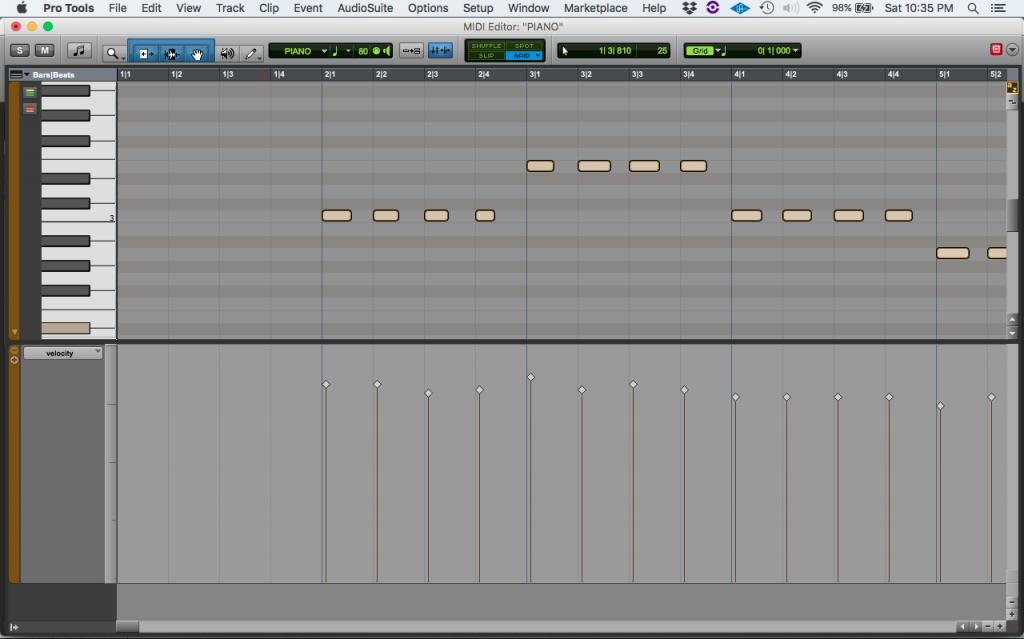
It is easy to see from the top window how every MIDI note, is represented by a horizontal square, has its own associated velocity on the lower portion of the window. Every velocity is graphed as a thin vertical line with a dot on the top.

For general reference, the velocity can be defined as the MIDI message that expresses how “loud” (or soft) the notes have been played.
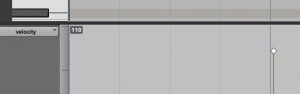
In order to know the velocity of a certain note, we can click at the little dot on top of the velocity line and the velocity number will show on the left side of the screen:
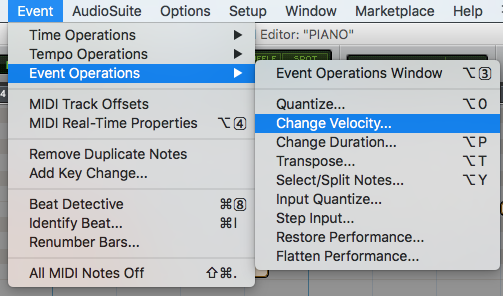
3. On the top menu bar click: Event -> Event Operations -> Change Velocity
4. The Events Operation window will open on the “Change Velocity” function as:
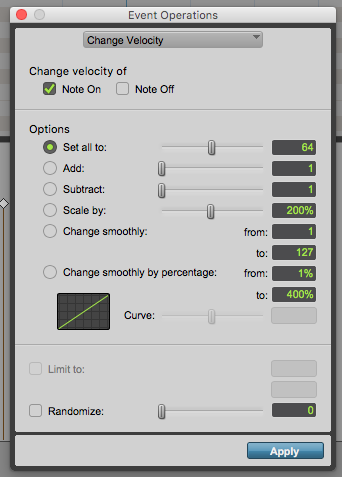
This window lets the user configure the different parameters of the Change Velocity function. Before we apply the velocity change procedure to the MIDI clip, it is important that we explain the most important parameters of this window. These parameters are:
- Note On: When this option is selected, the function will change the velocity of the note being pressed.
- Note Off: When this option is selected, the function will change the velocity of the note being released. This function is off by default, since normally engineers work with the “Note ON” MIDI message.
- Set All To: If this option is selected, all the notes will be set to the same velocity value that can be defined by the slider next to this.
- Add: If this option is selected, all the velocities of the passage will be added a certain number defined by the slider next to it.
- Subtract: If this option is selected, all the velocities of the passage will be subtracted a certain number defined by the slider next to it.
- Scale by: If this option is selected, all the velocities of the passage will be scaled by a certain factor defined by the slider next to it.
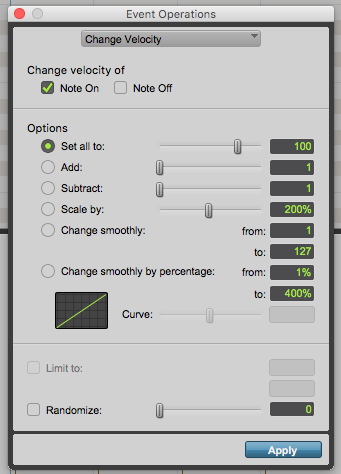
For the purpose of this tutorial, we want to make all the velocities the same. The defined number will be 100. The parameters that we must apply are:
- Note On: Checked.
- Note Off: Unchecked.
- Set All To: 100.
- Add: Unchecked.
- Subtract: Unchecked.
- Scale by: Unchecked.
5. Set the parameters of the “Change Velocity” functions to the ones defined above as:
6. Press “Apply” to apply changes. All the velocities will now look the same:
It is easy to see now how all the velocity lines are the same, representing the same velocity on all notes. If the user plays this passage, the piano will sound like all the notes were played with the same intensity.
At this point the user has properly learned how to Change Velocity in Pro Tools.
We hope this tutorial on how to Change Velocity in Pro Tools has been helpful! Call OBEDIA today to learn how to use Pro Tools from a digital audio professional.
CLICK HERE to learn Avid Pro Tools one on one with a digital audio professional at OBEDIA.