This tutorial will show you how to quantize MIDI in Ableton Live.
Quantizing allows you to snap MIDI data up to a grid, allowing it to be kept on time with your entire session’s tempo and timing. It can also allow you to correct performance issues, and correct improper playing.
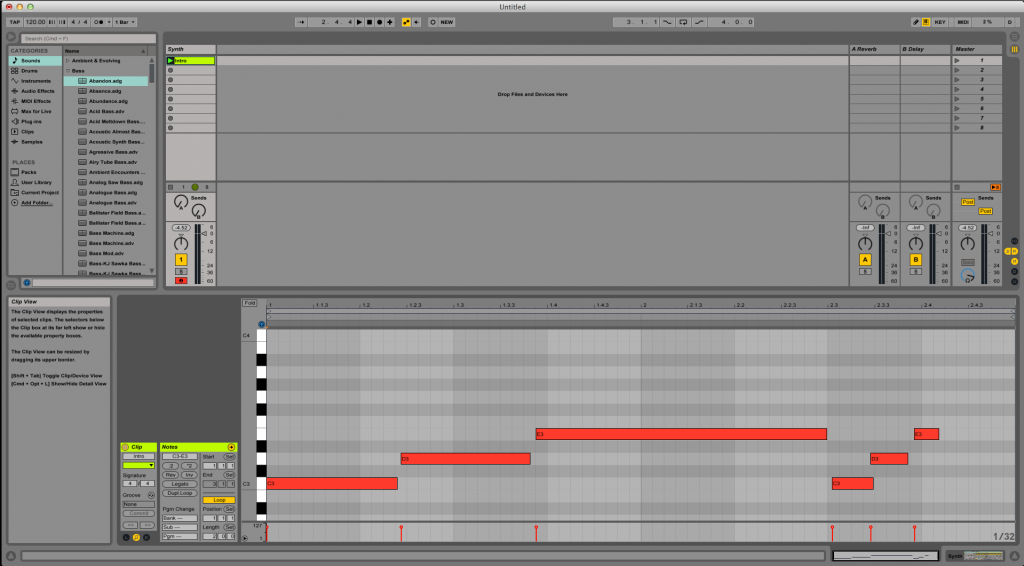
For the purpose of this tutorial, the user must have created an Ableton Live Set, created a MIDI track and recorded MIDI information into it. In this case, the track is labeled as “Synth”, and has a very simple 2-bar phrase recorded into it.
The Ableton Live Arrange window looks like this (you can apply MIDI quantize in both Session and Arrange view in Ableton Live):
The first step in quantization is to configure the grid at which Ableton will quantize the MIDI notes previously recorded
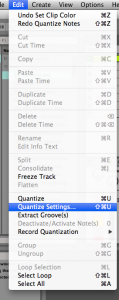
1. On the top menu bar click on: Edit -> Quantize Settings
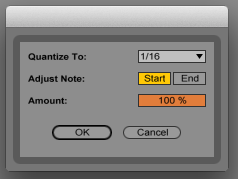
The following window will appear:
This is the quantize settings window and it gives the user the following options:
- Quantize to: Lets the user select the quantization grid that Ableton will use. For the purpose of this tutorial, it will be quantized to sixteenth notes (1/16).
- Adjust Note: Lets the user select which part of the note will be quantized. By default only the start of the notes are quantized, but the endings can also be selected. If both the start and endings are selected, the notes’ length could be altered to fit the desired grid. For the purpose of this tutorial, this configuration will be left default, so only the start of the notes will be quantized.
- Amount: This parameter determines how much will the notes be dragged to the desired grid. An amount of 100% is a “perfect” quantization which means the notes will be exactly moved to the grid. An amount of 50% will move the notes to a mid point between the actual position and the grid. The user can play with this parameter to give it more of a “human feel”.
2. Once these options have been selected, the user can close this window by pressing “Cancel”. The configurations will be saved.
Now the user must select the desired notes to be quantized from the “Synth” track.
3. By clicking and dragging on the clip overview, the user can highlight the desired notes, which will turn into light blue color.
Note that for this tutorial, all the notes were selected, but this does not have to be the case. Quantization can be applied to individual notes if needed.
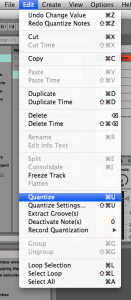
4. On the top menu bar click on: Edit -> Quantize
By doing this, the selected notes will be quantized following the settings previously determined.
The MIDI notes are now quantized and it is easy to see how they were dragged to line up with the 1/16 note grid.
Using these simple steps, you can quantize the MIDI data in your Ableton Live session.
If you found this tutorial useful, please consider sharing it!
If you’d like to get live one on one training in Ableton Live, join OBEDIA today: https://www.obedia.com/ableton-live


