This tutorial shows the user How to use the Ableton MIDI Effect Rack.
CLICK HERE to learn Ableton Live one on one with a digital audio professional at OBEDIA.
In general, a Rack is a flexible tool for working with effects, plug-ins and instruments in a track’s device chain. Racks can be used to build complex signal processors, dynamic performance instruments or stacked synthesizers. Racks can also streamline your device chain by bringing together your most essential controls. While Racks excel at handling multiple devices, they can extend the abilities of even a single device by defining new control relationships between its parameters.
In the case of MIDI Racks, these can only contain MIDI effects, and can only be placed in MIDI tracks.
For the purpose of this tutorial we will explain step by step how to create a MIDI Rack to control two parameters of two independent MIDI Effects contained in this rack. The two MIDI Effects used will be PITCH and RANDOM. The parameters that will be controlled by the Rack will be “Pitch” (from the PITCH MIDI effect) and “Chance” (from the RANDOM MIDI effect).
- Create a new Live session with at least one Instrument added to the first MIDI track:
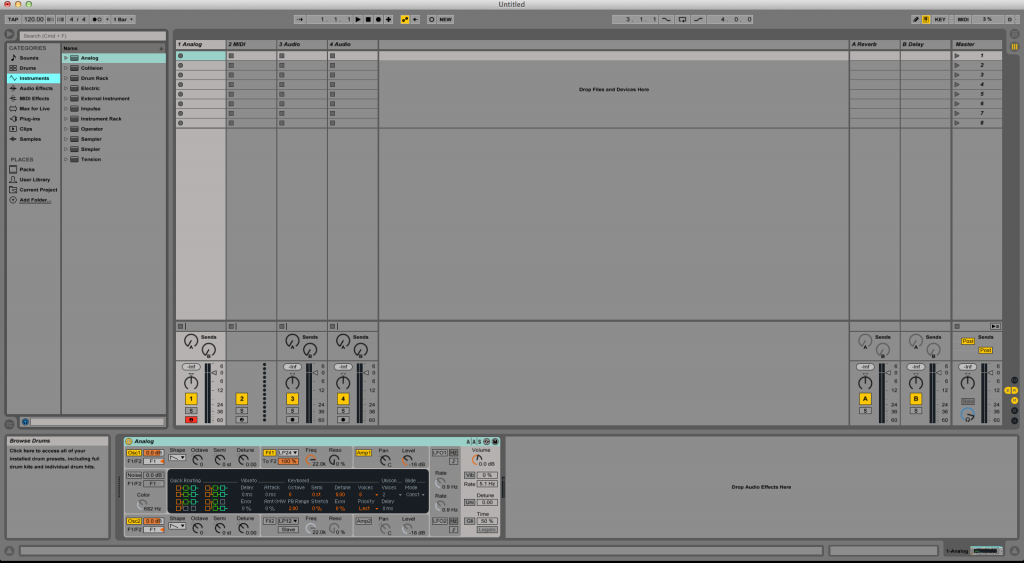
2. From the browser, look for MIDI Effects -> MIDI Effect Rack.
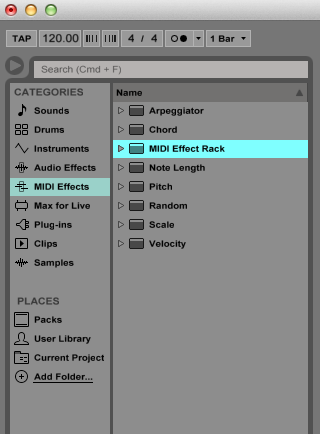
3. Drag and drop MIDI EFFECT RACK to add it to the first track labeled as “1 Analog”:
As soon as the MIDI Effect Rack has been added to the track, it is easy to see how it appears before “Analog” on the device view.

4. Repeat step #3 to add PITCH MIDI Effect and RANDOM MIDI Effect to the MIDI Effect Rack:
As soon as PITCH and RANDOM have been added to the MIDI Effect Rack it is important to note how they are contained within it.
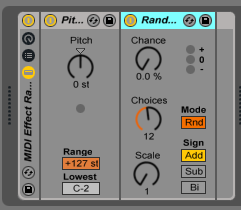
5. Right click on the “Pitch” parameter of PITCH and then click on “Map to Macro 1”:
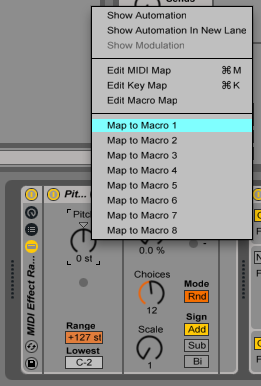
As soon as we click on “Map to Macro 1”, the MIDI Effect Rack will show the Macro controls. Note how the “Pitch” parameter is now mapped to the first Macro control (first knob located at the top left of the Macro controls):
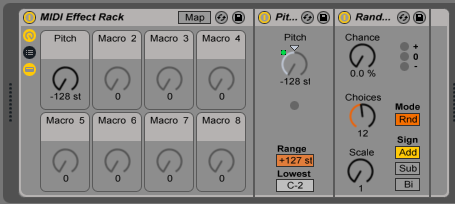
6. Right click on the “Chance” parameter of RANDOM and then click on “Map to Macro 2”:
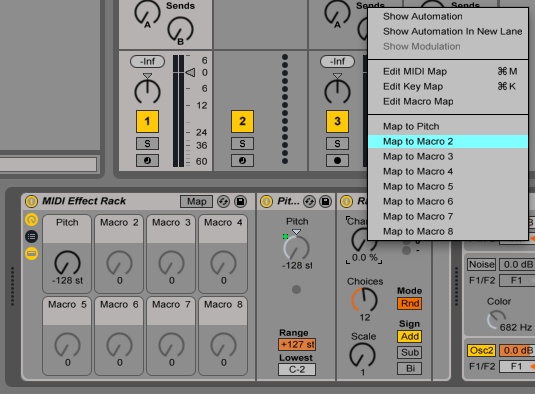
As soon as we click on “Map to Macro 2”, the “Chance” parameter will now be mapped to the second Macro control:
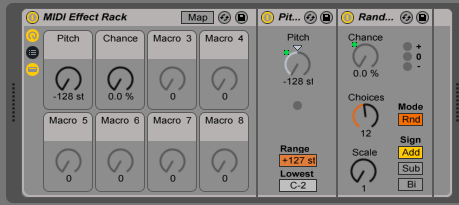
7. Hide devices of MIDI Effect Rack by clicking on the “Show/Hide Devices” button of the Rack:
![]()
After clicking on this button, the MIDI Effects contained within the rack will be hidden and the MIDI Effect Rack will now look like this:
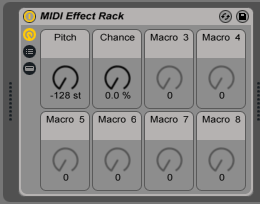
Note that the devices are now hidden but the mapped parameters are still controlled by the Macro controls of the Rack. The user can now access those parameters using their respective Rack knobs. We have now finished creating and configuring our first MIDI Effect Rack.
We hope you found this tutorial on How to use the Ableton MIDI Effect Rack useful.
CLICK HERE to learn Ableton Live one on one with a digital audio professional at OBEDIA.
