The following tutorial shows the user how to create a custom drum rack in Ableton Live.
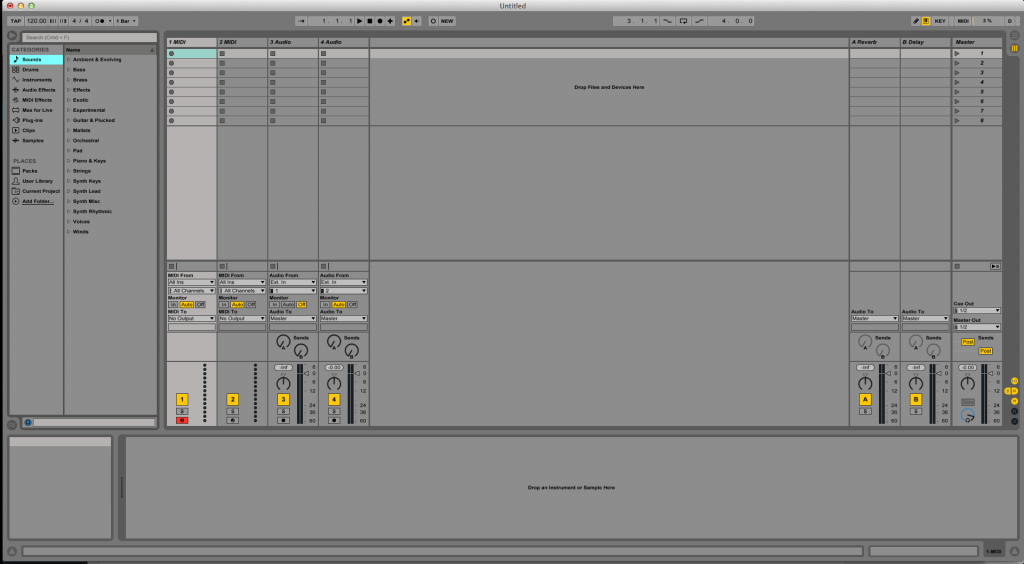
This tutorial starts with a blank default Live Set:
- Locate the Drum Rack from the Browser on the left by searching on categories: Drums -> Drum Rack.
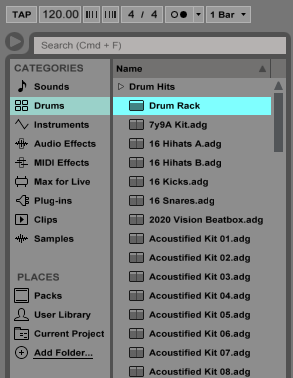
2. Double click on “Drum Rack”.
Ableton by default will add this Drum Rack to the first MIDI track and will also rename it as “Drum Rack”
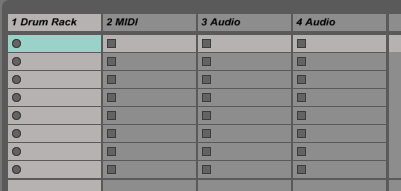
It is also easy to see how the Drum Rack is the only device associated to this track as:

This Drum Rack, by default is completely empty, which means no samples have been assigned to any of the possible “cells” or “pads” of the rack:
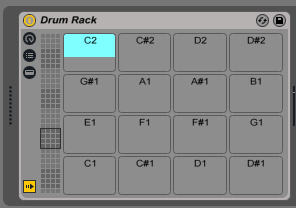
This is the moment in which the user can create his or her own custom Drum Rack by basically assigning several samples to these empty pads.
3. Search for a sample to add to the Drum Rack by going to the Browser on the left and clicking: Samples
The list of possible Ableton samples will show up as:
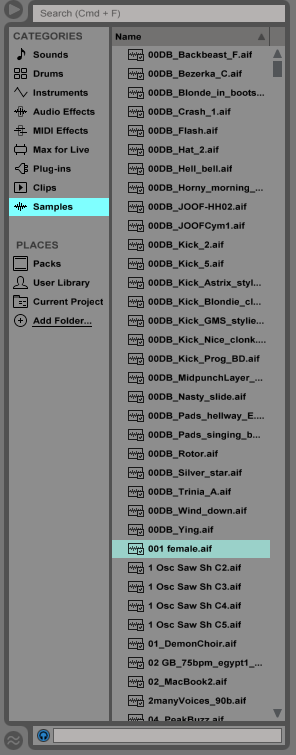
4. To add a sample to the Drum Rack, the user must simply drag and drop the sample into the desired Drum Rack Pad (cell).
For the purpose of this tutorial we will be dragging the sample titled “001.female.aif” into the Drum Rack Pad controlled by note E1. As soon as the sample has been dragged and dropped into the Pad, the pad will now show the name of the sample as:
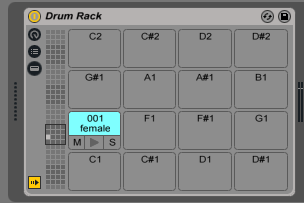
5. Repeat the process by adding other samples to other Drum Rack Pads until you have all the samples you need. For the purpose of this tutorial, we have added a kick, snare and hi hat samples to the rack:
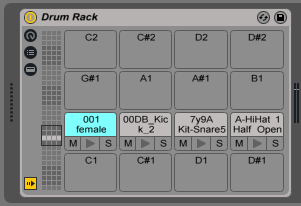
Now that the user has assigned all the desired samples, it is time to record the drums using this custom-made Drum Rack.
Keep in mind every Drum Rack Pad is assigned to a different key of the keyboard or MIDI note, so it is the user’s responsibility to assign them to the most convenient keys in order to make it easier to play.
