This tutorial shows you How to use the VELOCITY MIDI effect in Ableton Live.
CLICK HERE to learn Ableton Live one on one with a digital audio professional at OBEDIA.
Ableton’s VELOCITY MIDI effect is a tool included in Live that can alter incoming MIDI note velocity values (1-127) in either a controlled or random manner. It can function on MIDI Note On or Note Off messages, or both, depending on the setting of the Operation chooser.
On this tutorial we will go step by step in how to configure this VELOCITY MIDI effect of Ableton Live.
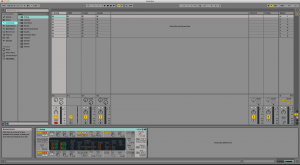
- Create a new Live session with at least one Instrument added to the first MIDI track:

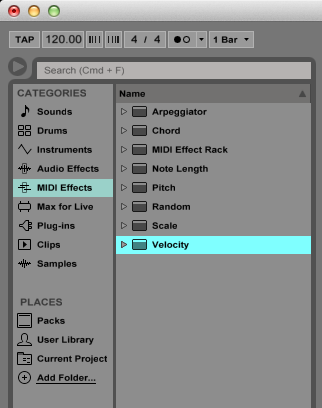
2. From the browser, look for MIDI Effects -> Velocity.

3. Drag and drop Velocity to add it to the first track labeled as “1 Analog”:
As soon as the Velocity MIDI effect has been added to the track, it is easy to see how it appears before “Analog” on the device view.

4. Configure VELOCITY so that it alters incoming MIDI note values.
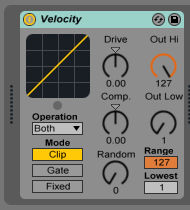
In order to do this we must explain the graphic interface and parameters of VELOCITY.

Velocity has 9 controls that can be explained as:
- Operation: This chooser selects whether the VELOCITY effect should apply to MIDI Note On messages (when set to “Velocity”), MIDI Note Off messages (when set to “Rel. Vel.”), or both,
- Out Hi/Low knobs: These knobs define the range of note velocities which can be output from the device. These velocities are represented by the Y-axis of the display.
- Range and Lowest knobs: These two controls define the range of note velocities which will be accepted by the device. Lowest sets the lowest accepted velocity value, which Range adds to. Incoming velocities are shown by the X-axis of the display. Notes with velocities outside of this range are still accepted if the device is in Clip or Fixed mode but their velocities are transformed in value.
- Mode: This switch determines what happens to incoming notes whose velocities are not within the range defined by the Range and Lowest controls. Clip mode clips note velocities so that they remain in range; Gate mode will block notes whose velocities are outside of the range (the LED below the X-Y display will flash when a note is gated) and Fixed mode will remap all note velocities to the value of the Out Hi control.
- Random knob: This control adds or subtracts a random value to all velocities. It is represented by a gray area on the display curve.
- Drive knob: Positive Drive values push velocities into the upper ranges, making most notes play loudly. On the other hand, with negative Drive values, the velocities will be kept in the lower ranges therefore making notes play softly.
- Compand knob: This control is a compressor and an expander at the same time. When the values are set above zero, it will force the incoming notes to locate to the outer boundaries of the curve, making them play either loudly or softly. Conversely, if values are set below zero, the velocities will be pushed towards the middle range.
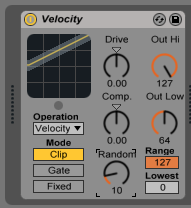
For the purpose of this tutorial we will set the Velocity MIDI effect so that it accepts all incoming notes but it will output them from in a range of velocities of 64 to 127; this means that notes incoming notes below 64 will be amplified to meet the minimum velocity of 64, while the rest of the incoming notes (61 to 127) will be reproduced at the same velocity. Also, we will add a small amount of randomness to the output by using the Random knob.
The settings we will use are:
- Operation: Velocity
- Mode: Clip
- Drive: 0
- Comp: 0
- Random: 10
- Out Hi: 127
- Out Low: 64
- Range: 127
- Lowest: 0
Our final configuration of Velocity MIDI Effect will look like this:

The Velocity MIDI Effect is now configure for our purpose.
We hope you found this tutorial on How to use the VELOCITY MIDI effect in Ableton Live helpful! If you’d like to learn Ableton Live in real time with a professional digital audio trainer, please contact us.
CLICK HERE to learn Ableton Live one on one with a digital audio professional at OBEDIA.
