This tutorial shows the user How to use the Ableton Live OVERDRIVE audio effect.
CLICK HERE to learn Ableton Live one on one with a digital audio professional at OBEDIA.
Ableton’s OVERDRIVE is one of the stock audio effects included in Live that modifies the audio signal of a track by adding distortion to it, ultimately emulating a classic guitar pedal. The distortion added can go from a subtle “creamy” overdrive tone to a heavier crushed and distorted tone. One advantage of using this effect is the capability of driving the signal extremely hard without loosing the dynamic range of the original signal, something not typically possible in hardware units of this kind.
This tutorial will present a step-by-step guide on how to configure and use the OVERDRIVE audio effect in Live.
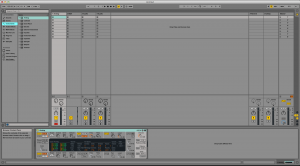
- Create a Live Set with at least one track. In this case we have a MIDI track with a mono virtual instrument assigned to it:

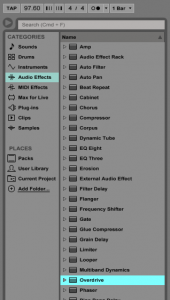
2. From the Browser, search for Audio Effects -> Overdrive.

3. Drag and Drop the Overdrive audio effect on top of the audio track labeled as “1 Analog”.
As soon as this effect has been dropped on top of the track, it is easy to see how the Overdrive audio effect now appears right after the Analog virtual instrument.

4. Configure the Overdrive audio effect for proper usage
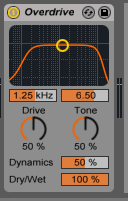
Now that we have added the effect to our audio track, we can explain each of the parameters included. The following picture shows the graphic interface of this audio effect.

Overdrive has 6 different parameters we can control, these are:
- Drive: This knob sets the amount of distortion applied to the incoming signal. It is important to note that 0% drive does not mean no distortion.
- Tone: This knob acts as a post-distortion equalizer that boosts the high frequencies of the modified signal at higher values.
- Center Frequency: This slider sets the center frequency of the bandpass filter applied pre-drive stage.
- Bandwidth: This slider adjusts the width of the bandpass filter.
- Dynamics: This knob controls controls how much of the original dynamic range is preserved. The higher this knob is set, the more of the original dynamic range is preserved, therefore applying less compression to the signal.
- Dry/Wet: This control adjusts the balance between the original and the processed signal.
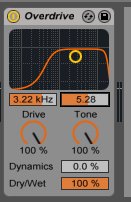
For the purpose of this tutorial, we will be configuring the Overdrive effect to distort the incoming signal as much as possible, obtaining a completely crushed output signal. The parameters will be configured as:
- Drive: 100%
- Tone: 100%.
- Center Frequency: 3.22 KHz.
- Bandwidth: 5.28.
- Dynamics: 0%.
- Dry/Wet: 100%.
Our Overdrive audio effect will look like this:

We have now finished configuring our audio effect and it is ready to be used.
We hope you found this tutorial on How to use the Ableton Live OVERDRIVE audio effect useful!
CLICK HERE to learn Ableton Live one on one with a digital audio professional at OBEDIA.
