This tutorial shows the user how to use Ableton’s DYNAMIC TUBE audio effect.
CLICK HERE to learn Ableton Live one on one with a digital audio professional at OBEDIA.
Ableton’s DYNAMIC TUBE is one of the stock audio effects included in Live that modifies the audio signal of a track by adding the distortion characteristics of vacuum tubes. This effect gives the user the possibility of emulating 3 different types of tubes, each with its own transfer function, being able to yield 3 different timbres.
This tutorial will present a step-by-step guide on how to configure and use the DYNAMIC TUBE audio effect in Live.
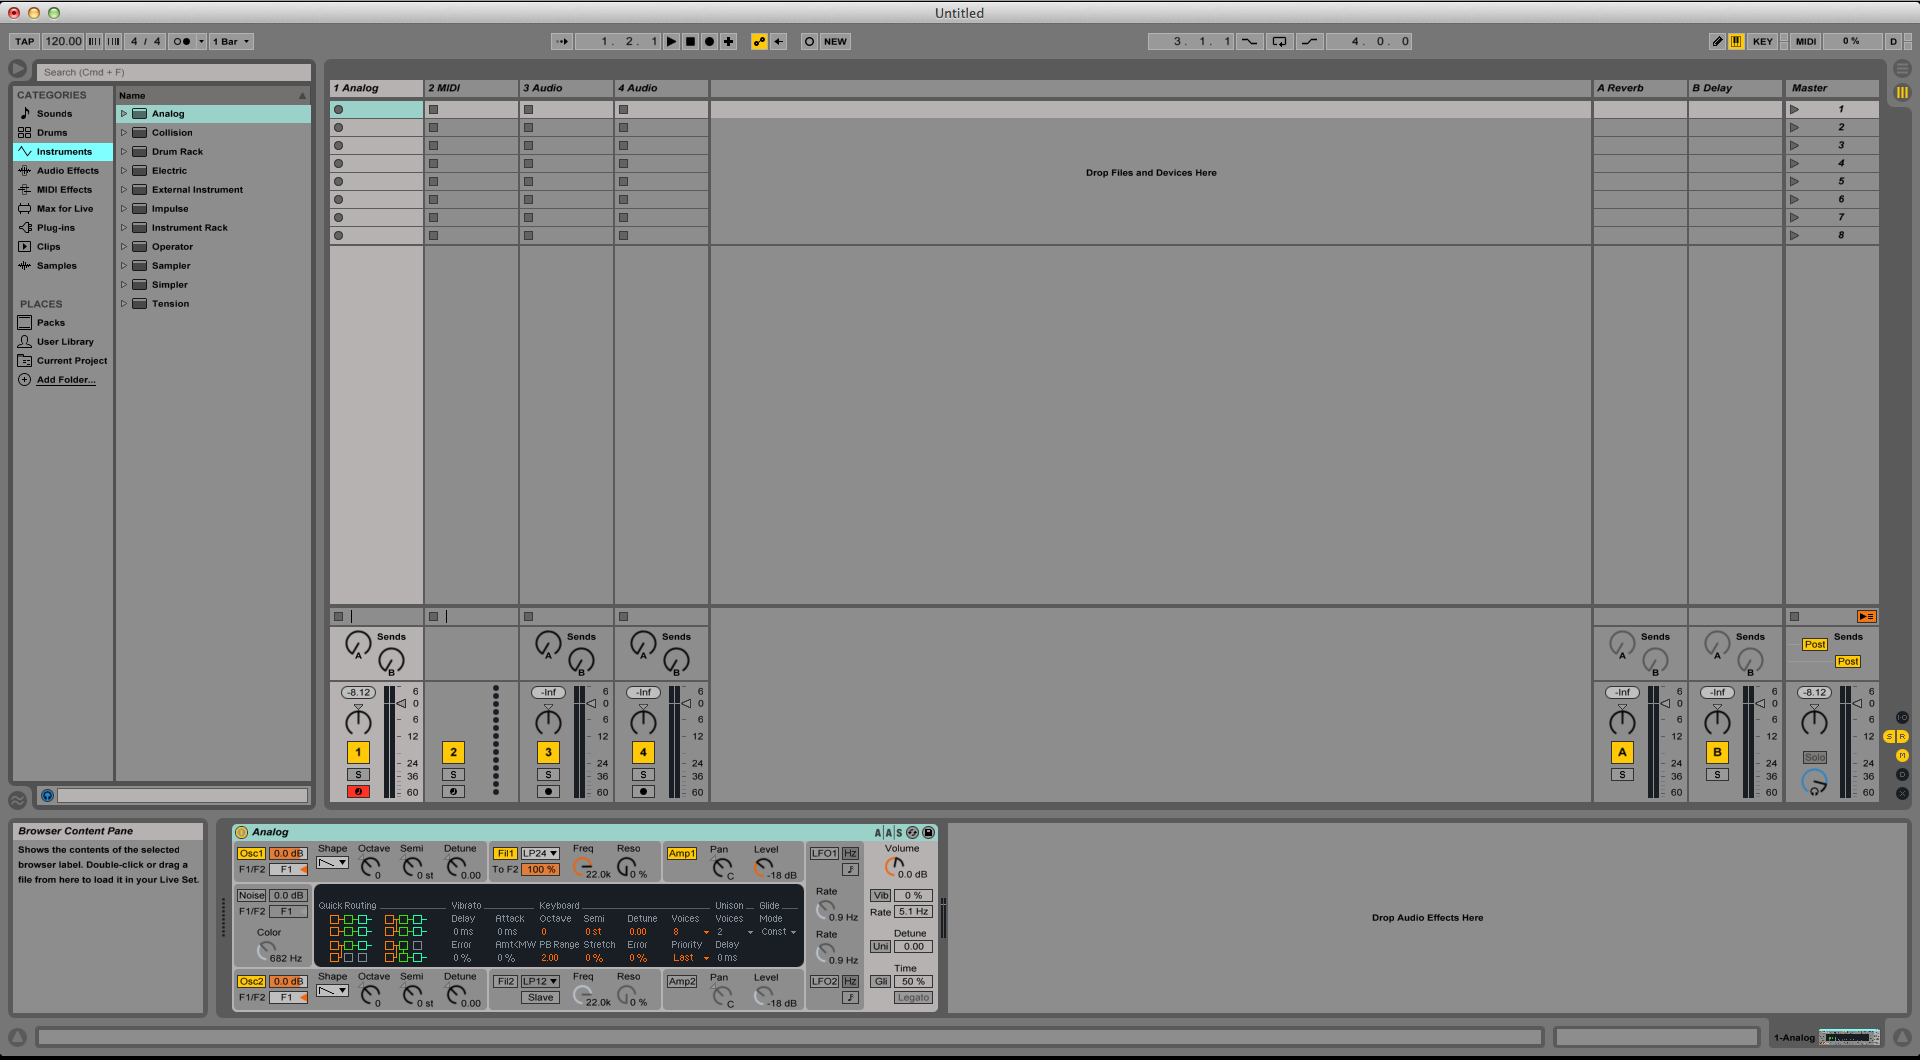
- Create a Live Set with at least one track. In this case we have a MIDI track with a mono virtual instrument assigned to it:

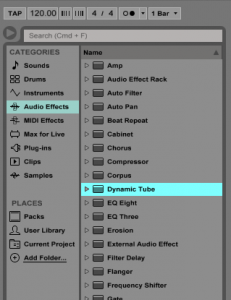
2. From the Browser, search for Audio Effects -> Dynamic Tube.
3. Drag and Drop the Dynamic Tube audio effect on top of the audio track labeled as “1 Analog”.
As soon as this effect has been dropped on top of the track, it is easy to see how the Dynamic Tube audio effect now appears right after the Analog virtual instrument.

4. Configure the Dynamic Tube audio effect for proper usage
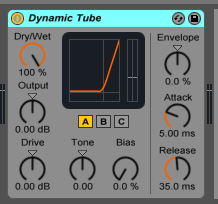
Now that we have added the effect to our audio track, we can explain each of the parameters included. The following picture shows the graphic interface of this audio effect.

Dynamic Tube has 9 different parameters we can control, these are:
- Dry/Wet: This knob controls the rate between the original signal and the modified signal (processed by the transfer function of the tube). A value of 100% means the output of the effect is fully modified.
- Output: This knob adjusts the level of the signal coming out of the effect. This can vary from -15 dB (cut) to +15 dB (boost).
- Drive: This knob controls the input level of the signal entering the tube. High levels of drive yield into more dirt coming out of the tube.
- Tube Mode: This switches toggle the 3 different type tube’s transfer functions. These are:
- Tube A: Does not produce distortion if the bias is set low, but it will react whenever the input signal exceeds a certain threshold, therefore yielding brighter harmonics.
- Tube C: It is a very poor tube amp that produces distortion all the time with a very warm/mellow timbre.
- Tube B: This emulation resembles a mid-point between type A and type C.
- Tone: This knob controls the spectral distribution of the distortion characteristics, steering the sounds into the higher registers, or into more more mid-range or deeper ends of the spectrum.
- Bias: This parameter is the basic control of all vacuum tube amps. Higher BIAS values move the input signal closer into the transfer function’s region of non-linearity, where the tube adds its “distorted” character. Extreme high values of BIAS, will yield into completely broken and crushed distorted sounds.
- Envelope Amount: Ableton Live lets the user modulate the BIAS by using an envelope follower. The level of this knob determines how much the input signal will influence the BIAS control. Positive values make louder signals sound dirtier, while negative values create expansion effects by reducing distortion on loud signals.
- Attack and Release: These knobs control how quickly the envelope follower reacts to volume changes from the input signal. They have no effect if the envelope amount is set to zero.
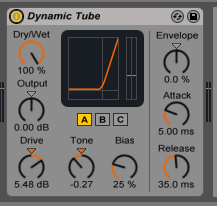
For the purpose of this tutorial, we will be configuring the Dynamic Tube effect to distort the incoming signal very lightly, obtaining a warm and creamy classic tube sound. The parameters will be configured as:
- Dry/Wet: 10%.
- Output: 0dB.
- Drive: 5.48 dB
- Tube Mode: A.
- Tone: -0.27.
- Bias: 25%.
- Envelope Amount: 0%.
- Attack: 5ms.
- Release: 35ms.
After applying the previous parameters, our Dynamic Tube should look like this:

We have now finished configuring our audio effect and it is ready to be used.
We hope you found this tutorial on How to use the Ableton Live DYNAMIC TUBE audio effect useful!
CLICK HERE to learn Ableton Live one on one with a digital audio professional at OBEDIA.

