The following tutorial shows the user how to create and configure MIDI track in Pro Tools.
CLICK HERE to learn Avid Pro Tools one on one with a digital audio professional at OBEDIA.
From previous tutorials the user has seen how an “Instrument Track” in Pro Tools is capable of receiving MIDI information coming from a MIDI controller, and sending it to a Virtual Instrument that will output digital audio information.
Another way of triggering a Virtual Instrument in Pro Tools is by using MIDI tracks in combination with an AUX Input track. The MIDI track will record the MIDI data and it will send it to the Virtual Instrument that is contained in an AUX Input Track as an insert. The Virtual Instrument will receive this data and output the digital audio. This audio information will come out of the AUX Input track at the end of its signal flow.
This tutorial will present a step-by-step guide on how to create and setup a MIDI track in tandem with an AUX Input track for Virtual Instrument purposes in Pro Tools. This tutorial assumes the user has already configured a MIDI keyboard/controller for use in this software.
1. Open or create a new Pro Tools session and make sure you can see the Edit window:
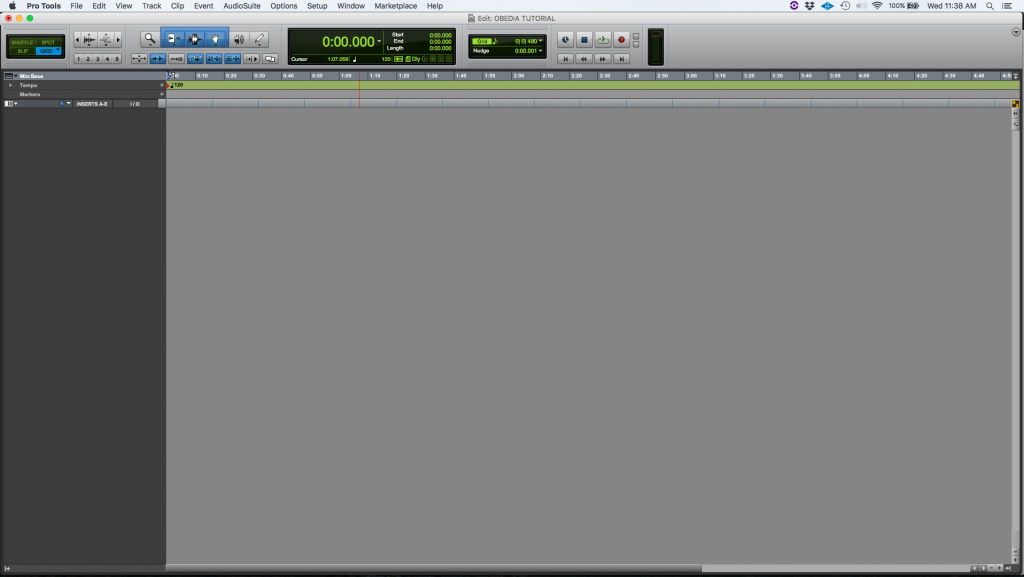
2. At the top menu bar click on: Track -> New.
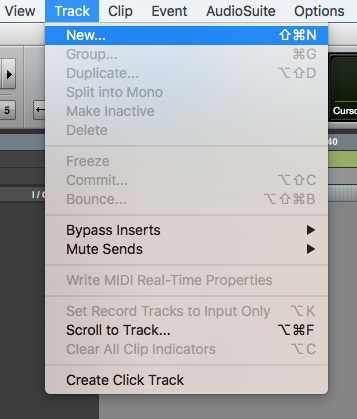
3. The New Tracks window will appear as:

4. Set the New Tracks window to create a new MIDI track and an AUX Input track:
The New Tracks window will appear as:

Note how by default, the MIDI track is Ticks-based, compared to audio tracks and AUX Input tracks that are sample-based.
5. Press “Create” to create the track. As soon as this button is pressed, the window will close and the program will take us back to the Edit window:
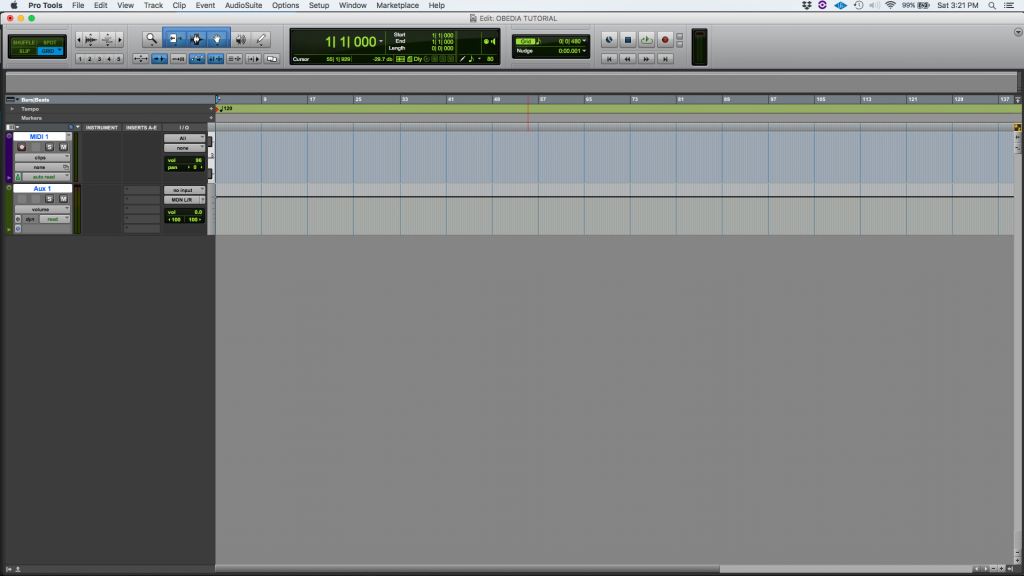
6. Click on the first Insert slot of the AUX Input track to add a new Virtual Instrument. Once clicked navigate through the list as: Multichannel Plugin -> Instrument -> Mini Grand:
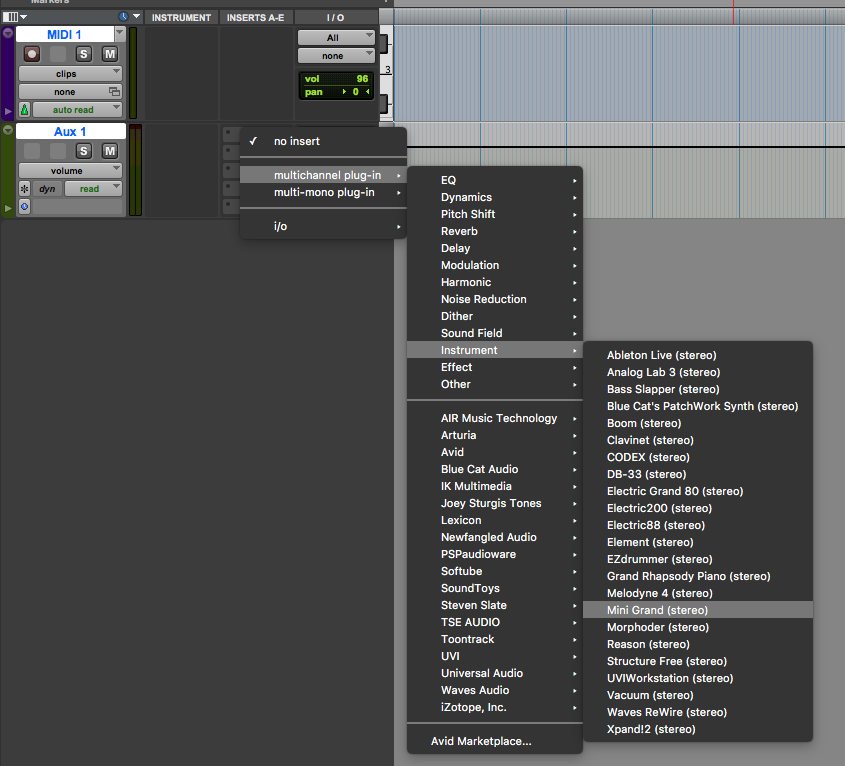
Once “Mini Grand” has been selected, it will appear as the first insert of our AUX Input track and open the instrument’s graphical interface as:
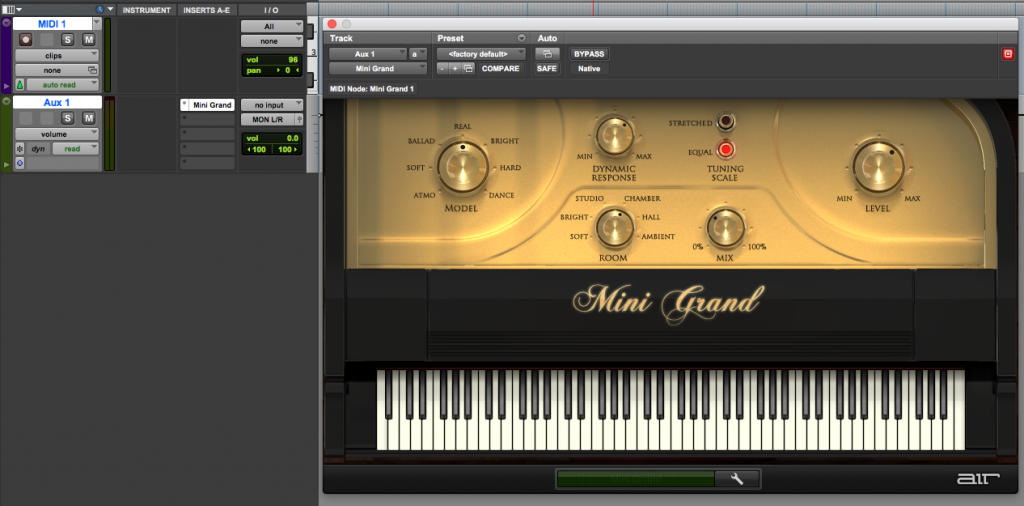
The next step of the process is to setup the MIDI track’s output to trigger the Mini Grand virtual instrument. At this point the graphic interface of Mini Grand can be closed if needed.
7. From the MIDI tracks’ output click on: none -> Aux 1 – Mini Grand 1. This will send the MIDI information to the Virtual Instrument.
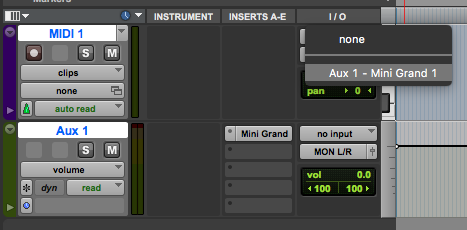
Once clicked, the MIDI track’s output will switch from “none” (default) to Mini Grand 1-1 as:

8. Press the “Record Enable” button of the MIDI track in order to arm the track for recording, the button will turn on red as:

At this point the user can play the MIDI controller and listen to the Mini Grand coming out of the main analog outputs (labeled as “MON L/R” in this case). The recording can be done at any time now at the MIDI track.
We have successfully created and configured a MIDI track to trigger a Virtual Instrument loaded on an AUX Input track. The tutorial has now finished.
CLICK HERE to learn Avid Pro Tools one on one with a digital audio professional at OBEDIA.
