In this blog, we will talk about the File Manager Window and Collecting Files in Ableton Live .
Ableton Live 9 has a dedicated side-window related to file management of the set. This side-window is called “File Manager”. This tutorial shows how to use that window to gather file information of the set and collect external files.
This tutorial assumes the user has created and Ableton Live set that contains external files. For the purpose of this tutorial, the external files were simply audio files that were dragged and dropped into audio tracks in Ableton.
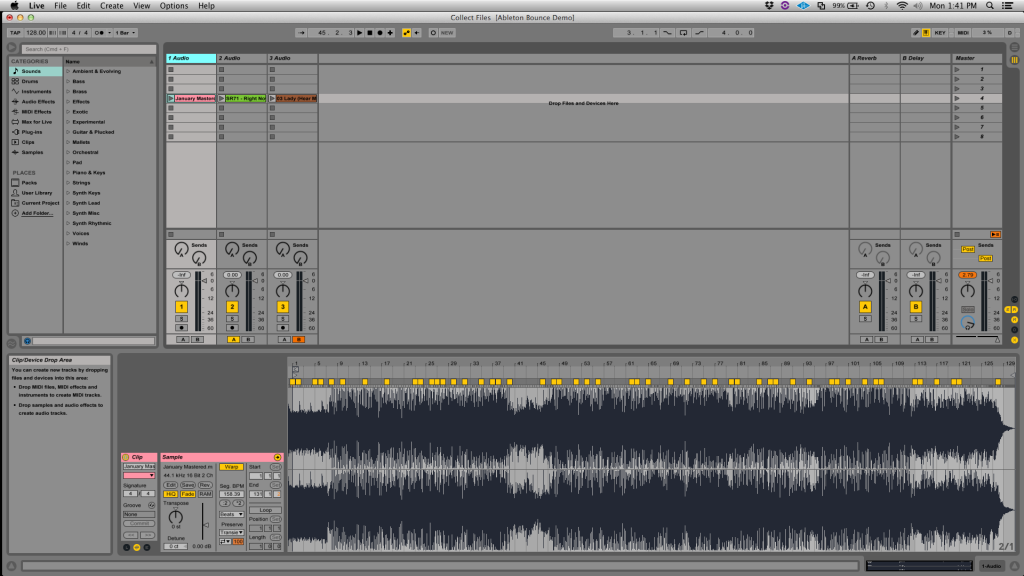
The Ableton Live set looks like this:

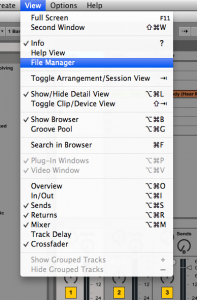
1. On the top menu bar, click on: View -> File Manager

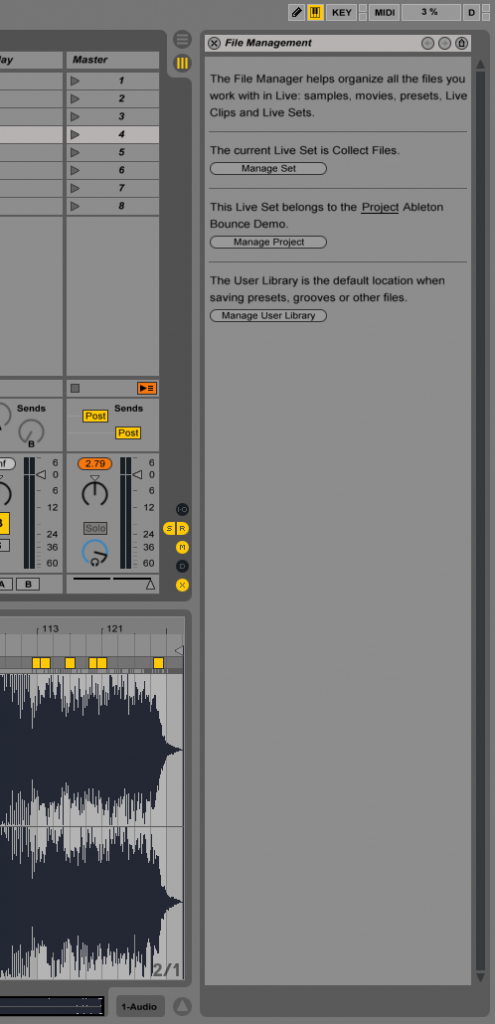
After doing this, the File Manager side-window will appear on the right side of the main screen as:

Just by looking at the default view of this window, we can gather certain useful information of the set as:
- Name of the set: In this case, it says the name for the set is “Collect Files”.
- Project where the set is contained: In this case, it says the project where the set is contained is called “Ableton Bounce Demo”
2. Click on “Manage Set” to see more file management options
The following window will appear:

Once again this window shows the user other important information and options regarding file management as:
- View and Replace files: Lets the user see the exact files used in the set, their names and locations.
- Missing Files: Lets the user know if there are files addressed to the set but not contained in the computer.
- External Files: Lets the user know if there are any files used in the session that are not contained in the project folder but another folder of the computer.
The “external files” option lets the user “collect” the files and copy them into the project folder so that are files are contained in the same place.
3. Click on: Collect into Project -> No.
As soon as the user clicks on the “No” option, the text will change to “Yes” and the background of it will be yellow, indicating that the user indeed wants to collect the files.

4. At the bottom of the “File Manager” side-window, click on: Collect and Save.
After doing this, Ableton will copy the files into the project folder. This operation might take some minutes depending on the amount of files to be collected.
When finished, Ableton will show the following notification:

5. Press “OK”.
The window will close and the changes will be made effective. At this point all the external files have been collected into the project folder.
We hope you found this tutorial on File Manager Window and Collecting Files in Ableton Live useful.
