The following tutorial shows the user how to bounce a Mix in Pro Tools.
CLICK HERE to learn Avid Pro Tools one on one with a digital audio professional at OBEDIA.
As explained on previous tutorials, the basic philosophy of Avid Pro Tools is to drive the user into a workflow of the old style tape-based recording studios in which the control room was designed involving a combination of a console, a multi-track tape machine and a stereo tape machine to “print” the final mixes coming out of the board’s main output.
Pro Tools emulates the procedure of “printing” a mix to the stereo tape machine, by adding a function known as “Bouncing”, or more specifically “Bounce to Disk”. In this case, the program lets the user create a stereo file of the final mix that gets stores in the drive. The information that gets “bounced” is the combination of all the signals coming out of the main stereo analog output of the interface, which is on most cases the default analog output pair 1-2. The stored file is what the engineer would call a “mix” of the song.
The following tutorial shows a step-by-step guide on how to bounce a Mix in Pro Tools.
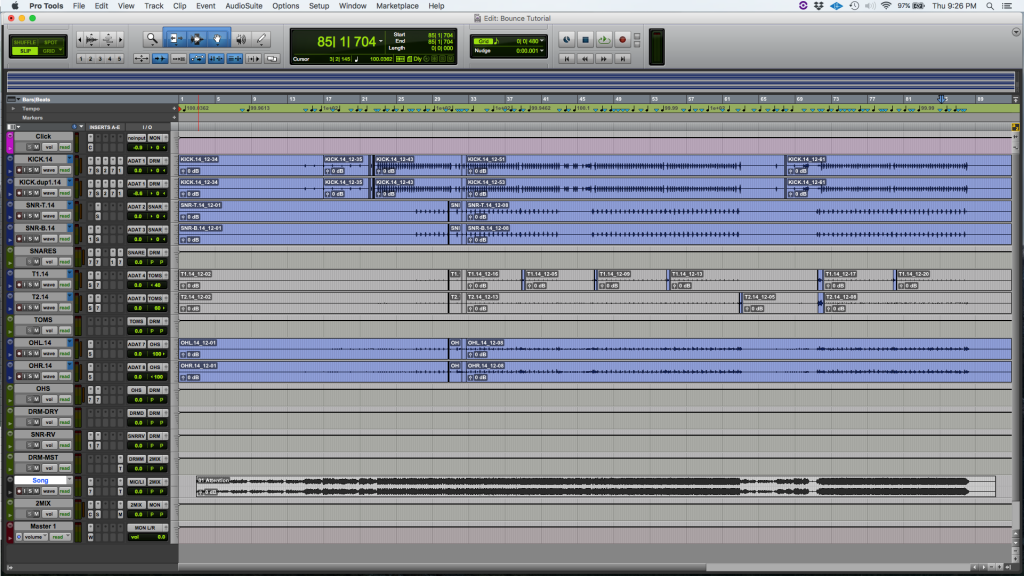
1. Open a Pro Tools session.

It is assumed that the Pro Tools session contains a mix that is ready for the user to “bounce” as a stereo file in the hard drive.
2. From the top menu bar click on: File -> Bounce to -> Disk
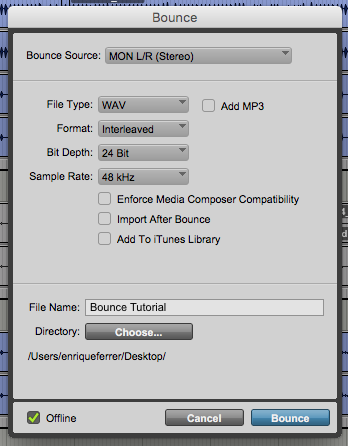
The following window will appear:

This is the “Bounce” window. It lets the user configure the bouncing procedure and its output. The window gives the user several parameters to control, these are:
- Bounce Source: This drop down list lets the user select which analog output will be the source that feeds the information stored in the file. By default in Pro Tools, the bounce source is the main analog output. In the case of our tutorial it is labeled as “MON L/R”. Since this is the output where the monitors are connected, everything the user can listen through the monitors is what will be “bounced” to the stereo file.
- File Type: This option lets the user select the type of file that will be stored, by default WAV is selected.
- Add MP3: This checkbox lets the program add an mp3 version of the bounced file, that can be carried around easier due its small size.
- Format: This option lets the user select between interleaved, multiple mono or mono summed. For the purpose of our tutorial we will select “Interleaved” so the file contains both channels as a stereo configuration.
- Bit Depth: This option lets the user select between 16, 24 or 32-bit float bit depths.
- Sample Rate: This option lets the user select between a list of different sample rates.
- File Name: This field lets the user set the name of the “Bounced File”.
- Directory: This directory lets the user select the location in the disk where the file will be stored after bouncing.
- Offline: When this option is un-checked, the bouncing procedure will be done “online” which means it will last as long as the song lasts, in real time, while it plays. Checking this box makes the bouncing happen faster than real time and the song will not play while it happens.
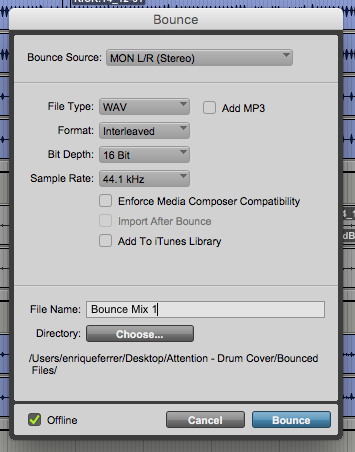
3. For the purpose of our tutorial the parameters will be set as:

4. Press “Bounce” and the procedure will start:

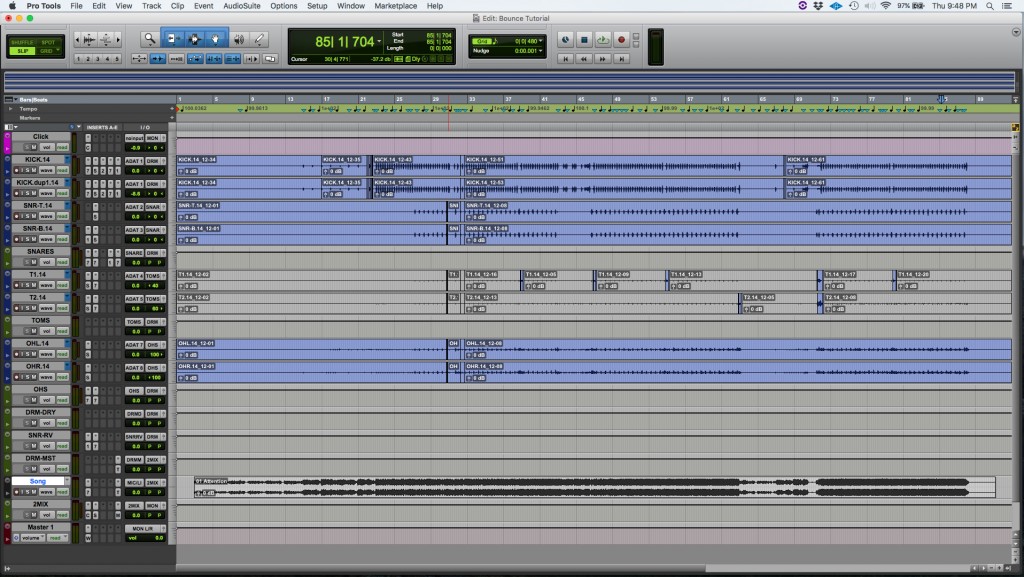
5. Once finished, Pro Tools will take the user back to the previous window as:

6. The final bounced file can be found in the folder the user specified as the directory:

And that’s it!
Did you find this tutorial on How to Bounce a Mix in Pro Tools useful? If so: CLICK HERE to learn Avid Pro Tools one on one with a digital audio professional at OBEDIA.
