The following tutorial shows the user how to create a Master Fader track in Pro Tools.
CLICK HERE to learn Avid Pro Tools one on one with a digital audio professional at OBEDIA.
Master Fader Tracks in Pro Tools are another useful asset that this software includes. Their main purpose is to monitor the level of analog outputs by using the different digital scales that Pro Tools can display. These tracks also function as the mix bus fader (also labeled as the “master fader”) of an analog console because it lets the user boost or cut the final stereo signal that feeds the speakers and also add processing such as compression or equalization as inserts to the final mix.
This tutorial will present a step-by-step guide on how to create and setup a Master Fader track for proper use in Pro Tools. The tutorial assumed the user already has audio tracks created in the session.
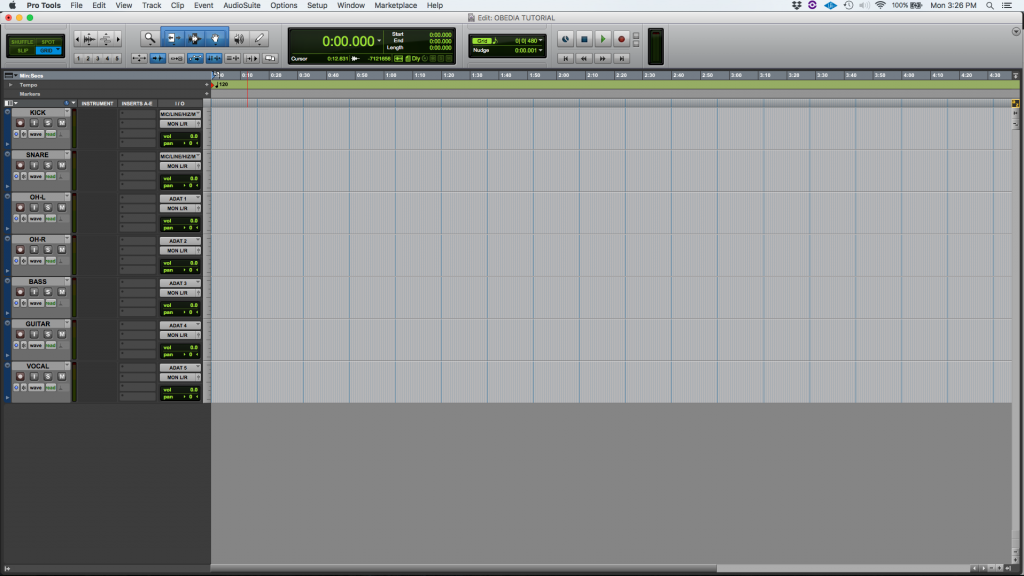
1. Open or create a new Pro Tools session and make sure you can see the Edit window:

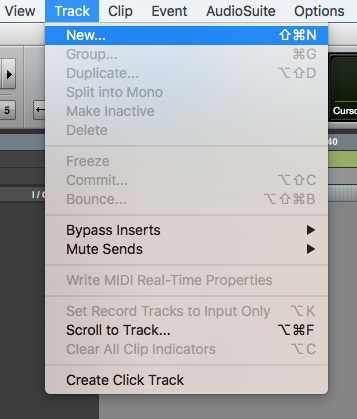
2. At the top menu bar click on: Track -> New.

3. The New Tracks window will appear as:

4. Set the New Tracks window to create a new Master Fader track:
In order to do this, we must evaluate all the possibly options this window presents, these are:
- Create: It lets the user type the number of tracks that wants to be created.
- Mono/Stereo: This drop-down list lets the user select if the created tracks will be mono (single audio channel) or stereo (two audio channels, left and right).
- Track type: This drop-down list, lets the user select the type of tracks that will be created, the available options are: Audio track, Aux Input, Master Fader, VCA Master, MIDI Track, Instrument Track.
- Samples/Ticks: This drop-down list, lets the user select between sample-based tracks (normally used for audio content) or tick-based tracks (normally used for MIDI information).
For the purpose of this tutorial we will create a single Master Fader track, sample-based. The parameters of the New Tracks window will be set as:
- Create: 1.
- Mono/Stereo: Stereo.
- Track type: Master Fader.
- Samples/Ticks: Samples.
Our New Tracks window should look like this:

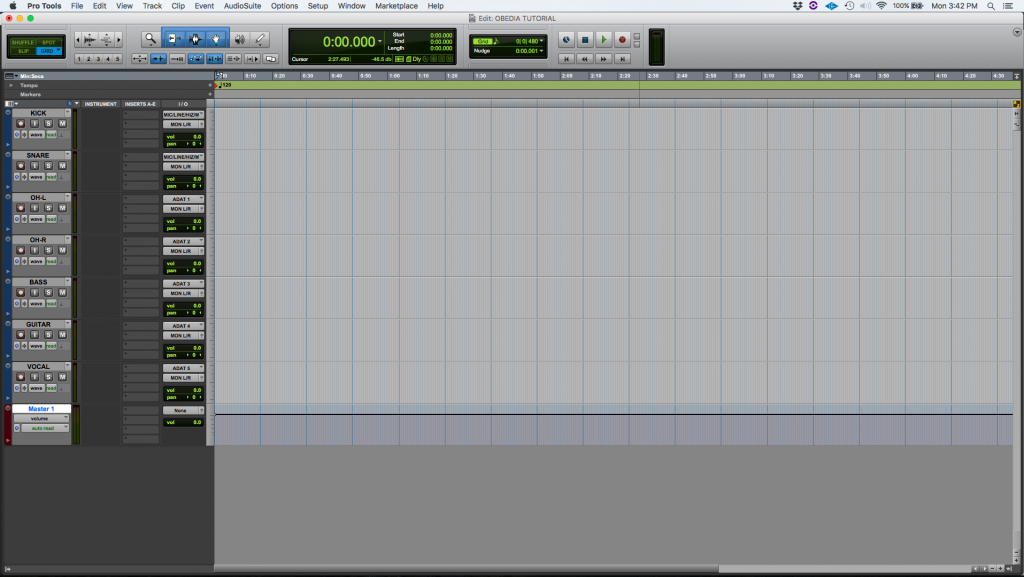
5. Press “Create” to create the Master Fader track. As soon as this button is pressed, the window will close and the program will take us back to the Edit window:

Note the new Master Fader track labeled by default as “Master 1”.
The next step of the tutorial is to route the output of the Master Fader track to the proper analog output.
6. Set the output of the Master Fader track to the main analog output, labeled as “MON L/R (Stereo)”.
This operation can be done by clicking on the output of the track labeled as “none” and navigating to the proper output as: none-> Output -> MON L/R (Stereo).

Once the output has been selected, the track will change as:

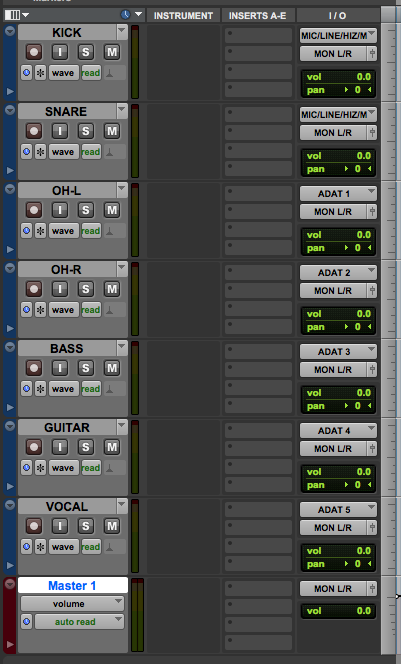
Our tracks inputs and outputs will now look as:

Note how all the audio tracks are routed to the analog output MON L/R, which is controlled by the Master Fader labeled as “Master 1”. The user can now boost or reduce the level of the overall stereo signal feeding the analog output pair by using the Master 1 fader. The user can also apply processing the the whole mix by adding plugins on the inserts list of Master 1.
At this point we have successfully created a stereo Master Fader track and configured its output for proper playback of audio material. The tutorial has now finished.
We you found this article on How to create a Master Fader Track in Pro Tools useful!
CLICK HERE to learn Avid Pro Tools one on one with a digital audio professional at OBEDIA.
