The following tutorial shows the user how to create and configure an instrument track in Studio One 4.
CLICK HERE to learn Presonus Studio One 4 one on one with a digital audio professional at OBEDIA.
Just as any other Digital Audio Workstation, Studio One has the ability to record and edit MIDI information that can be used to trigger virtual instruments.
Instrument tracks are presented in Studio One 4 as the track type where MIDI can be recorded and assigned to the desired virtual instrument that will output the respective audio information from the track. In other words, Instrument Tracks receive MIDI information and output digital audio.
This tutorial will present a step-by-step guide on how to create and setup an instrument track for proper use in Studio One 4.
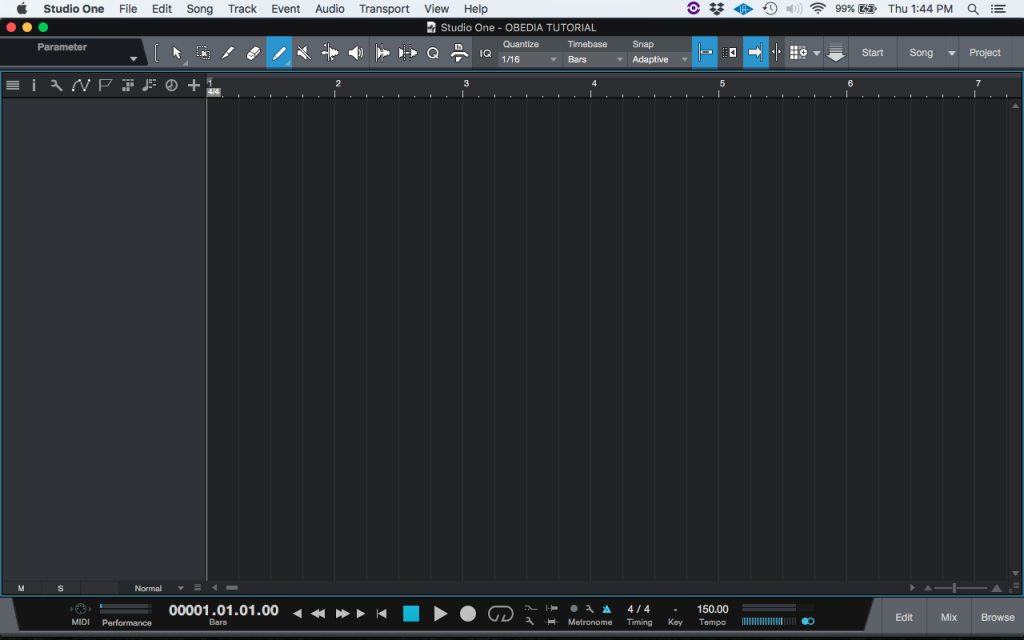
1. Open or create a new Studio One 4 song:
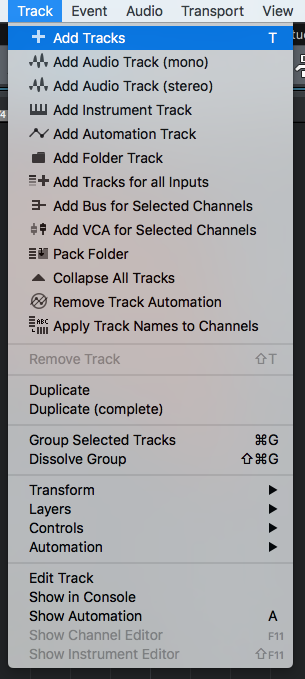
2. From the top menu bar, click on: Track -> Add Tracks
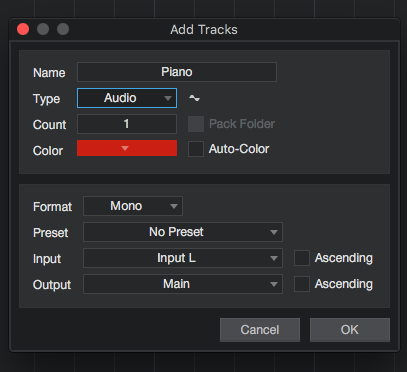
3. The “Add Tracks” window will open as:
4. Configure the “Add Tracks” window to create a new instrument track:
This window lets the user select the type of track created, the number of tracks created and configure all of its parameters. For the purpose of this tutorial we will create a single instrument track called “Synth” and it will be triggering the “Mai Tai” virtual instrument included in Studio One 4.
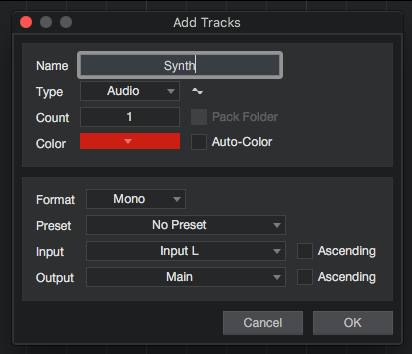
The first step on configuring the window would be changing the name to “Synth”, this can be done from the “Name” field of the window, by clicking and typing the desired name:
![]()
After typing “Synth” the window will look like this:
The second step is to change the track type to instrument. This can be done by clicking on the “Type” drop-down list:

After selecting “Instrument”, the window will now look like this:
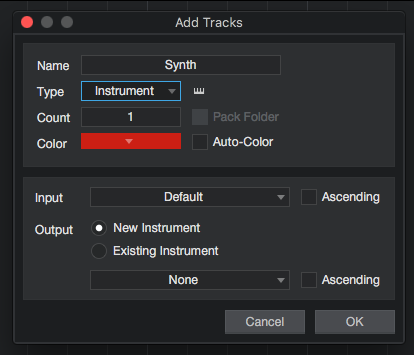
The third step is to select the input source to the instrument track. From the dropdown list, the user can pick several options:
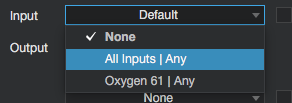
For the purpose of this tutorial we will select “All Inputs / Any”:
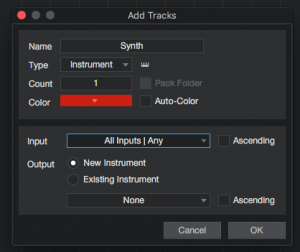
The last step is to select the “Output” of the track. Studio One 4 refers to the output as the virtual instrument that will receive the MIDI information and output the digital audio. By selecting “New Instrument”, the user can browse through a list of virtual instruments installed in the computer in order to select them as:
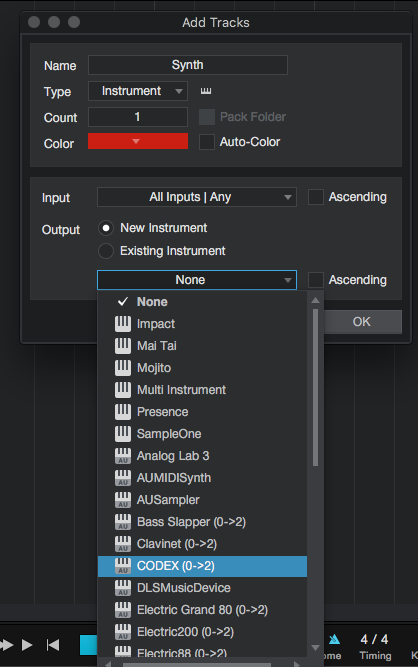
For the purpose of this tutorial, “Mai Tai” will be selected as:
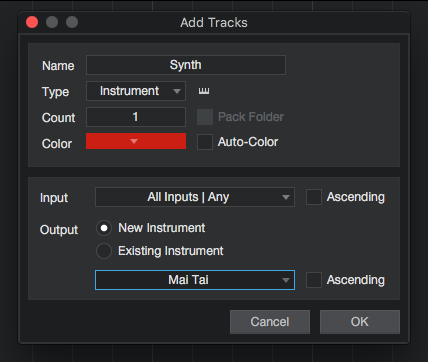
5. Press “OK” to create the track. The window will close and the track will now appear in Studio One 4 as:
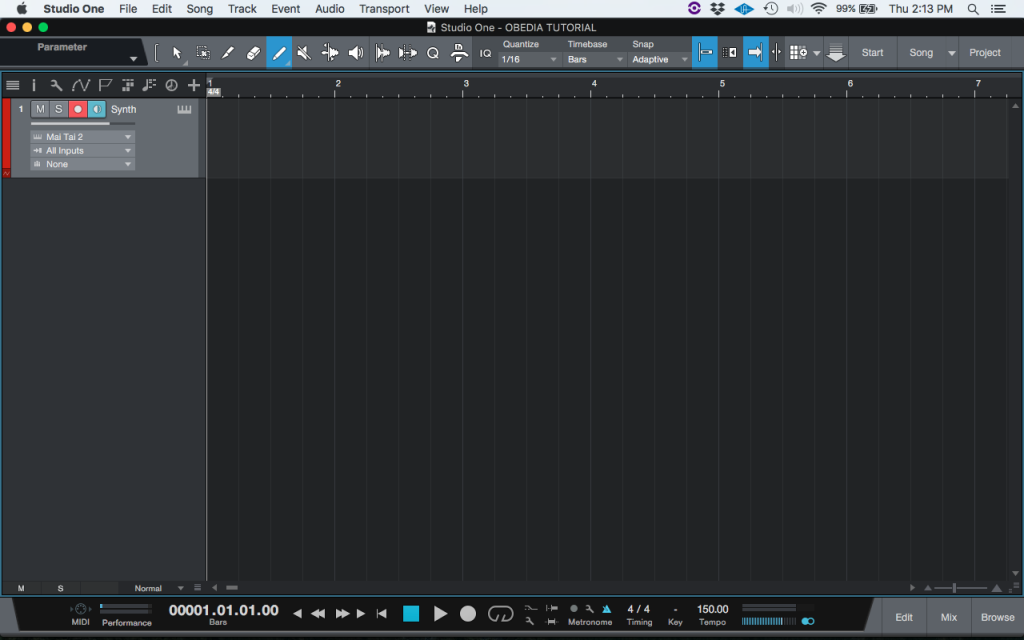
At this point the Instrument track has been created and configured. It is ready to be used. The tutorial has now finished.
We hope this tutorial on how to create and configure an Instrument Track in Studio One 4 has been helpful! Call OBEDIA today to learn how to use Studio One 4 from a digital audio professional.
CLICK HERE to learn Presonus Studio One 4 one on one with a digital audio professional at OBEDIA.
