The following tutorial shows the user how to make a track Inactive or Active in Pro Tools.
CLICK HERE to learn Avid Pro Tools one on one with a digital audio professional at OBEDIA.
Another operation that can be applied to a track is the process of making it inactive. When a track has been made inactive, it will not route any signal through it, therefore no processing will be applied and no audio will be output. Tracks that are inactive, appear as greyed-out and they do not consume CPU resources. Once a track has been made inactive, the user can revert its state by making it active.
This tutorial will present a step-by-step guide on how to make a track inactive or active in Pro Tools. The tutorial assumed the user already has audio tracks created in the session.
1. Open or create a new Pro Tools session:
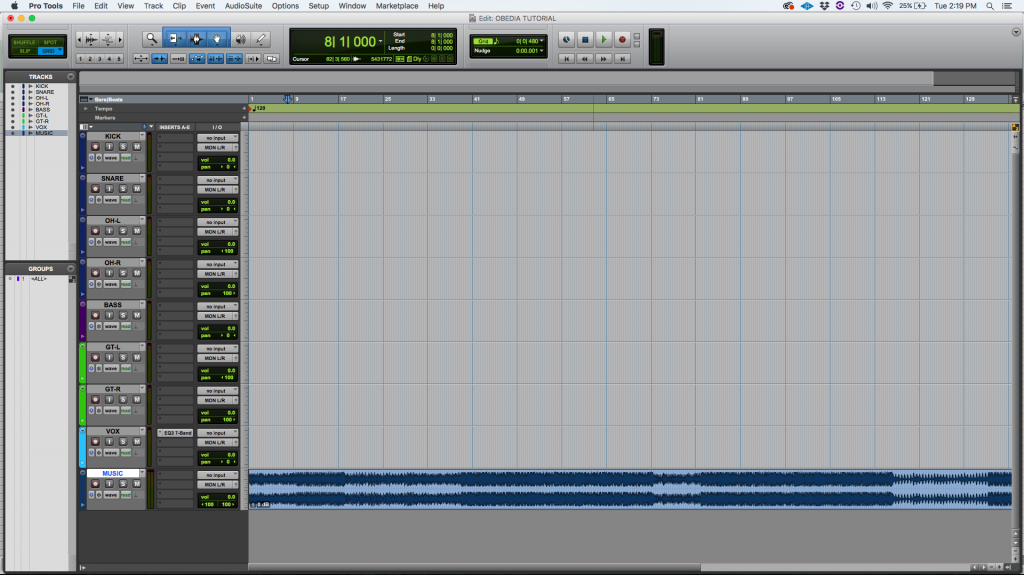
It is easy to see how the “MUSIC” track has been selected by the user because it appears highlighted in the Edit Window as:

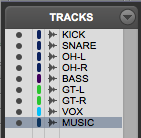
At the same time it appears highlighted in the Tracks List as:
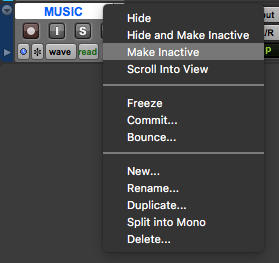
2. To make a Track inactive, right click on top of the track’s name from the Edit Window and clicking on “Make Inactive” as:
After clicking on “Make Inactive”, the track appears greyed-out on the Edit Window as:

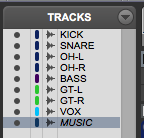
Note how the track name appears to be italic from the Tracks List, meaning it is inactive:
Since the track has been made inactive, it does not playback any audio information, therefore it does not consume any CPU resources.
3. In order to make a track active, right click on the track’s name from the track’s list, and then click “Make Active” as:
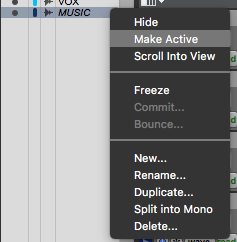
After we click on “Make Active”, the track appears again in the Edit Window as:

Note how the track does not show greyed-out anymore, meaning it is now active again. The track will process the audio information and output its signal to the selected analog output; it will also consume CPU resources.
At this point the user has learned how to make a track inactive or active in Pro Tools. The tutorial has now finished.
We hope you found this tutorial on How to make a track Inactive or Active in Pro Tools useful!
CLICK HERE to learn Avid Pro Tools one on one with a digital audio professional at OBEDIA.
