The following tutorial shows the user how to transpose a MIDI recording in Pro Tools.
CLICK HERE to learn Avid Pro Tools one on one with a digital audio professional at OBEDIA.
On previous tutorials we have explained how to record basic MIDI information into Pro Tools. After MIDI has been recorded, the user has several “Event Operations” that can be applied to the MIDI clip.
A very useful function of these operations is called “Transpose”. This function is capable of transposing the notes of a MIDI recording by a certain number of octaves, semitones or steps. This is specially useful when the musician has recorded a piano part for example, and the producer decides the key of the song is not appropriate for the singer; using this function the engineer is capable of changing the key of the recording very easily without having to record the passage again.
This tutorial will present a step-by-step guide on how to transpose MIDI in Pro Tools. The tutorial assumes the user has already create a Pro Tools session that contains at least one track with MIDI information recorded. These operations have been explained on previous tutorials by OBEDIA.
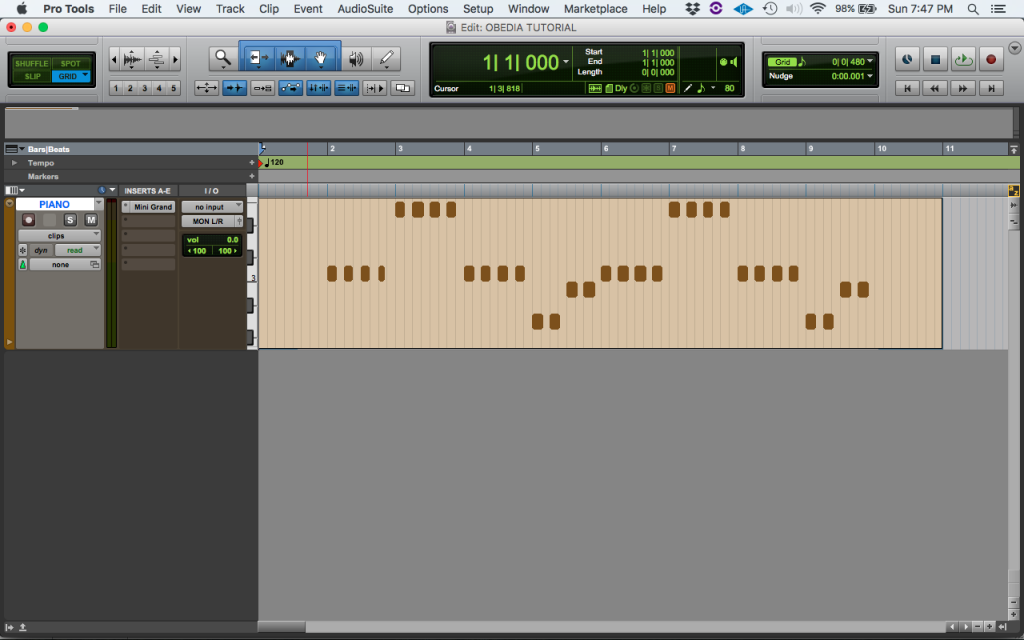
1. Open a new session. Make sure it contains an Instrument with MIDI information recorded to it:
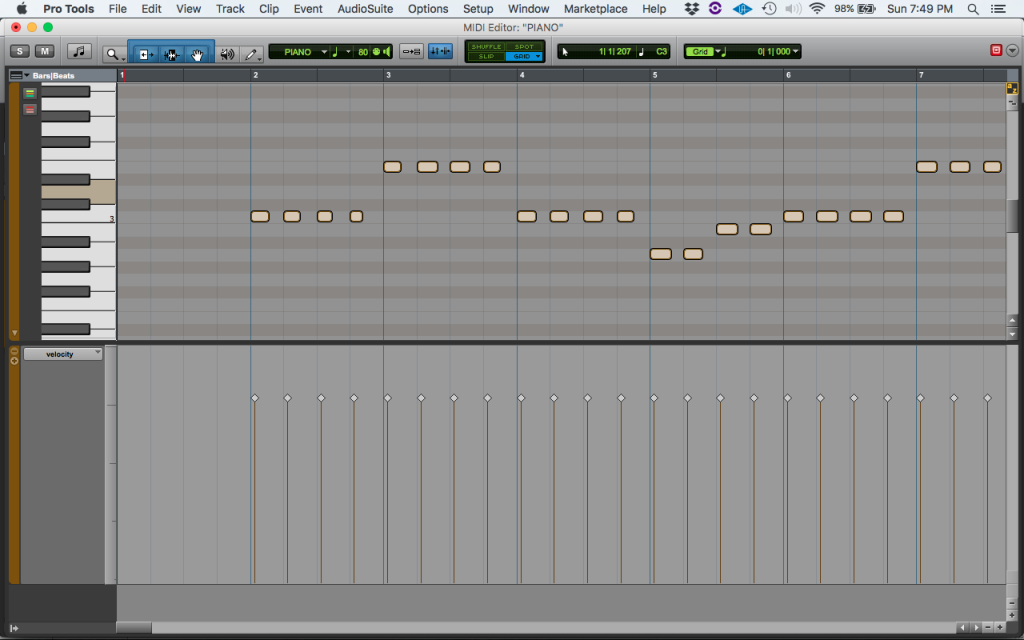
2. Double-click on the MIDI clip in order to select it. The MIDI editor will open and the clip will show as highlighted:
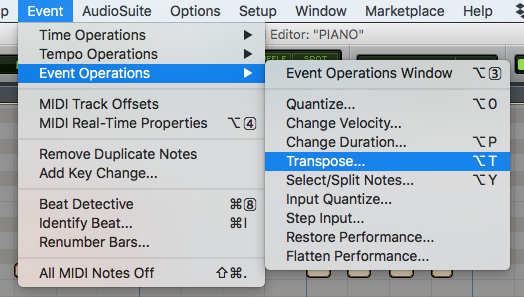
3. On the top menu bar click: Event -> Event Operations -> Transpose
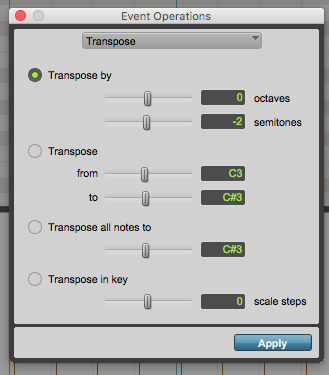
4. The Events Operation window will open on the “Transpose” function as:
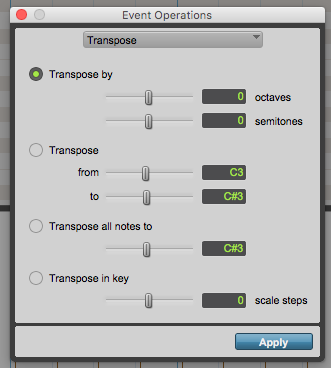
This window lets the user configure the different parameters of the Transpose function. Before we apply this procedure to the MIDI clip, it is important that we explain the most important parameters of this window. These parameters are:
- Transpose by: When this option is selected, the function will transpose the selected notes by a certain amount of octaves and semitones defined by the two sliders located underneath.
- Transpose: When this option is selected, the function will transpose the selected notes from a certain key to another one. Both of these keys are defined by the sliders underneath.
- Transpose all notes to: When this option is selected, the function will transpose the selected notes to a single note defined by the slider underneath.
- Transpose in key: When this option is selected, the function will transpose the selected notes in key by a certain amount of key steps.
For the purpose of this tutorial, we want to transpose all the notes down 2 semitones. The parameters that we must apply are:
- Transpose by: Checked. 0 octaves. -2 semitones,
- Transpose: Unchecked.
- Transpose all notes to: Unchecked.
- Transpose in key: Unchecked.
5. Set the parameters of the “Transpose” function to the ones defined above as:
6. Press “Apply” to apply changes. All the notes should now look transposed as:
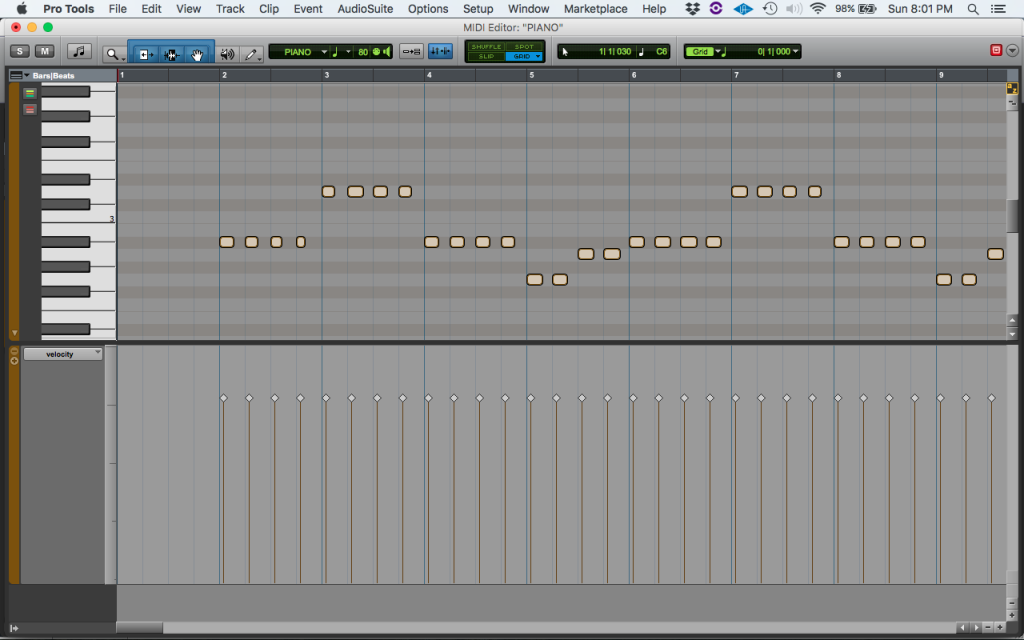
It is easy to see now how all the notes have been transposed two semitones down. If the user plays this passage, the piano will sound obviously lower in pitch.
At this point the user has properly learned how to Transpose a MIDI recording in Pro Tools.
We hope this tutorial on how to Transpose a MIDI recording in Pro Tools has been helpful! Call OBEDIA today to learn how to use Pro Tools from a digital audio professional.
CLICK HERE to learn Avid Pro Tools one on one with a digital audio professional at OBEDIA.