The following tutorial shows the user how to use the Presonus Flanger in Studio One 4.
On the modern days of audio mixing, the digital tools that engineers use in order to shape the recorded sound are called Plugins. Plugins can emulate the behavior of vintage analog pieces of gear, or simply act as clean/linear digital signal processors, performing tasks such as equalization, compression, limiting, expansion, gating, time-domain effects, etc. Studio One 4 comes with a variety of proprietary plugins that can help the user mix a music production completely “in-the-box”.
One of the most used processors that come with Studio One is the Flanger, which can be defined as an effect that can create spatial depth, timber changes and even percussive artifacts. It is typically used on guitar tracks in order to create cool tone shifts, or embellishing synthesizer sounds.
The flanger effect works by splitting an audio signal into two identical copies and applying a varying short delay to one signal, then feeding its output back to its input by varying amounts in order to mix the processed and unprocessed signals. The delay time of the Flanger can be modulated with an LFO, which can also by synchronized to the song’s tempo.
For the purpose of this tutorial, we will explain how to use the Presonus Flanger plugin in Studio One 4:
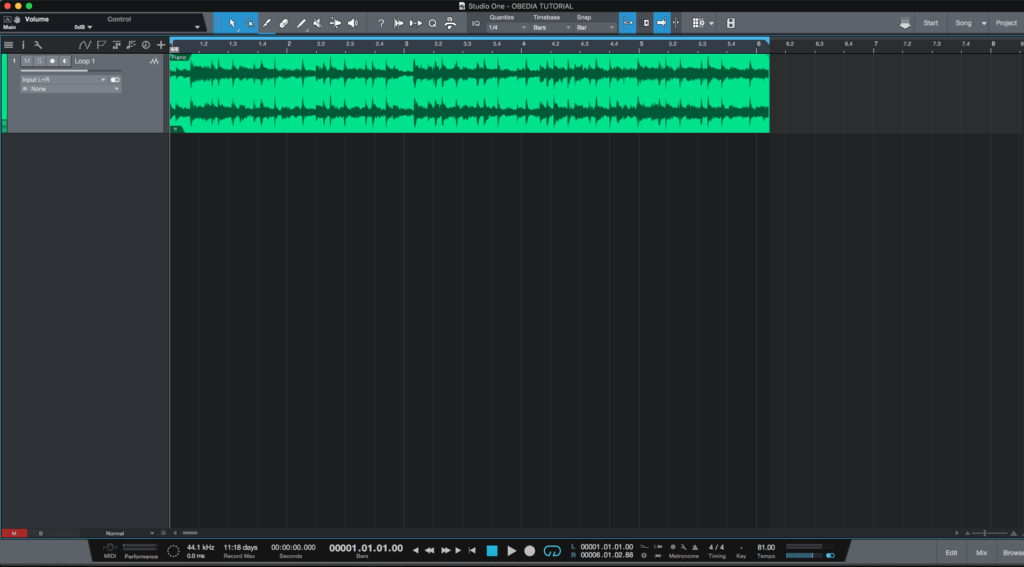
- Open or create a new Studio One 4 song:
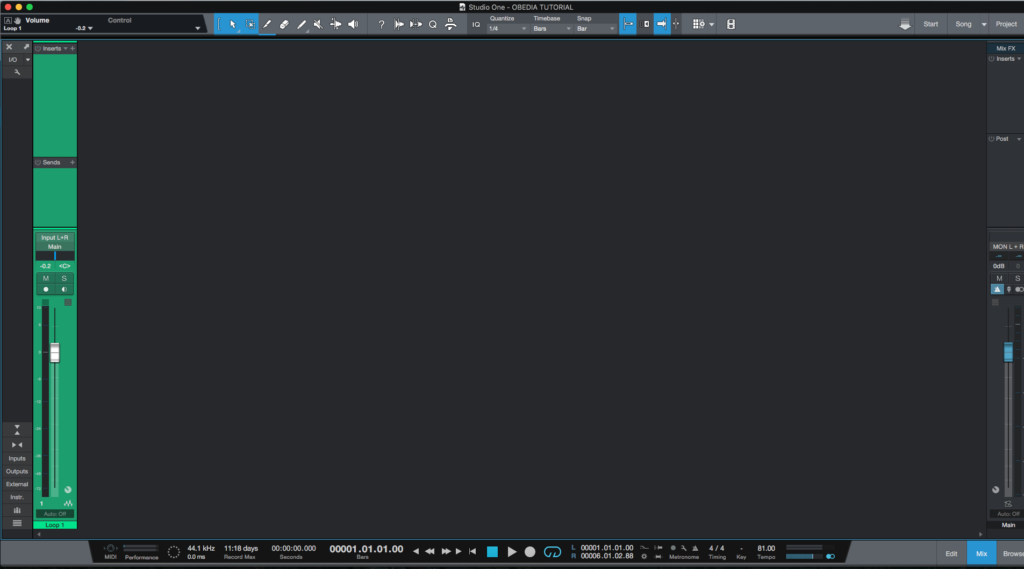
2. Open and maximize the MIX tab:
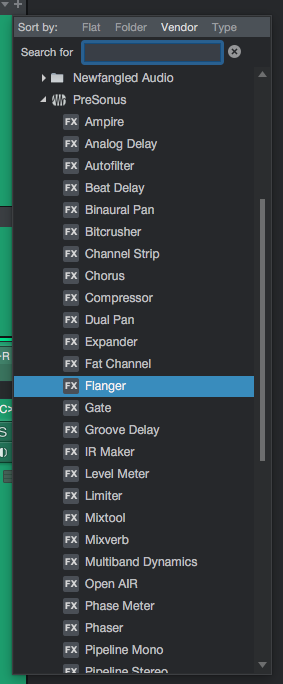
3. From the inserts list of the track, select “Flanger”:
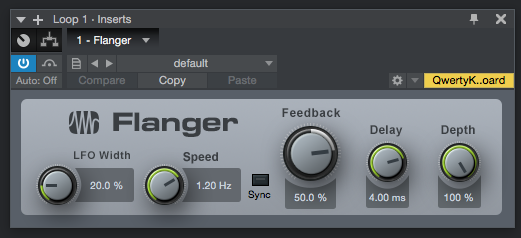
The Flanger plugin window will open as:
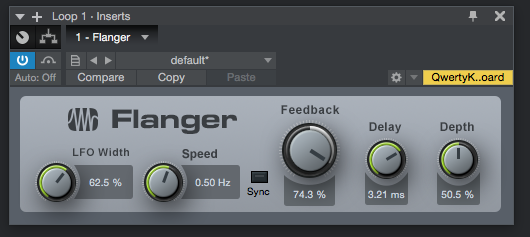
It is easy to see from the previous picture, the Flanger plugin has several parameters that can be explained as:
- LFO Width: These knob adjusts the range of the LFO modulation on delay time (speed). It can go from 0% to 100%., where 100% will modulate will modulate the speed parameter from 0 to twice the Speed.
- Speed/Beats: This knob can be used to adjust the speed of the LFO. When the Sync button is OFF, the speed will be rated in Hertz. When the Sync button is ON, the speed will be expressed in Beats.
- Sync: This button switches between the Speed control expressed in Hertz or Beats.
- Feedback: This knob adjusts the amount of delayed output to be fed back into the input. Negative values result in inverted feedback.
- Delay: This knob can adjust the delay time for the copied signal.
- Depth: This knob controls the mix of the processed Flanger output with the original signal.
For the purpose of this tutorial, we will use the Flanger to yield an obvious involving flanging effect. The Flanger will be set as:
- LFO Width: 62.5%.
- Speed/Beats: 0.50 Hz.
- Sync: OFF.
- Feedback: 74.3%.
- Delay: 3.21 ms.
- Depth: 50.5%.
4. Apply the previous configuration, and the Flanger plugin should look like this:
At this point we have successfully explained how to use and configure the Flanger plugin in Studio One 4. The tutorial has now finished.
Using Presonus Studio One 4 software to produce music would be ideal with one of our professionally designed PCAudioLabs Systems due our high-performance specifications in order to work with any of the Digital Audio Workstations supported. If you would like to order one of our PCAudioLabs computers, please call us at 615-933-6775 or click this link for our website.

