This tutorial shows the user How to use the Ableton Live LIMITER audio effect.
CLICK HERE to learn Ableton Live one on one with a digital audio professional at OBEDIA.
Ableton’s LIMITER is one of the stock audio effects included in Live based on a mastering-quality dynamic range processor that makes sure its output never exceeds a specified level. In other words, Live’s LIMITER acts as a compressor with an infinite ratio, never letting input signals cross a specified level. Limiter can be used on the master track or on individual tracks to prevent clipping.
This tutorial will present a step-by-step guide on how to configure and use the LIMITER audio effect in Live.
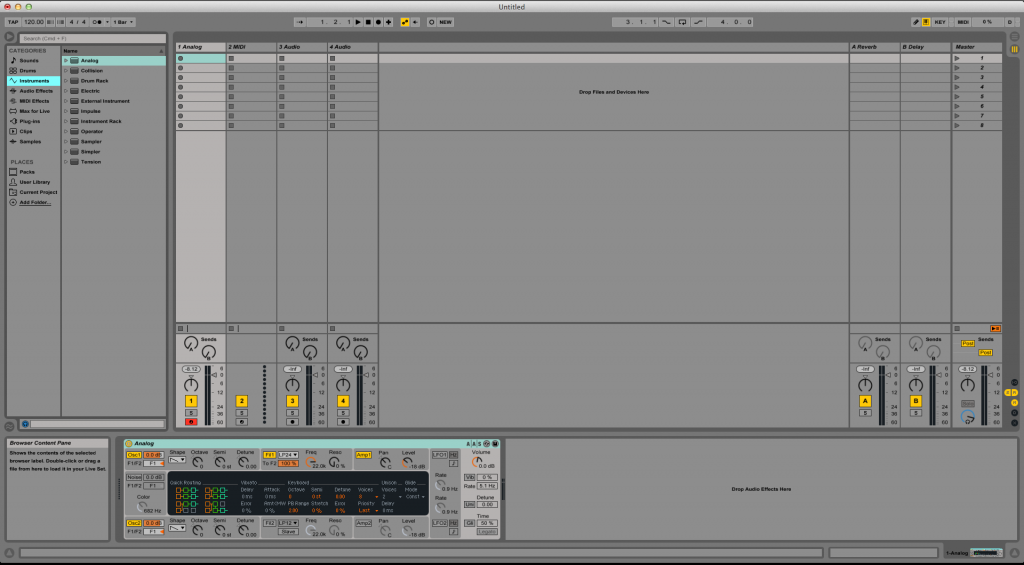
- Create a Live Set with at least one track. In this case we have a MIDI track with a mono virtual instrument assigned to it:

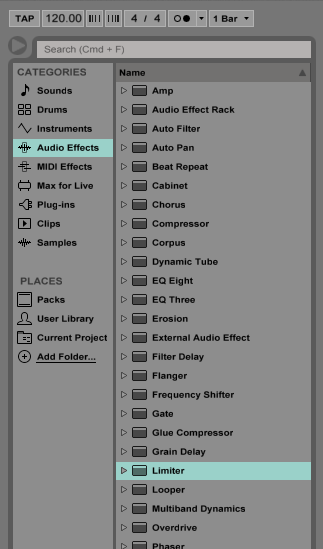
2. From the Browser, search for Audio Effects -> Limiter.

3. Drag and Drop the Limiter audio effect on top of the audio track labeled as “1 Analog”.
As soon as this effect has been dropped on top of the track, it is easy to see how the Limiter audio effect now appears right after the Analog virtual instrument.

4. Configure the Limiter audio effect for proper usage
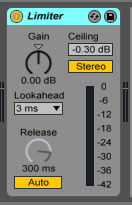
Now that we have added the effect to our audio track, we can explain each of the parameters included. The following picture shows the graphic interface of this audio effect.

Limiter has 6 different parameters we can control, these are:
- Gain: This knob controls the level of the incoming signal before applying the limiting.
- Lookahead Time: This drop-down window lets the user select the time it takes for the limiter to respond to peaks. The shorter the time is, the greater the compression will be since all the peaks will be “caught” by the limiter, yielding more distortion.
- Auto Release: When this switch is enabled, the limiter will automatically adjust its release time based on behavior of the input signal. If this switch is disabled, the Release time knob can be used manually.
- Release: This knob sets the amount of time it takes for the effect to stop limiting after the signal has crossed below the ceiling. This knob is disabled when Auto Release is enabled.
- Ceiling: This control will set the maximum output level of the limiter. If the incoming signal is below this level, the signal will not be limited. Conversely, input signals above this level will be limited.
- Stereo-L/R: This switch toggles between stereo limiting or L/R limiting. When set to Stereo, limiting will be applied to both channels whenever either of the channels requires compression. On the other hand, when set to L/R, left and right channels are limited independently, resulting in potential greater compression or stereo image distortion.
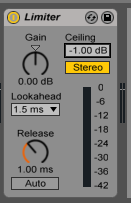
For the purpose of this tutorial, we will be configuring the Limiter effect to control the incoming signal at its fastest lookahead time of 1.5ms and manual release time of 1ms. The ceiling will be set to -1 dB and the mode will be set to Stereo. The parameters will be set as the following:
- Gain: 0dB.
- Lookahead Time: 1.5ms.
- Auto Release: OFF.
- Release: 1ms.
- Ceiling: -1dB.
- Stere-L/R: Stereo.
Our final configuration will look like this:

We have now finished configuring our audio effect and it is ready to be used.
We hope you found this tutorial on How to use the Ableton Live LIMITER audio effect useful!
CLICK HERE to learn Ableton Live one on one with a digital audio professional at OBEDIA.
