This tutorial shows the user How to use the Ableton Live UTILITY audio effect.
CLICK HERE to learn Ableton Live one on one with a digital audio professional at OBEDIA.
Ableton’s UTILITY is one of the stock audio effects included in Live that is capable of developing several functions of a regular channel strip of a console, such as controlling the gain, panning, muting and polarity flip. Utility does not create obvious audible “effects” but it is very useful when it is used in combination with other devices.
This tutorial will present a step-by-step guide on how to configure and use the UTILITY audio effect in Live.
1. Create a Live Set with at least one audio track. Make sure the audio track has at least one audio clip assigned to it.
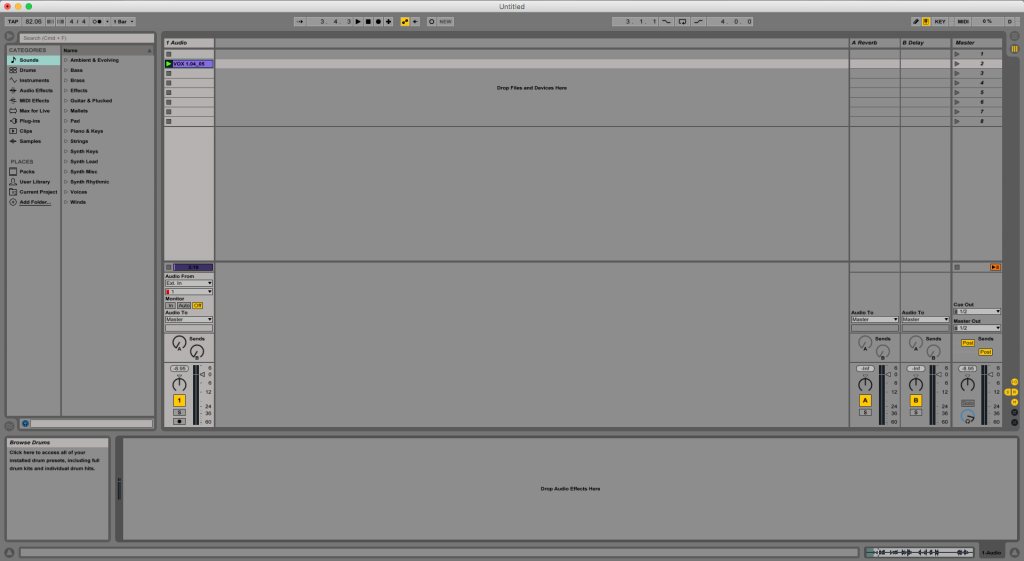
2. From the Browser, search for Audio Effects -> Utility.
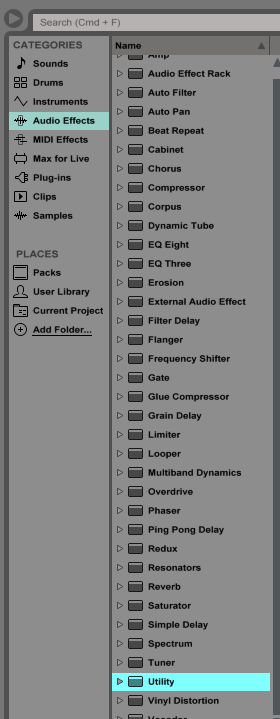
3. Drag and Drop the Utility audio effect on top of the audio track labeled as “1 Audio”.
As soon as this effect has been dropped on top of the track, it is easy to see how the Utility audio effect now appears on the device view of the track.
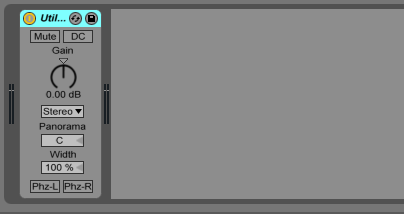
4. Configure the Utility audio effect for proper usage
Now that we have added the effect to our audio track, we can explain each of the parameters included. The following picture shows the graphic interface of this audio effect.
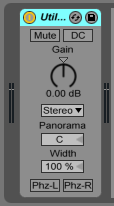
Utility has several different parameters we can control, these are:
- Mute: When this switch is ON, no signal will pass thorough the Utility device and the other parameters of it will be greyed out.
- DC: This switch filters out DC offsets and extremely low frequencies that are far below the audible range. It will only have a sonic effect if a signal contains these frequencies and is processed after Utility with nonlinear effects such as compressors or wave-shapers.
- Gain: This knob adjusts the level of the input signal. The provided gain can go from -35 dB to 35 dB.
- Channel Mode: This chooser allows selective processing of the left and right channels of the signal. If, for example, Left is selected, the right channel is ignored and the left channel appears on both outputs. This is especially useful if the user has a stereo file that contains different information on both channels but only one wants to be used. When set to “Stereo”, both channels will pass through Utility. When set to “Swap”, the left and right channels will be passed swapped to the output.
- Panorama: This knob is what audio engineers commonly know as a “pan pot”. It lets the engineer place the signal anywhere in the stereo field.
- Width: This slider acts as a continuous mono to stereo controller when it is set from 0% to 100%, where 0% represents total mono and 100% represents perfect stereo. When this control is set above 100%, the output of the device starts to “fold in” on itself, emphasizing the stereo or “out of phase” components of the signal. If this is set to 200% (maximum possible value), it will only contain the difference between the left and right channels at 180 degrees out-of-phase signal at the output.
- Phz-L/Phz-R: These two buttons let the user flip the polarity of the left and right channels of the signal.
For the purpose of this tutorial, we will be configuring Utility to swap the left and right channels of a signal, filter the DC offsets and boosting the gain by 3 dB . The parameters will be set as the following:
- Mute: OFF.
- DC: ON.
- Gain: +3 dB.
- Channel Mode: Swap.
- Panorama: C.
- Width: 100%.
- Phz-L/Phz-R: OFF/OFF.
Our final configuration will look like this:
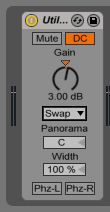
We have now finished configuring our audio effect and it is ready to be used.
We hope you found this tutorial on How to use the Ableton Live UTILITY audio effect useful!
CLICK HERE to learn Ableton Live one on one with a digital audio professional at OBEDIA.
