The following tutorial shows the user how to create track groups in Pro Tools.
CLICK HERE to learn Avid Pro Tools one on one with a digital audio professional at OBEDIA.
When working with several tracks that are related to each other (as for example the individual tracks of a drum kit, or the stereo tracks of a piano), Pro Tools offers an important function that gives the user a relative grouping function for linking tracks and their controls. Tracks that have been “grouped” can be edited the same way or mixed keeping the same relative level between the tracks. Some of the functions that can be linked in a track group are: track height, track view, track timebase, audio and MIDI editing functions, automation editing functions, main mute, solo, send level, send mute, main volume, main pan, record enable, input monitoring, automation mode, plugin controls, plugin bypass, send pan.
The following tutorial shows a step-by-step guide on how to create track groups in Pro Tools.
1. Open a Pro Tools session
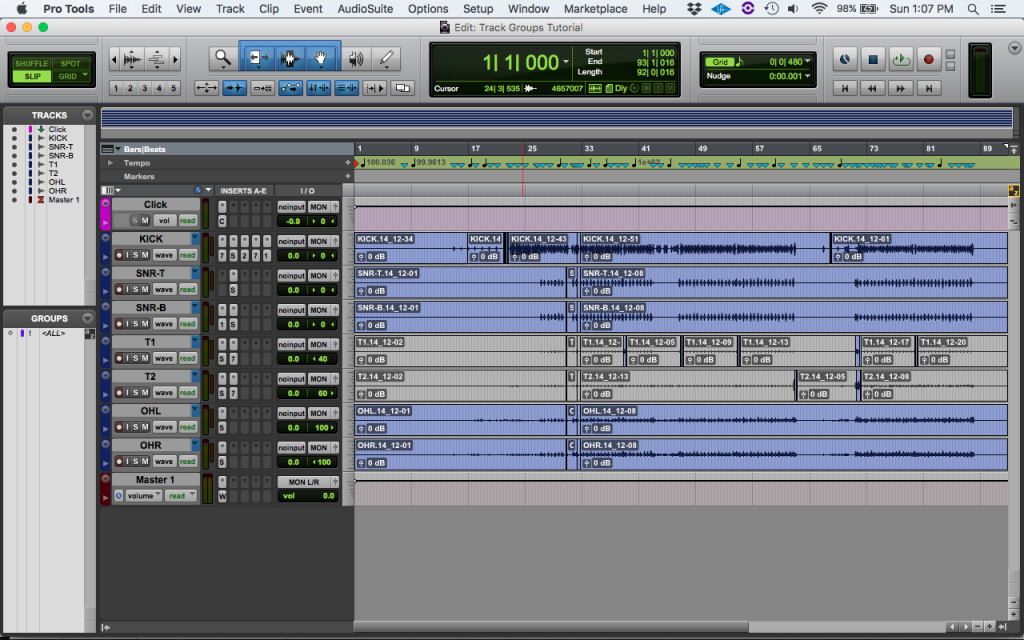
From this session we can see that all the audio tracks are related to a drum set, therefore it makes sense to group them as a “Drums” group so they can be edited or treated the same way.
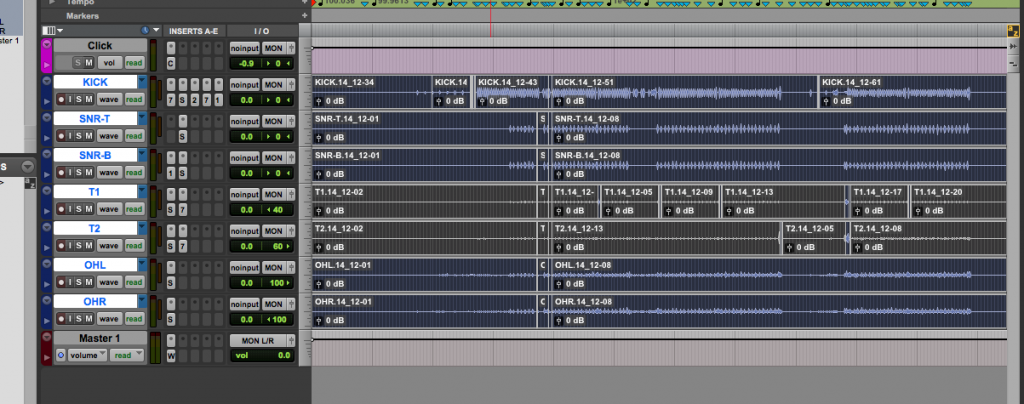
2. Before creating a group, all the tracks must be selected. Select the tracks by clicking on the first track of the group, holding shift, and clicking on the last track. Tracks will be highlighted to let the user know they have been selected:
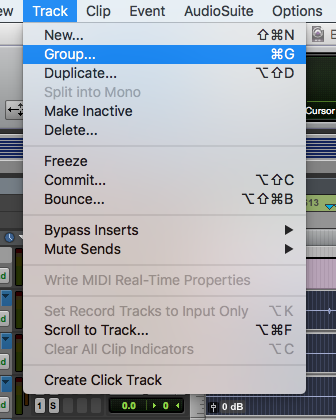
Now that the desired tracks have been selected, the group can be created.
3. Create the group by clicking on the top menu bar: Track -> Group:
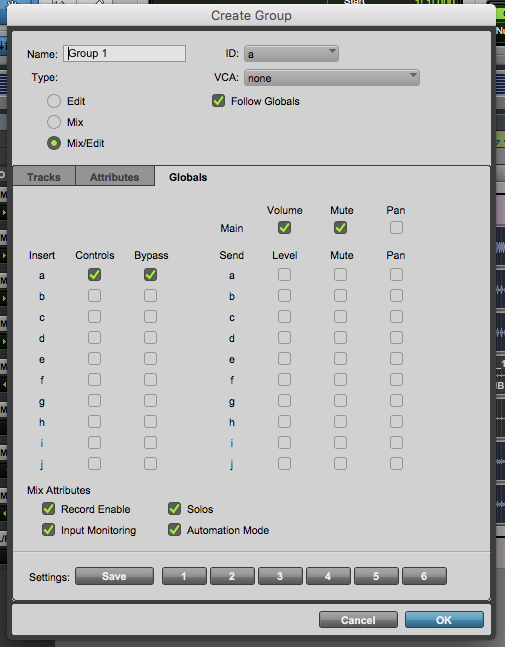
4. The “Create Group” window will show as:
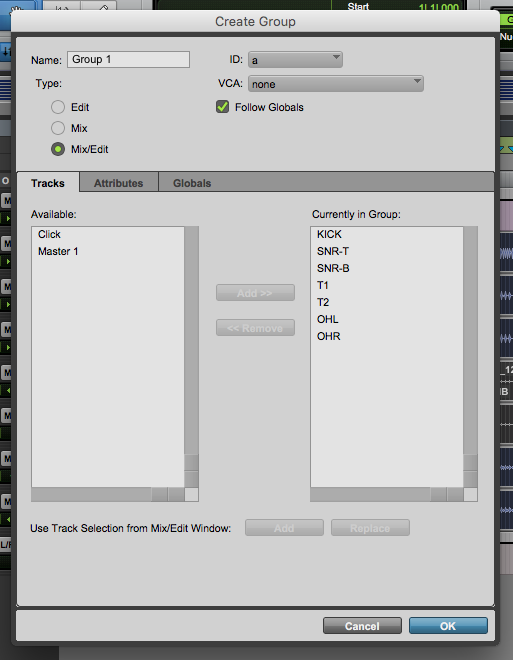
From this window we can easily note certain parameters from the “Tracks” tab:
- Name: By default, it provides a name created by the software. The user can change this to “Drums”.
- Type: The program gives the user 3 different group type options. For the purpose of this tutorial we will use the “Mix/Edit” type so that the groups will link the editing and mixing parameters of the tracks included.
- ID: This is a basic identification and it can be left default.
- VCA: The software gives the user a possibility to associate the group to a VCA fader. In the case of this tutorial, no VCA fader is being used so it can be left default as “none”.
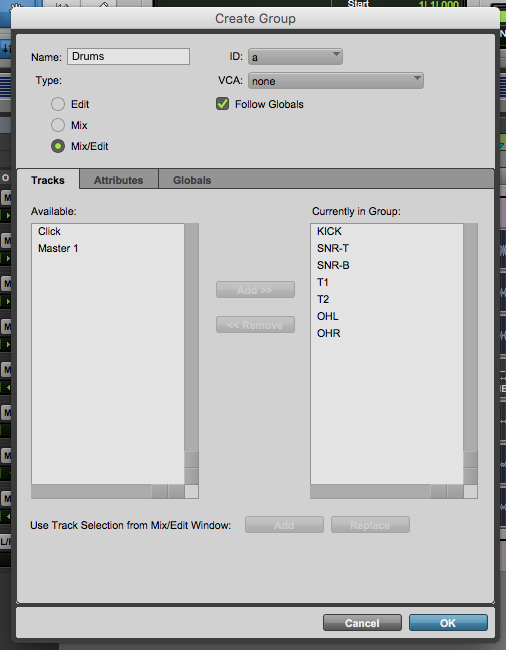
- Tracks currently in group: This list shows the tracks that will be added to the group, it can be seen that all the tracks that were previously highlighted, are now part of the group.
- Tracks available: This list shows all the tracks that were not added to the group because the were not highlighted upon the creation of it.
- Follow Globals: When this option is checked, the “global attributes” will be assigned to control the group. The global attributes can be modified by switching to the “Globals” tab of this window.
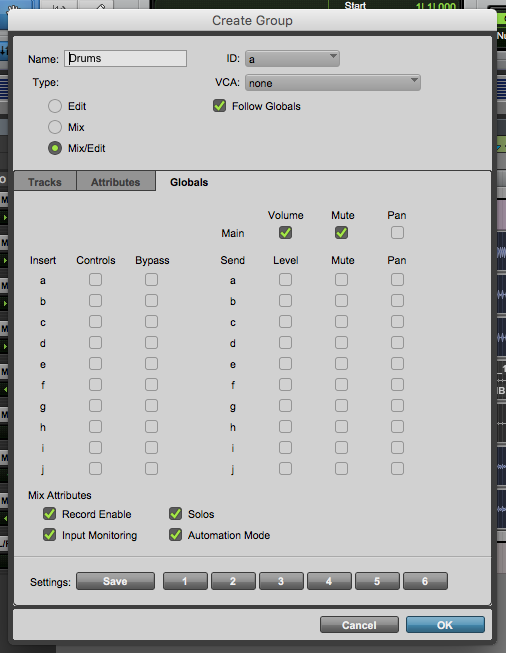
Switching to the “Globals” tab, the global attributes can be modified:
From this tab, it is easy to see how all the options that can be “checked”, will be linked for all the tracks in the groups, these options include: volume, mute, pan, inserts controls and bypass, sends level/mute/pan, record enable, input monitoring, solos, automation modes.
For the purpose of this tutorial, we will link the following options only:
- Main Volume
- Main Mute
- Record Enable
- Input Monitoring
- Solos
- Automation Modes
5. Apply the changes to the “Create Group” window:
The tracks tab will look as:
The “Globals” tab will look as:
6. Click “OK” to save changes and create the group. The software will take us back to the original window:
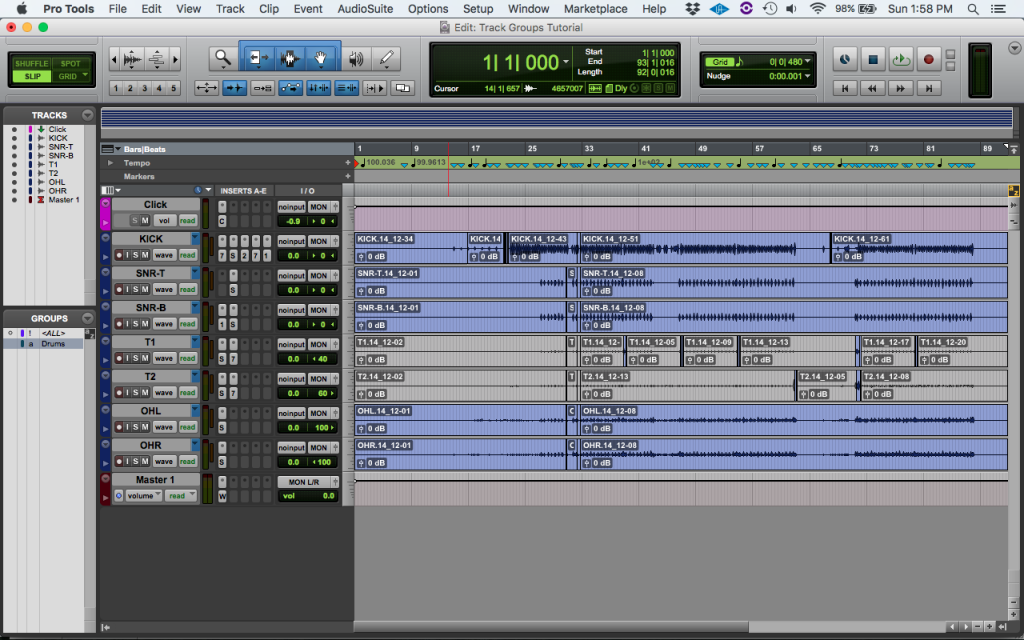
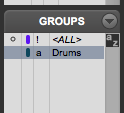
It is easy to see the new group located at the “Groups” list as:
Now that the group has been created, all of these tracks will share all the mix and edit parameters explained before. The user is encouraged to solo (or mute) one of the tracks for example, to make sure they all solo (or mute), in order to test the linked parameters.
At this point the user has learned how to create track groups in Pro Tools. The tutorial has now finished.
CLICK HERE to learn Avid Pro Tools one on one with a digital audio professional at OBEDIA.