The following tutorial shows the user the different solo latch options included in Pro Tools.
CLICK HERE to learn Avid Pro Tools one on one with a digital audio professional at OBEDIA.
The solo function is a basic feature that is included in any Digital Audio Workstation that has been taken from the original function presented in analog consoles. Solo buttons are presented on each channel strip and when they are engaged, they exclusively route the output of that track to the mix bus. When no solo buttons are engaged, all the channels strips from the console (or from the DAW) will route their signals to the mix bus.
- Latch: When this option is engaged, pressing subsequent Solo buttons will add them to the soloed mix of tracks.
- X–OR (Cancels Previous Solos): When this option is engaged, pressing subsequent Solo buttons will cancel previous solos.
The following tutorial shows a step-by-step guide on how to use and change the solo latch options in Pro Tools.
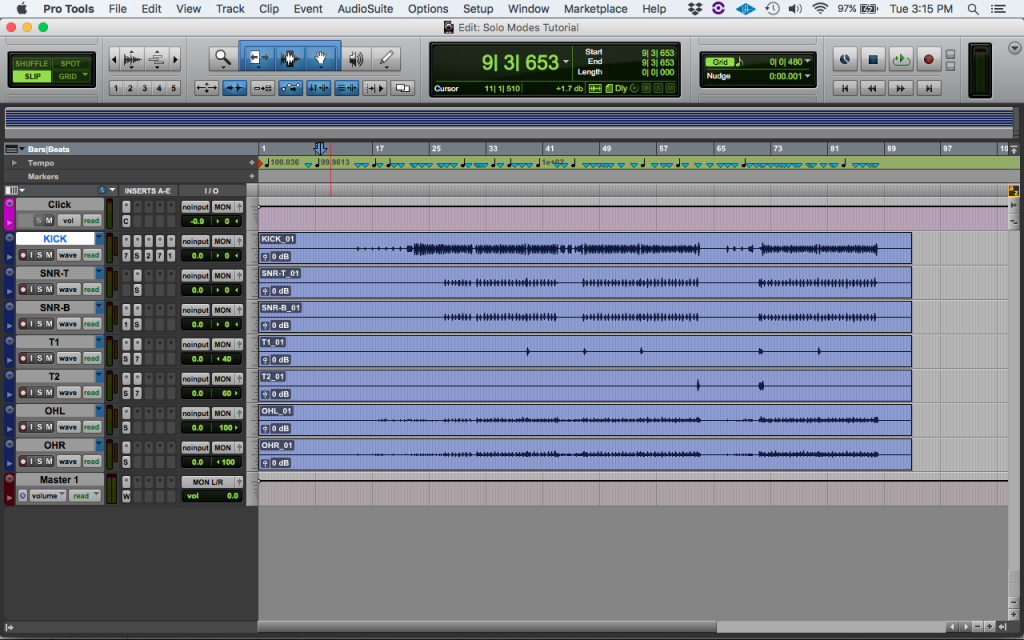
1. Open a Pro Tools session that contains several tracks:
The default solo latch option in Pro Tools is called “Latch”. This mode lets the user solo more than one track. In other words, if all tracks are in solo, the whole mix will be playing, therefore they will sound just as if no tracks had been solo. This is obviously an extreme case, since engineers only use solo modes for maybe a couple tracks when certain parts must be checked individually in order to look for possible clicks, pops or extraneous noises on the tracks.
2. Solo the “KICK” and “SNR-T” track by clicking on the “S” located on their channels strips:
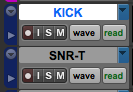
After solo-ing the tracks, the “S” should appear yellow as:

Note how the remaining tracks “M” appears orange, indicating since the “KICK” and “SNR-T” tracks are solo, the remaining are muted.
The other solo latch option included in Pro Tools is called “X-OR”. The main difference between this and the previous mode, is that X-OR will cancel the previous solo applied, therefore only one track can be solo. This function is very used in the mastering stage of a music production when an engineer must switch between different mixes to listen to them individually.
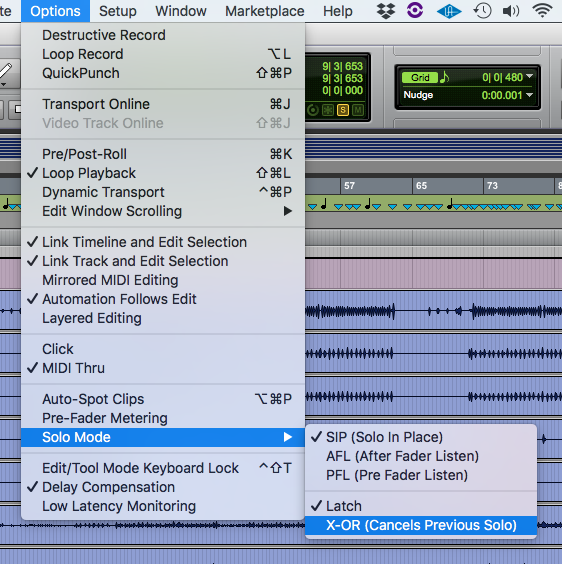
3. Change the solo latch option from “Latch” to “X-OR” by clicking on the top menu bar: Options -> Solo Mode -> X-OR.
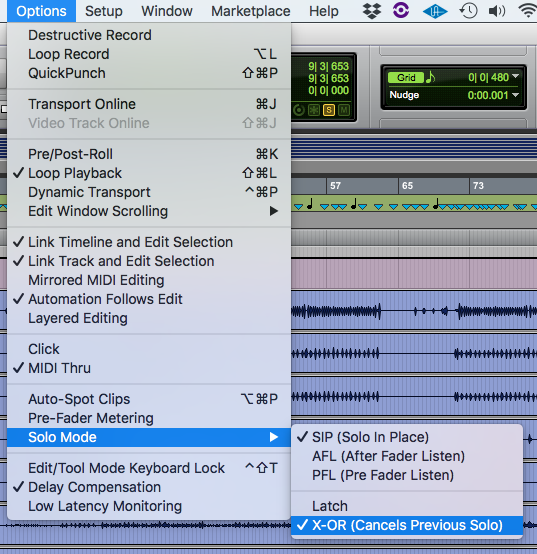
After selecting this option, it should appear checked as:
4. Solo the “KICK” track in X-OR mode by clicking on the “S” located at the channel strip:
![]()
If the user tries to playback the session, the “KICK” track will be the only playing back its signal. If the user now tries to solo another track, it will not be added to the “KICK” track, but it will replace the “KICK” track.
It is important to note that in general, “Latch” option is the one that will be used on most of the situations since it lets the user have more than one track selected. However, an engineer that is dedicated to audio mastering will find that the “X-OR” is more suitable for that purpose.
At this point the user has learned how to use the different solo latch options in Pro Tools. The tutorial has now finished.
CLICK HERE to learn Avid Pro Tools one on one with a digital audio professional at OBEDIA.