This tutorial shows the user how to Rescan Ableton Live Plugins so that the software can recognize these plugins and be able to use them.
Ableton Live is capable of running VST and AU plugin formats for plugin operation. However, by default these configurations must be enabled, the proper folders must be selected and the plugins must be scanned. This tutorial shows step by step of how achieve the Rescan Ableton Live Plugins task.
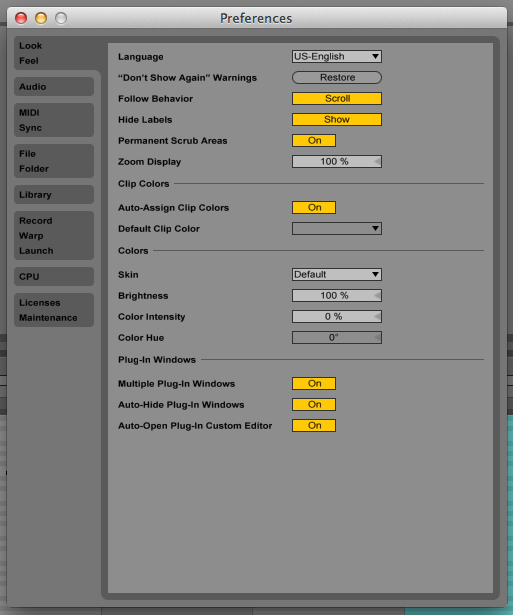
- On the horizontal menu bar of Ableton click on: Live -> Preferences
The Preferences window will open:

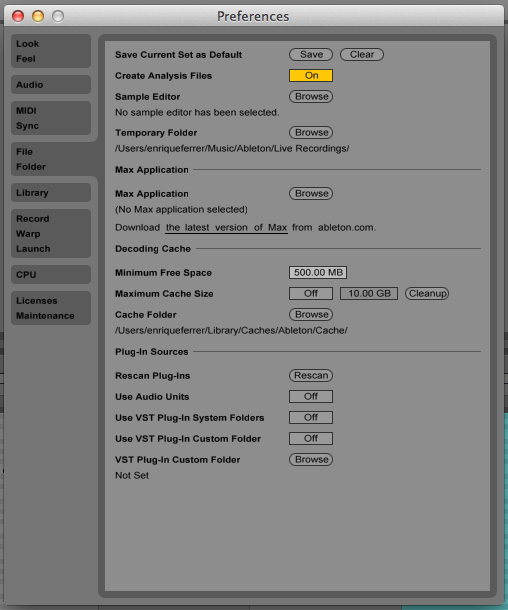
2. On the preferences window, click on the left option “File Folder”.
The “File Folder” screen will show:

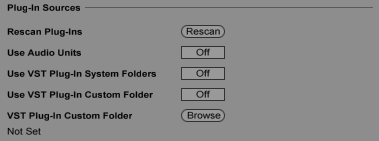
This is the window where all of our configuration will be done, specifically at the bottom of the window, the section called “Plug-In Sources”:

3. Activate AU and VST formats in Ableton
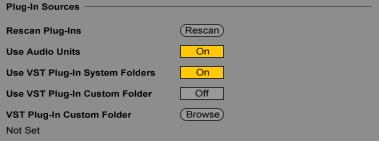
For the purpose of this tutorial, we will enable both VST and AU formats by turning ON the following options:
- Use Audio Units
- Use VST Plug-In system folders
These options can be turned ON by clicking on the small rectangles next to them labeled as “Off”. As soon as they are clicked, they will turn ON and change their color to yellow.
When turning on “Use VST Plug-In system folders”, Ableton might take a minute to load this operation since I will look for all the plugins installed in the default VST folder. Depending on the amount of plugins installed this could take longer.

4. (OPTIONAL) If your VST plugins are installed in a custom folder created by the user, that folder must be enabled too:
This folder can be turned ON by clicking on the small rectangle next to it labeled as “Off”. As soon as it is clicked, it will turn ON and change its color to yellow.
The user must also allocate that folder by clicking on the “Browse” option underneath to locate the directory. For the purpose of this tutorial, there was no custom VST folder, so this option will remain OFF.
5. Rescan Plug-ins
After all of these configurations have been done, now we can “Rescan” the plugins so the computer can recognize them based upon the previous configurations. Depending on the amount of plugins and folders allocated, this process might take several minutes to complete. This will Rescan Ableton Live Plugins.
To “rescan” the plugins, the user must click on the “Rescan” oval button.
6. Save and close
At this point all the configurations have been made effective. To save and confirm the changes, the user must simply close the preferences window.
We hope these tips on how to Rescan Ableton Live Plugins have helped you to get your project back on track!
Contact OBEDIA today to get started with your Pro Audio training, and start taming your technology:
615-933-6775 or Sign up here
