The following tutorial shows the user how to change the MIDI velocity of a group of notes in Studio One 4.
CLICK HERE to learn Presonus Studio One 4 one on one with a digital audio professional at OBEDIA.
Often times during mixing, the engineer might encounter a situation in which a whole part of a MIDI passage must be modified in order to change the timbre of the notes played. This can be achieved by changing the velocities of the notes from that part of the passage. This is specially common during the chorus of a song, in which the intention of the keyboard player is to hit the keys “harder” therefore creating the effect of subtle distortion of an electric keyboard virtual instrument for example. Instead of automating the fader on that part of the song, the MIDI velocities of that region can be boosted.
This tutorial will present a step-by-step guide on how to change the MIDI velocity of a group of notes in Studio One 4.
- Open a Studio One 4 that contains at least one Instrument track with MIDI notes recorded:
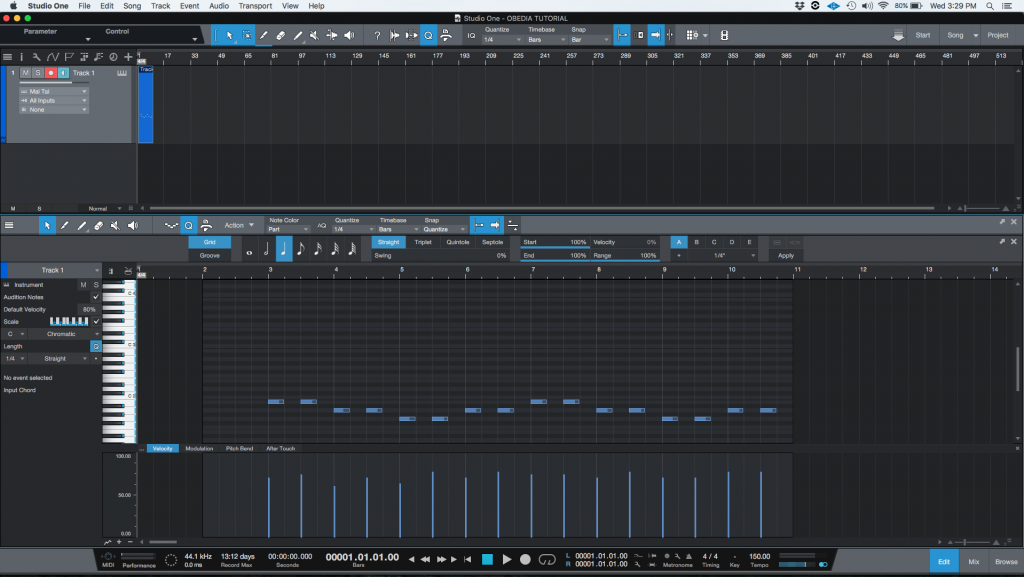
2. Looking at the piano roll of the track:
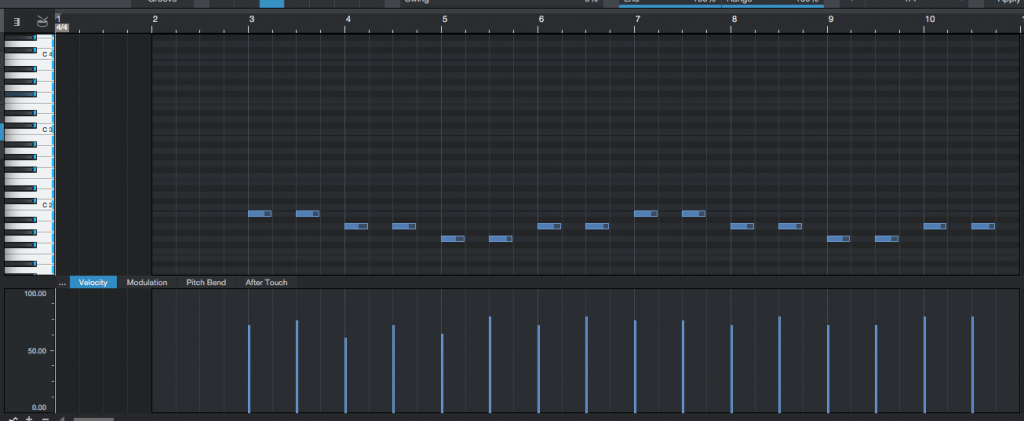
For the purpose of this tutorial we will modify the velocities of the first four notes of the passage.
3. Click and drag to select the first four notes of the passage:
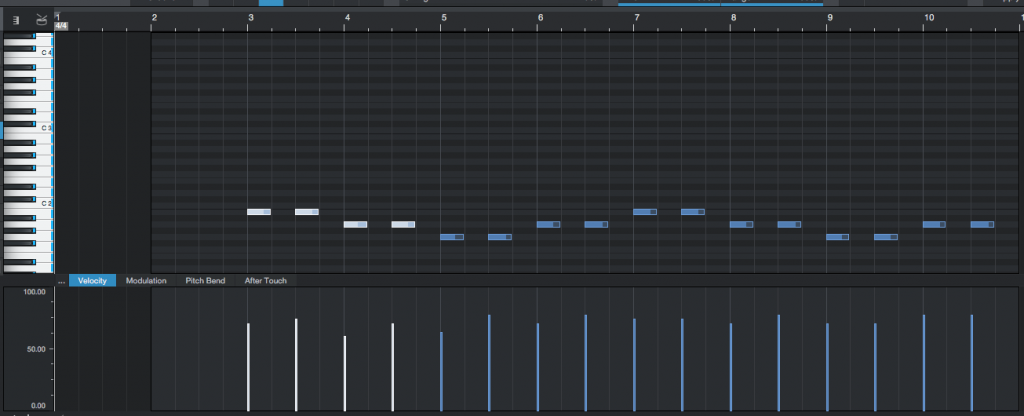
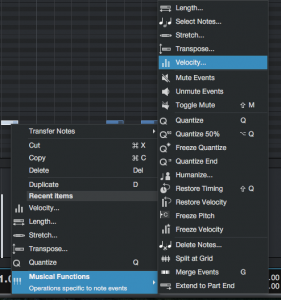
4. Right-click on any of the selected notes and the following list of functions will appear:
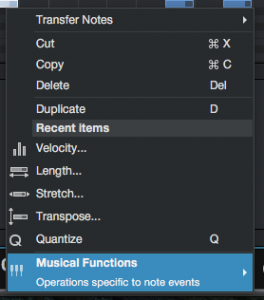
5. Click on: Musical Functions -> Velocity
The velocity window will open as:
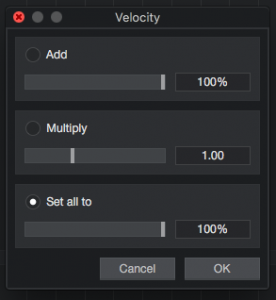
This window lets the user modify the velocity of a group of selected notes by offering three different modes of operation:
- Add: When selected, lets the user add or subtract a velocity percentage to the selected notes. The percentage can be determined by the position of the slider.
- Multiply: When selected, lets the user scale the velocities of the selected notes by a certain factor determined by the position of the slider.
- Set all to: When selected, lets the set the velocities of the selected notes to a certain percentage determined by the position of the slider.
For the purpose of this tutorial we will add a percentage of 100% to all selected velocities.
6. Configure the Velocity window to add 100% to all velocities:
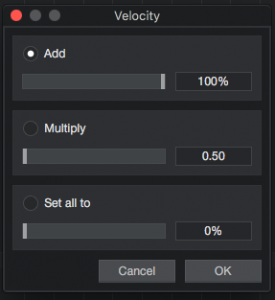
7. Press OK to apply changes, the velocity window will close and the passage will now look like this:

It is easy to see how our selected notes have now been modified modified so that their velocities are set to 100%. If the user starts the playback, those notes will sound louder than the rest of the passage.
At this point we have shown the user how to modify the velocity of a group of MIDI notes. The tutorial has now ended.
We hope this tutorial on how to change the MIDI velocity of a group of notes in Studio One 4 has been helpful! Call OBEDIA today to learn how to use Studio One 4 from a digital audio professional.
CLICK HERE to learn Presonus Studio One 4 one on one with a digital audio professional at OBEDIA.
