This tutorial shows the user how to create a New Song in Studio One 4.
CLICK HERE to learn Presonus Studio One 4 one on one with a digital audio professional at OBEDIA.
Studio One 4 is the Digital Audio Workstation developed by Presonus. Every time the user wants to start a new production in order to record, edit or mix audio content, a new “Song” must be created. Songs store all audio files created as well as the information regarding the position of the faders, pan pots, plugin assignments, just to name a few. These songs present a folder hierarchy that contains their respective files.
This tutorial will present a step-by-step guide on how to create a new song in Studio One 4:
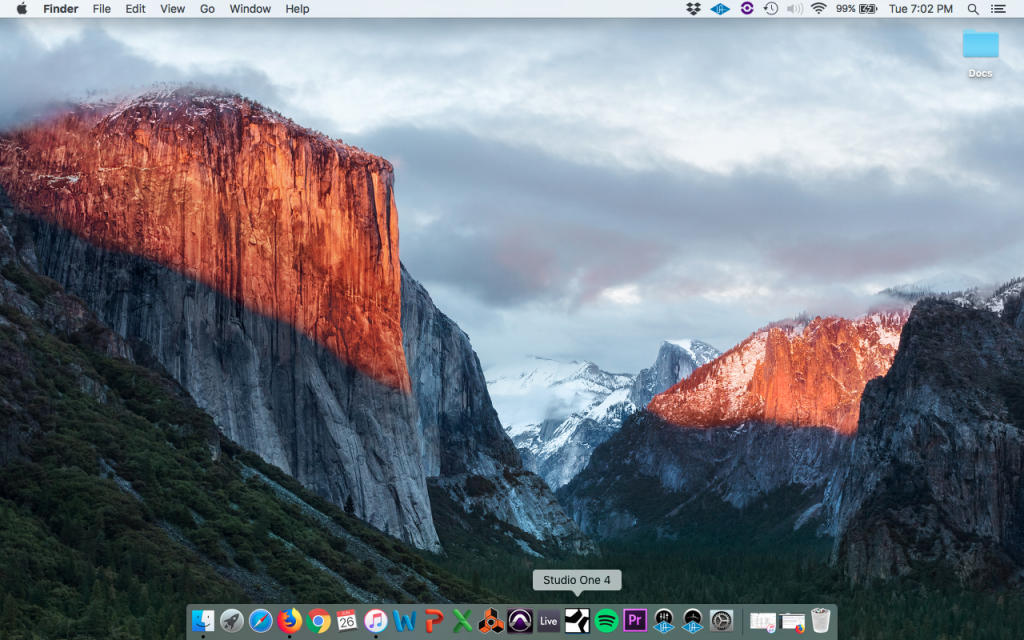
1. From the desktop, click on the Studio One 4 icon to open the software:
2. Once clicked, Studio One 4 will start the opening procedure, it might take some minutes to open, specially if it is the first time.

3. Once the loading procedure has finished, the “Studio One” window will appear, this is where the user can create or open a song or a project.
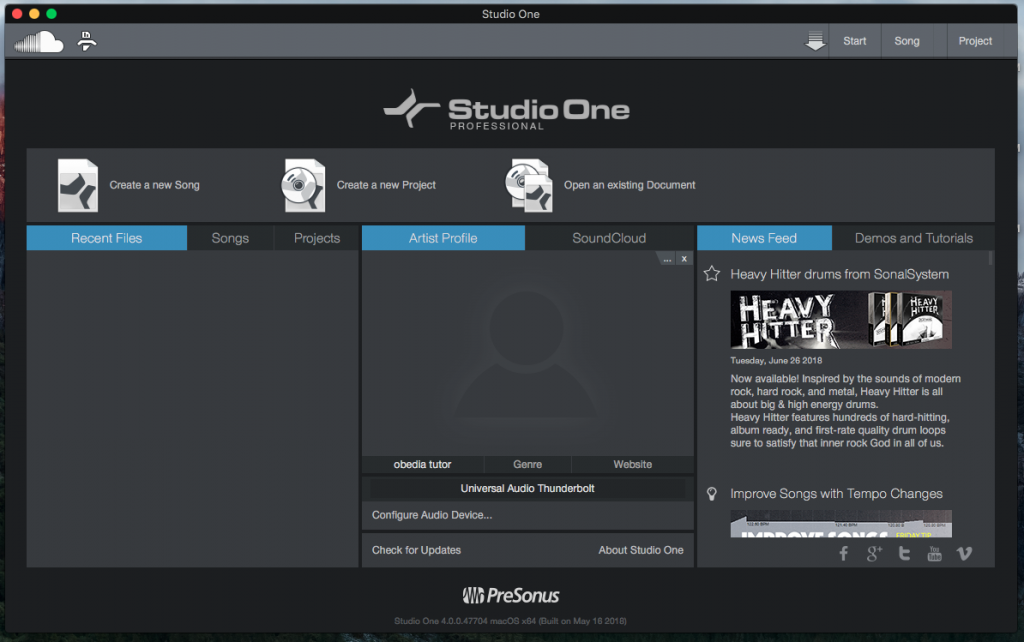
4. For the purpose of our tutorial, we will create a new song. This can be done by clicking on the “Create a new song icon”:
5. Once clicked, the “New Song” window will appear as:
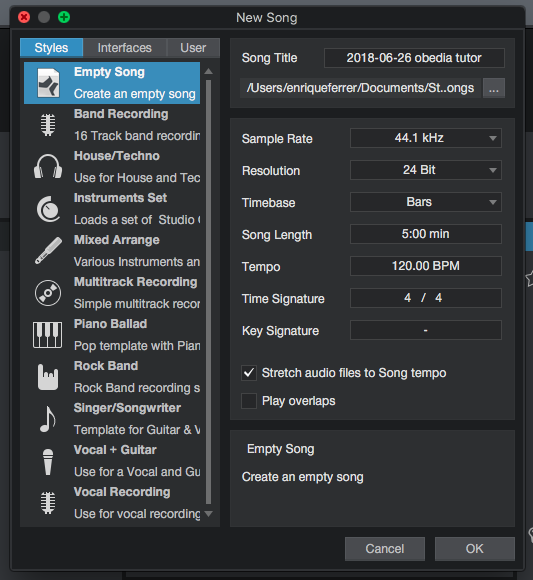
6. This window has 3 important areas that must be explained:
- The left area: where the “Styles”, “Interfaces” and “User” tabs are located
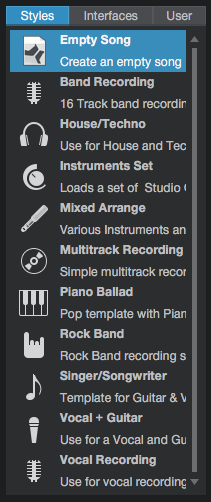
These 3 tabs present different pre-sets for songs. These presents might containe pre-created tracks, pre-configured interfaces and other parameters that the user might find useful to have included in a preset.
For the purpose of this tutorial, we will select “Empty Song” from the “Styles” tab, so that no preset is loaded, therefore the song created will have no tracks included, nor interfaces or I/O pre-configured.
- The Song Title area:
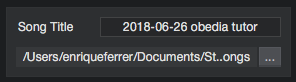
This is the area where the user can type the name of the song, next to “Song Title” and can also select the location in the drive where the folder for the song will be stored. By default, Studio One will store them in a folder called “Songs” located inside the “Studio One” folder inside the Documents folder on the computer.
For the purpose of our tutorial, the song title will be set to “OBEDIA TUTORIAL” and the location will be left default.
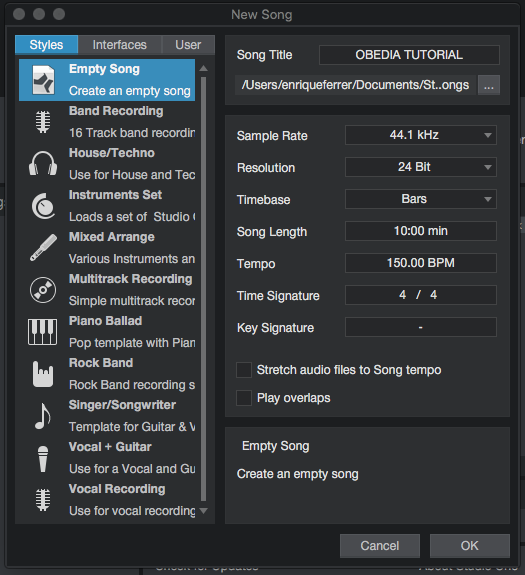
- The Sample Rate and Audio Resolution area:

This is the area where the user can set the sample rate of the digital audio recording, resolution (bit depth), timebase, song length, tempo of the click, time and key signatures, etc.
For the purpose of our tutorial, the parameters will be set as:
- Sample rate: 44.1 KHz
- Resolution: 24 bits
- Timebase: Bars
- Song Length: 10 minutes
- Tempo: 150 bpm
- Time signature: 4/4
- Key signature: Blank
- Stretch audio files to song tempo: Unchecked
- Play overlaps: Unchecked
7. Applying these parameters, our New Song window will look as:
8. Press “OK” to create the new song following our previous configuration:
The “New Song” window will close and Studio One will show its main window.
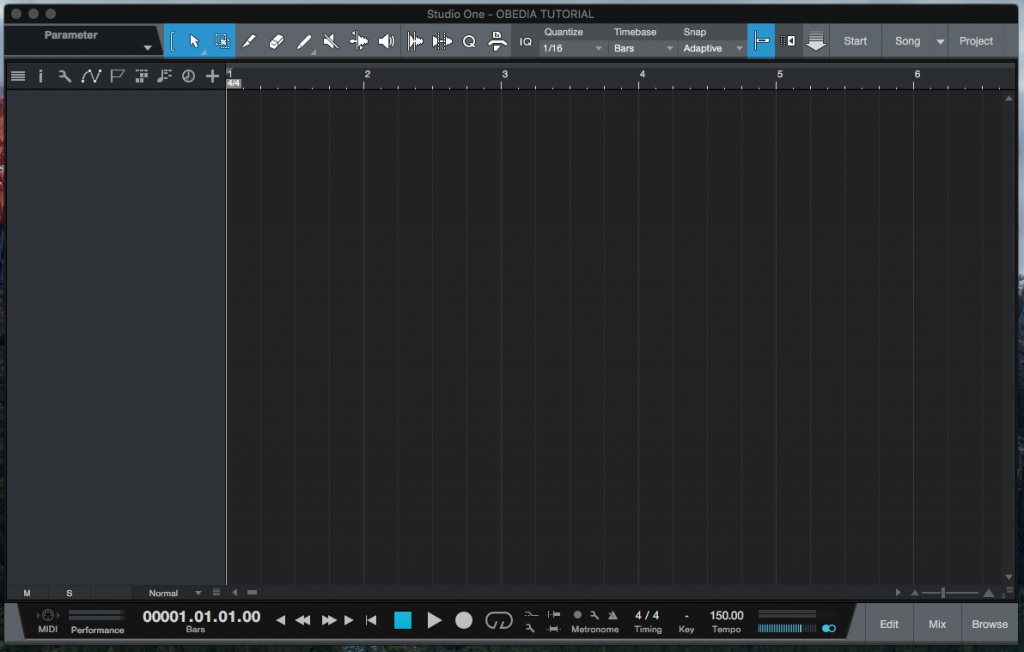
We have now finished creating and configuring our new Studio One 4 song.
We hope this tutorial on how to create a new Song in Studio One 4 has been helpful! Call OBEDIA today to learn how to use Studio One 4 from a digital audio professional.
CLICK HERE to learn Presonus Studio One 4 one on one with a digital audio professional at OBEDIA.