The following tutorial shows the user how to enable/disable tracks in Studio One 4.
CLICK HERE to learn Presonus Studio One 4 one on one with a digital audio professional at OBEDIA.
Often times during the mixing stage of a song, the audio engineer might encounter a situation in which the computer CPU’s resources are being considerably reduced due a high number of tracks and inserts. When this happens, the Song might start presenting clicks, pops or glitches that can turn the mixing session into a tedious process due constant software crashes or playback stops. A good way to save CPU resources is by disabling the tracks that are not being used in the session, this way no audio will be routed through them and the inserts applied will not tax the computer.
This tutorial will present a step-by-step guide on how to enable/disable tracks in Studio One 4.
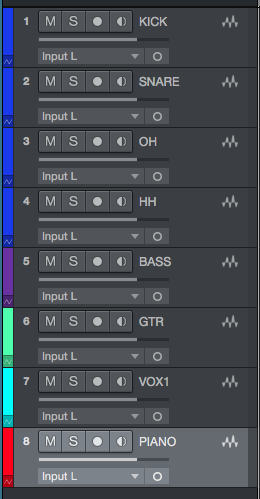
1. Open or create a new Studio One 4 song that contains several tracks:
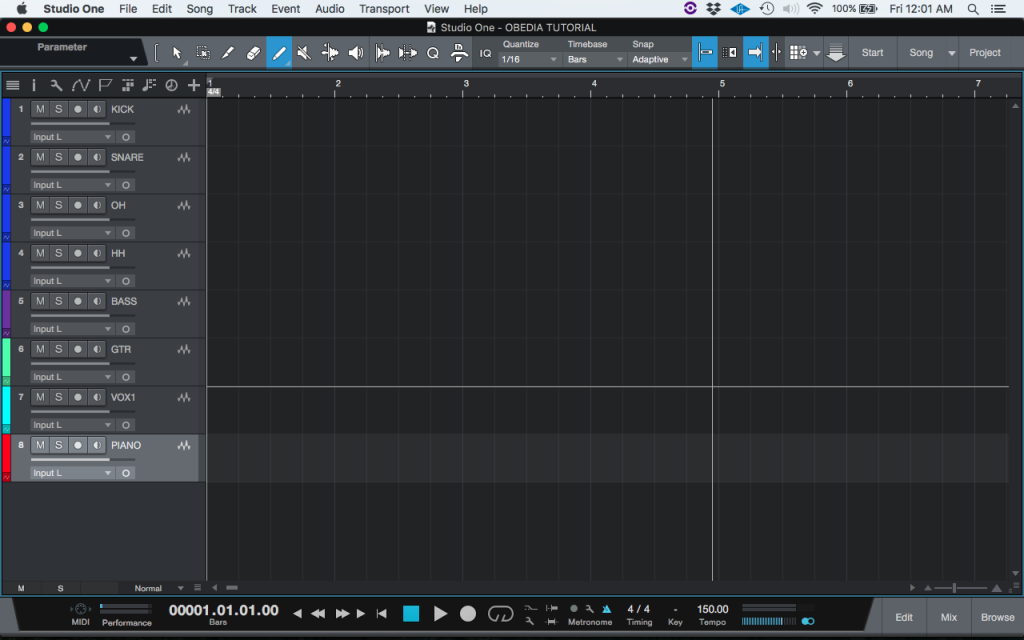
For the purpose of this tutorial we will disable the “Piano” track.
2. In order to disable the “Piano” track, right-click on it and the following drop-down list will appear:
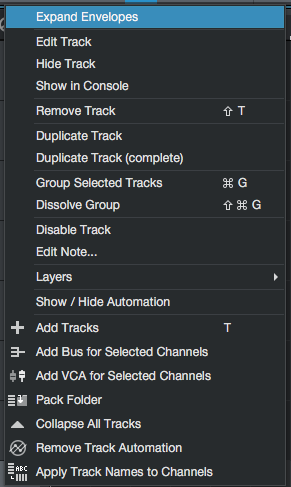
3. From the list, click on “Disable Track”:
![]()
The track will be disabled and it will not consume any CPU resources. Note how the disabled track appears to be greyed-out:
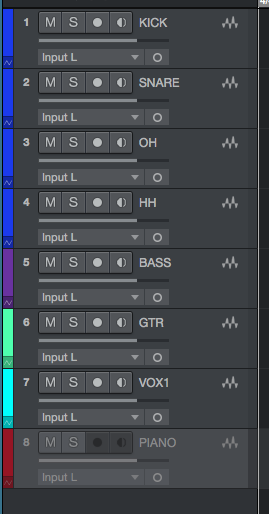
4. In order to enable the track, right-click on it and the following drop-down list will appear:
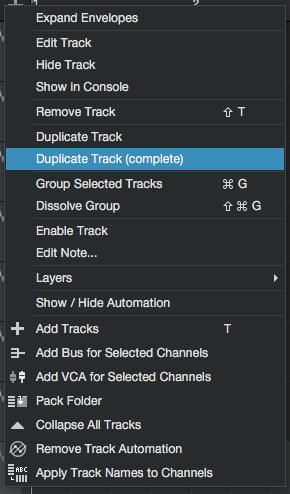
5. From the list, click on “Enable Track”:
![]()
The track will be enabled and it will consume CPU resources again. Note how the enabled track is not greyed out anymore:
At this point the user has learned how to enable/disable tracks in Studio One 4. The tutorial has now finished.
We hope this tutorial on how to enable/disable tracks in Studio One 4 has been helpful! Call OBEDIA today to learn how to use Studio One 4 from a digital audio professional.
CLICK HERE to learn Presonus Studio One 4 one on one with a digital audio professional at OBEDIA.
