The following tutorial shows the user how to PRINT a Mix as a stereo track within the Pro Tools session.
CLICK HERE to learn Avid Pro Tools one on one with a digital audio professional at OBEDIA.
On previous tutorials we have shown the user how to “Bounce” a mix into the hard drive as a stereo file that is stored in a directory pre-defined by the user. On this tutorial we present an alternative to the previous method by “printing” the mix inside the session as a stereo track.
“Printing” the mix is a process that simply consists in recording the output of the main mix bus into a stereo track inside the same session. The advantage of this approach is the fact that the user can easily play the “printed” mix inside the same program and do the potential changes to the individual tracks, in order to re-print the mix, creating updated versions of it.
The following tutorial shows a step-by-step guide on how to PRINT a Mix as a stereo track within the Pro Tools session.
- Open a Pro Tools session that contains a mix. The tutorial assumes the user has a mix bus where all the tracks are being routed to playback.
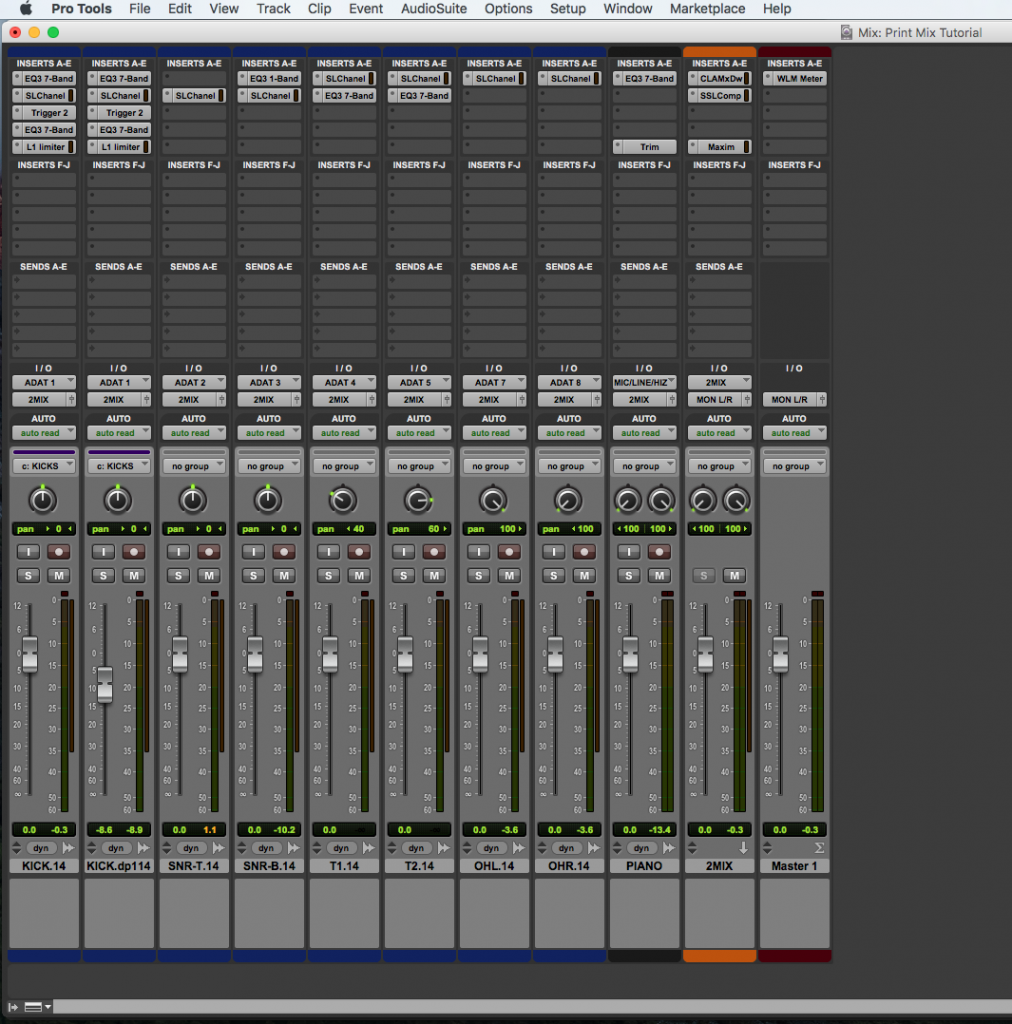
It is easy to see from the picture that all the tracks have been routed to a stereo aux track labeled as “2MIX”. This serves as the main mix bus for the session.
In order to print the mix into the session, the user must route the output of the mix buss to feed the input of a stereo audio track where the mix will be printed.
2. On the mix bus track, click on the output -> new track:

3. The “New Track” window will appear as:

The settings of this window must be changed as:
- Width: Stereo
- Type: Audio Track
- Time base: Samples
- Name: PRINT.
After applying these changes, the window will look as:

4. Press “Create” and the new stereo track will be created. The program will take us back to the original window as:
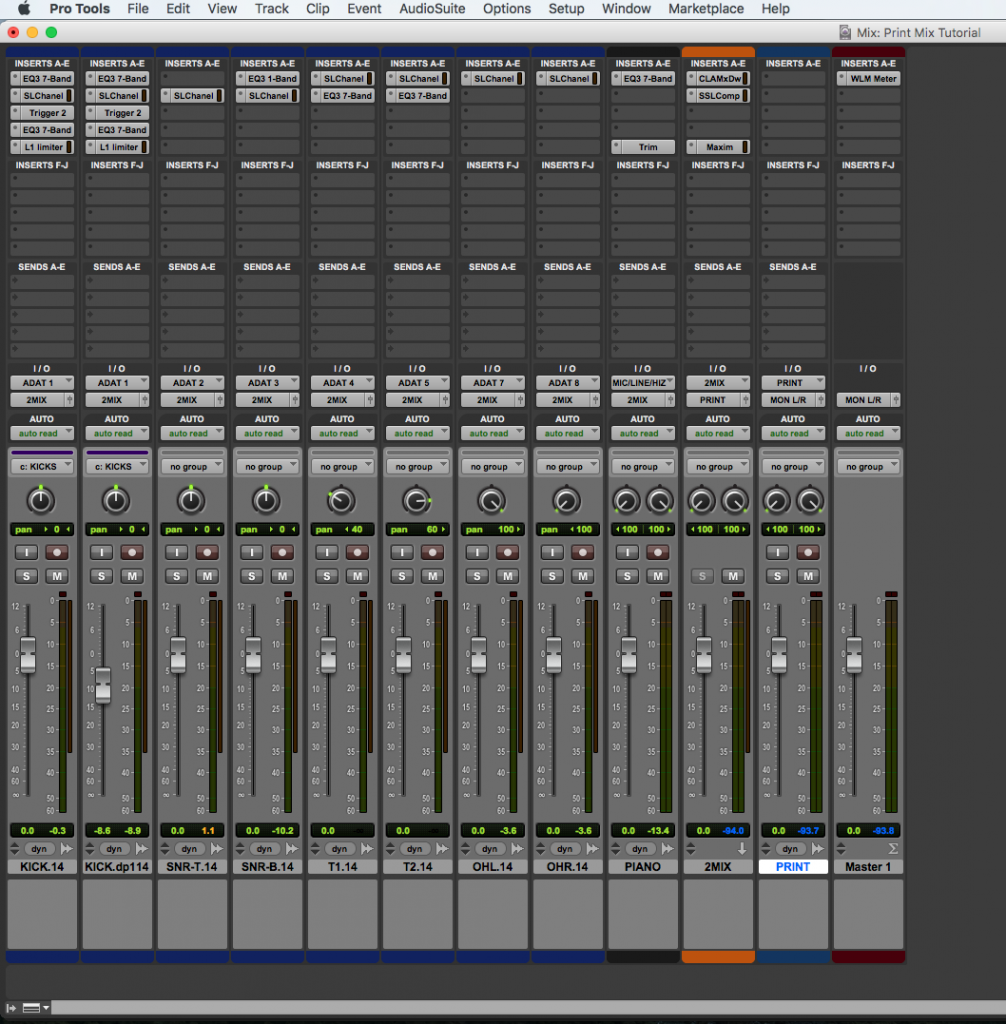
Now that the mix bus is routed to feed the stereo audio track labeled as “PRINT”, we must record enable the track, and press RECORD.
5. Record enable the PRINT track:

6. Switch to the Edit Window:
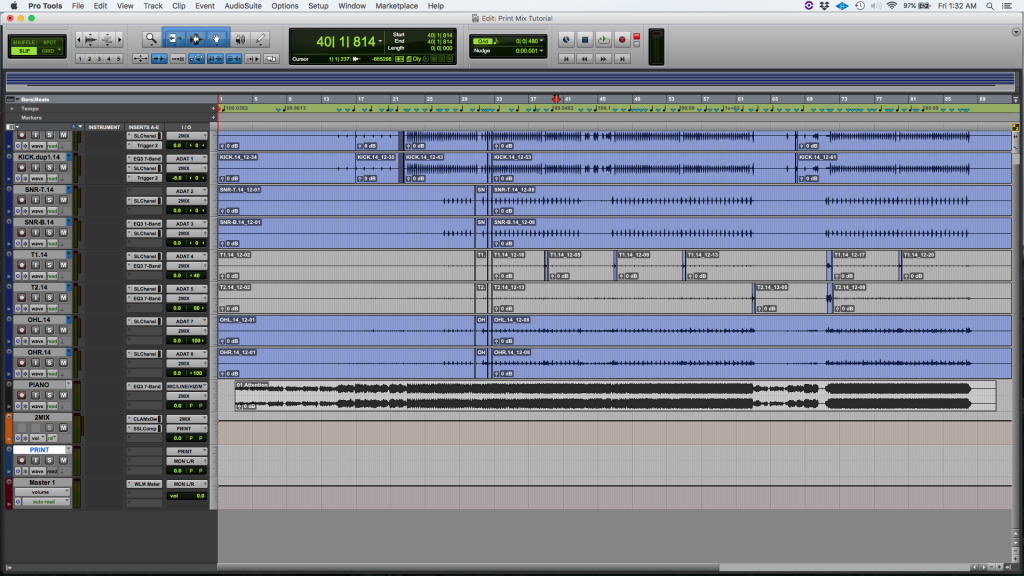
7. Press the RECORD ENABLE button at the top transport bar and then PLAY so that the recording procedure will start. All the audio coming out of the mix bus will be recorded into the PRINT track:
It is important to understand the “printing” procedure is done in real time. There is no offline option for this operation.
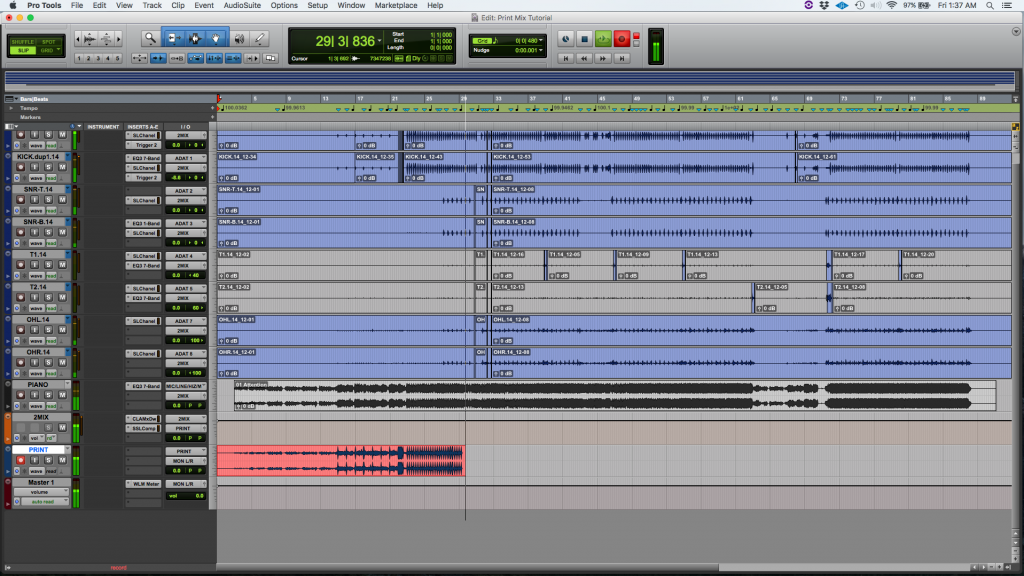
8. Once the recording has finished, the user can press STOP at the transport bar and the mix will have finished printing:
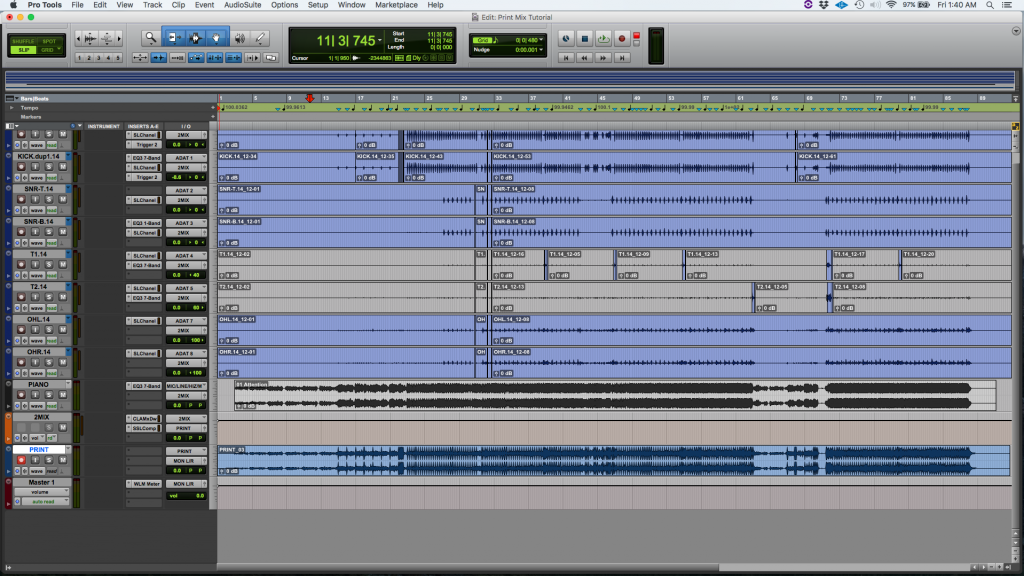
It is easy to see now how the mix has been effectively been printed into the session into a stereo audio track labeled as “PRINT”. The user can now audition this mix in order to modify it in case if it needed.
You have now learned How to PRINT a Mix in Pro Tools.
Was this tutorial helpful? If so: CLICK HERE to learn Avid Pro Tools one on one with a digital audio professional at OBEDIA.