
This tutorial shows the user how to setup a MIDI controller in Studio One.
CLICK HERE to learn Presonus Studio One one on one with a digital audio professional at OBEDIA.
Just as any other Digital Audio Workstation, Studio One has the ability to record and output MIDI information that can be used to trigger Virtual Instrument plugins or hardware units. The most common way to record MIDI information into the software is by using a MIDI keyboard controller.
This tutorial will present a step-by-step guide on how to setup a MIDI controller to work with Studio One as a MIDI device. The keyboard controller that we will be using for this tutorial is the M-AUDIO Oxygen 61.
1. Install the drivers and software included with your keyboard controller
Even though most MIDI keyboard controllers follow the “plug-and-play” philosophy, there are still some models that require a certain driver in order for your computer to detect them. Contact your manufacturer or investigate your device’s documentation to find out what kind of software do you need in order to properly install the device.
2. Open or create a new Studio One song:

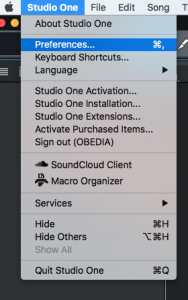
3. From the top menu, click on: Studio One -> Preferences
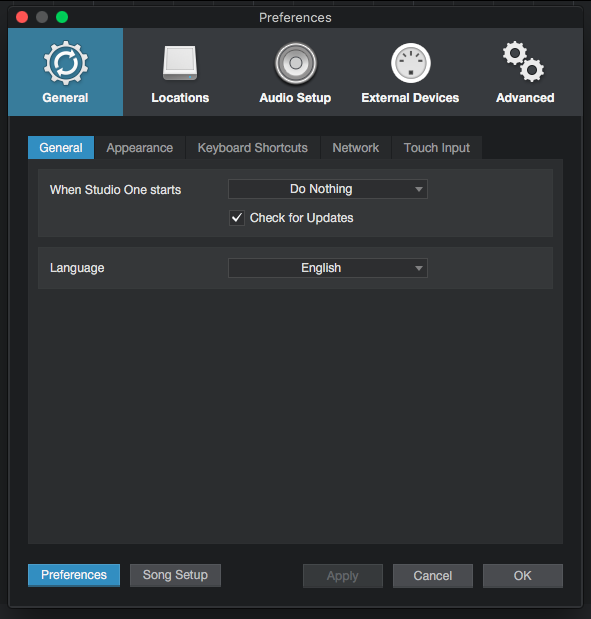
The preferences window will open as:
4. Click on the “External Devices” tab:
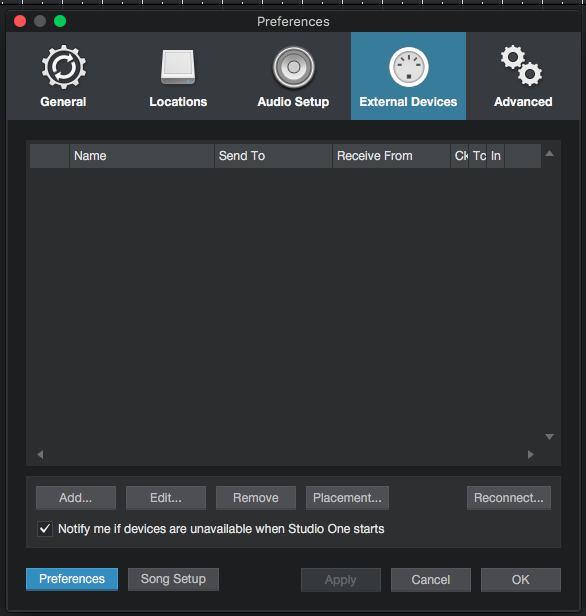
It is easy to see from the list that no MIDI controllers appear, this means we must add our own.
5. Click on “Add”:
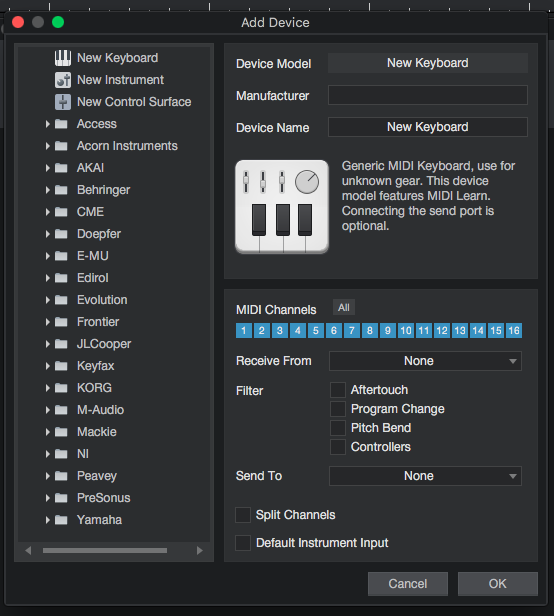
This is the “Add Device” window, where we can select and configure our MIDI controller in order to add it to the External Devices list.
For the purpose of this tutorial we are adding a new keyboard.
6. On the top left part of the window, click on “New Keyboard”, this option will highlight:
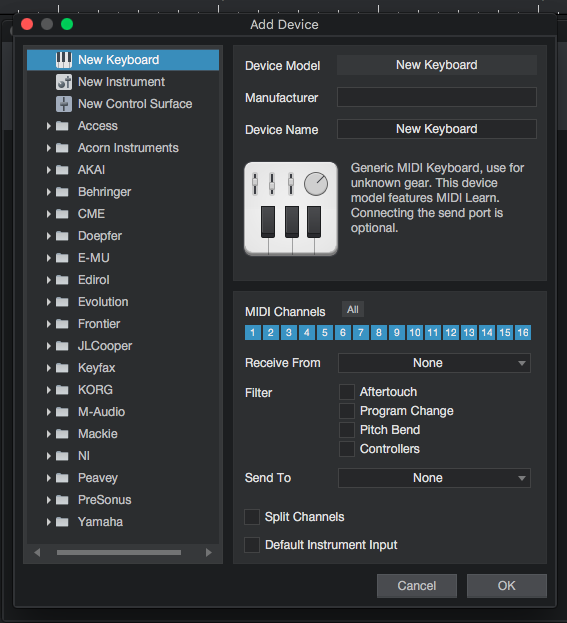
7. Configure the different fields of the New Keyboard:
This option gives the user certain parameters we must configure in order to add the new keyboard. The basic parameters that we will be configuring are:
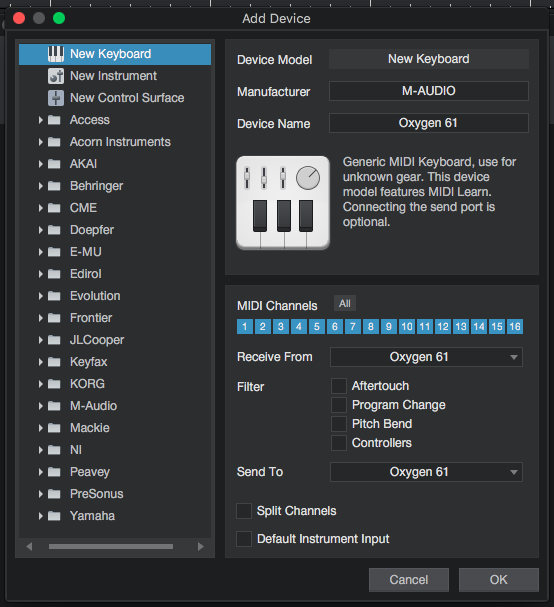
- Manufacturer: This field lets the user type the manufacturer of the new keyboard. For the purpose of this tutorial we will type “M-AUDIO”.
- Device Name: This field lets the user type the name of the new keyboard. For the purpose of this tutorial we will type “Oxygen 61”.
- MIDI Channels: This option lets the user select which MIDI channels can the controller use. For the purpose of this tutorial this will stay default, which means all channels will be enabled, therefore all the channels selectors will be light blue.
- Receive From: This drop-down list lets the user select where to receive MIDI from. For the purpose of this tutorial, we will select “Oxygen 61” from the list.
- Send To: This drop-down list lets the user select where to send MIDI. For the purpose of this tutorial, we will select “Oxygen 61” from the list.
- Filter: These check-boxes let the user filter certain MIDI messages. For the purpose of this tutorial all of this filters will be unchecked.
After applying these parameters, our “Add Device” window should look like this:
8. Press “OK” to save the changes, the Add Device window will close and it will go back to the “External Devices” tab of the Preferences window:
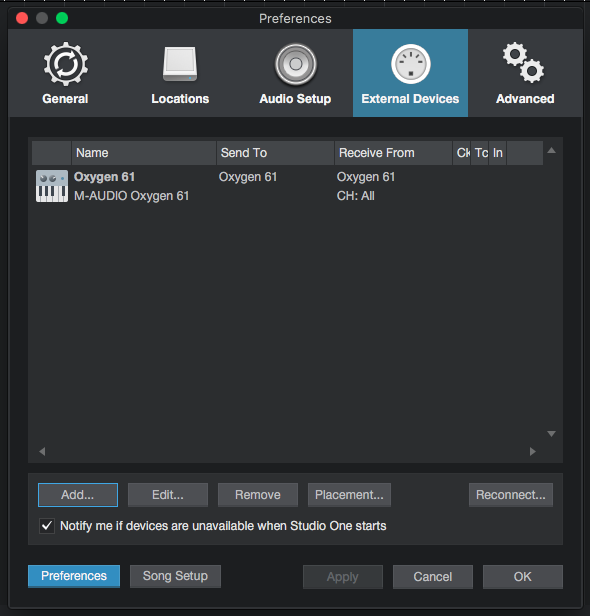
It is easy to see now how the M-Audio Oxygen 61 keyboard has been added to the External Devices list successfully.
9. Press “OK” and to save changes and the Preferences window will close:
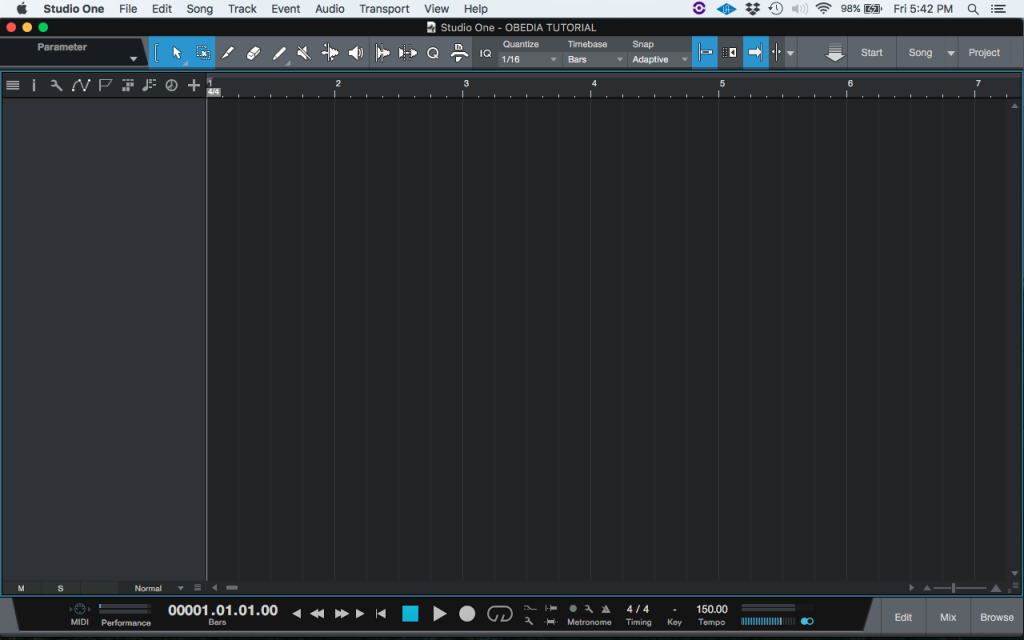
At this point the user has properly finished configuring the MIDI controller to work in Studio One.
We hope this tutorial on How to setup a MIDI controller in Studio One 4 has been helpful! Call OBEDIA today to learn how to use Studio One from a digital audio professional.
CLICK HERE to learn Presonus Studio One one on one with a digital audio professional at OBEDIA.