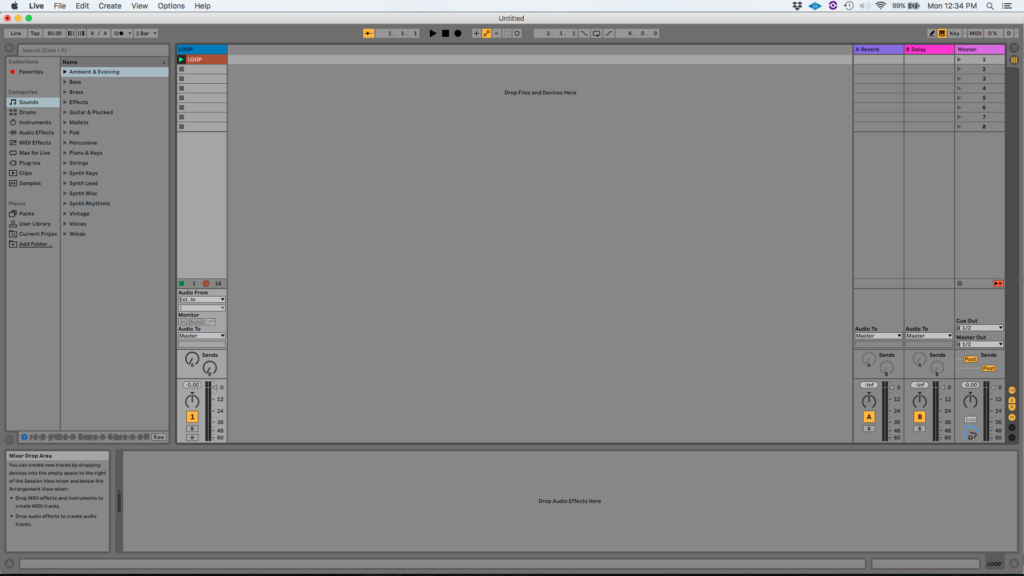
This tutorial shows the user how to use the Ableton Live AUTO FILTER audio effect.
Need a Pro Audio laptop to run Ableton Live software and all of its features at its best? Check out the MC Mobile line of Pro Audio Laptops from PCAudioLabs.
On the modern days of audio mixing, the digital tools that engineers use in order to shape the recorded sound are called Plugins. Plugins can emulate the behavior of vintage analog pieces of gear, or simply act as clean/linear digital signal processors, performing tasks such as equalization, compression, limiting, expansion, gating, time-domain effects, etc. Ableton Live comes with a variety of proprietary plugins (effects) that can help the user mix a music production completely “in-the-box”.
One of the most used inserts that come with Ableton Live is the AUTO FILTER, which can be defined as a classic analog filter emulation that can be modulated by an envelope follower and/or by an LFO to create moving filter effects.
For the purpose of this tutorial, we will explain how to use the AUTO FILTER audio effect in Ableton Live 10:
- Create a Live Set with at least one audio track. Make sure the audio track has at least one audio clip assigned to it.
2. From the Browser, search for Audio Effects -> Auto Filter:
3. Drag and Drop the Auto Filter audio effect on top of the audio track labeled as “Loop”.
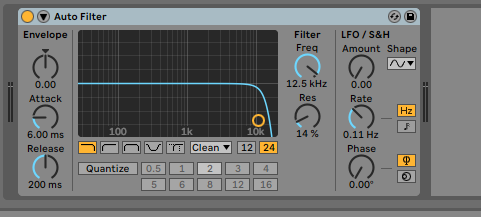
As soon as this effect has been dropped on top of the track, it is easy to see how the Auto Filter audio effect now appears on the device view of the track.
It is easy to see from the previous picture, the Auto Filter audio effect has several parameters that can be explained as:
- Envelope: This knob controls the extent to which the envelope affects the filter frequency.
- Attack: This knob controls how quickly the auto filter responds to input levels that rise.
- Release: This knob controls how quickly the auto filter responds to input levels that fall.
- Filter Type: These buttons let the user select between lowpass, highpass, bandpass, notch or morph type.
- Circuit Type: This dropdown lists lets the user select between Clean, OSR, MS2, SMP and PRD circuit styles.
- Slope: These buttons let the user select between a 12 dB/oct slope and a 24 dB/oct slope.
- Quantize: When this button is set to ON, the filter’s frequency modulation is updated rhythmically, following the beat quantization value.
- Beat Division: If the Quantize beat is ON, the user can select between the different possible subdivisions that represent modulation time in 16th notes.
- Filter Freq: This knob sets the filter cutoff frequency.
- Resonance: This knob sets the strength or emphasis of frequencies at the filter cutoff frequency.
- Amount: This knob sets the amount of LFO modulation applied to incoming signals.
- Shape: This dropdown list lets the user select between the different LFO waveforms.
- Rate: This knob sets the frequency of the LFO in Hertz or beat subdivisions, depending on the selected mode.
- Phase: This knob adjusts the amount of offset between the waveforms on the left and the right.
For the purpose of this tutorial, we will use the Auto Filter to create a subtle moving low-pass filter effect. The Auto Filter audio effect should be set as:
- Envelope: 12.1.
- Attack: 6ms.
- Release: 200ms.
- Filter Type: Lowpass.
- Circuit Type: Clean.
- Slope: 24.
- Quantize: OFF.
- Beat Division: N/A.
- Filter Freq: 2.55 KHz.
- Resonance: 33%.
- Amount: 30.
- Shape: Saw.
- Rate: 0.08 Hz.
- Phase: 0.
4. Apply the previous configuration, and the Auto Filter audio effect should look like this:
At this point we have successfully explained how to use and configure the Auto Filter audio effect in Ableton Live 10. The tutorial has now finished.
Using Ableton Live 10 software to produce music would be ideal with one of our professionally designed PCAudioLabs Systems due our high-performance specifications in order to work with any of the Digital Audio Workstations supported. If you would like to order one of our PCAudioLabs computers, please call us at 615-933-6775 or click this link for our website.


